The Yellow Farmhouse Garden

November 30, 2008

Once In A Lifetime

Filed under: Uncategorized — bob @ 11:27 pm

We have a very interesting botanical event happening in the greenhouse right now. One of our Agave plants is blooming.
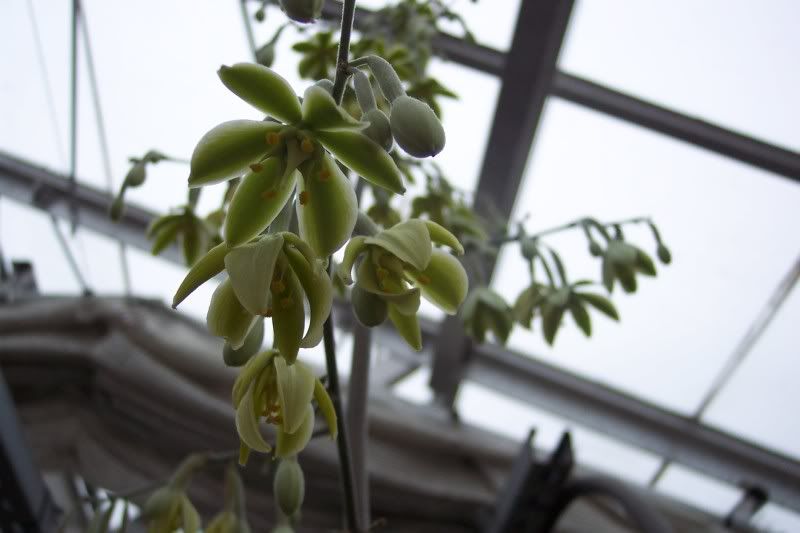
Agave plant in full bloom

Agave plant in full bloom

This plant is about 3 or 4 years old and has decided to bloom after all this time.  This is actually fairly quick for an Agave though.  Their other nick name is “century plant” , so-called because of the seemingly long length of time it normally takes them to flower in the wild.

Agaves are native to the southwestern part of this country and “south of the border down Mexico way”.  The ‘Blue Agave’ variety that grows in the Mexican state of Tequila is used to make… you guessed it…Tequila.

I don’t know what variety this one is since Judy rescued it from going into the compost bin at the Botanical Gardens.  At that time the plant was just a small  one inch diameter “bulblet” with no name.

Agaves only bloom when they have stored enough energy in their roots and leaves. How many years this takes depends on the species.  After blossoming and forming seeds, they die, trusting that the seeds will carry on the next generation.

Even though this Agave of ours is planted in a small 8 inch pot, the flower stalk is 10 feet tall! It has been alternately ignored and well tended throughout its life.  It couldn’t have had life too hard since it took quite a bit less time than a century to bloom. We had a few last year that were in 6″ pots and their stalks reached nearly 6 feet.
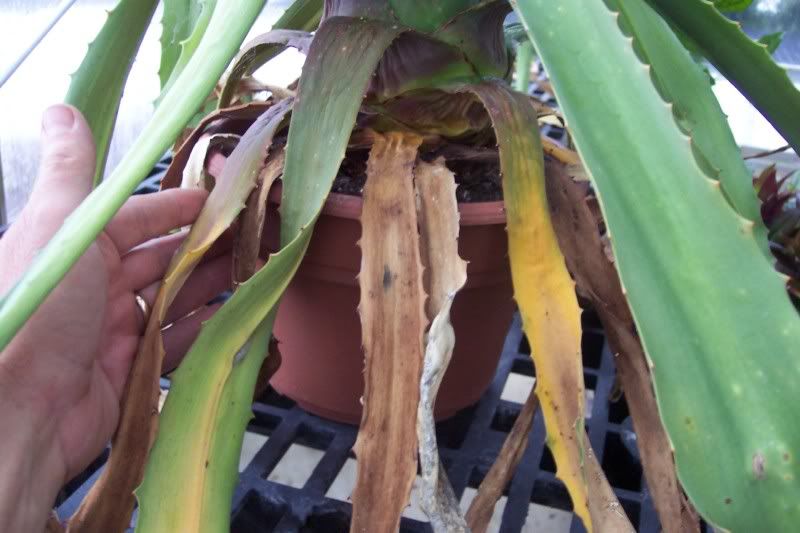
This Agave is planted in an 8 pot. Note the swollen bulb-like stem.

This Agave is planted in an 8" pot. Note the swollen bulb-like stem.

I counted over 120 flowers on the flower stalk! Wow! Each flower will produce a bulblet that will go on to produce another plant. I’d say that is pretty good odds that the next generation will survive.
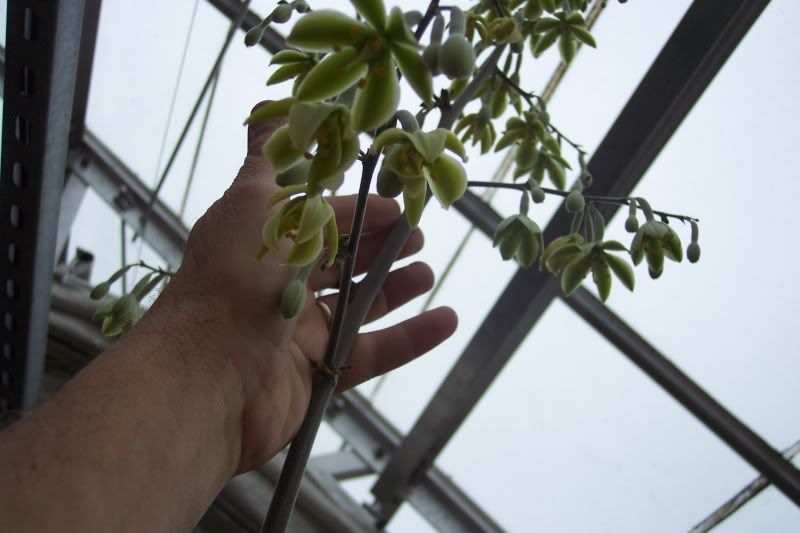
Our Agave produced a ten foot tall flower stem containing over  120 flowers. I can barely reach the lowest set of flowers.

Our Agave produced a ten foot tall flower stem containing over 120 flowers. I can barely reach the lowest set of flowers.

The new seeds will go into a 20 inch pot.  I wonder what will happen…


Bob
November 9, 2008

Fresh Memories of the Garden

Filed under: Uncategorized — judy @ 1:27 pm

Now it feels like November.  Cold, rainy and dreary.  Gone are the Indian Summer days. Summer’s garden seems long past.

But with a little bit of effort a few weeks ago, I am able to make a pot of chili today using fresh tomatoes!

The day before we had that really cold night (not just the first frost when we covered our tomatoes, but this time it was going to get below  freezing so we knew the covering up wouldn’t do much good) it went to 28 degrees where my garden was.  I had picked all the tomatoes I could.  This was just a few days after that total day long rain that made the tomatoes start cracking , they swelled up so much.  I picked the red ones with a little cracking and all the green larger ones, some with a tinge of red and some that were totally green but otherwise perfect with no blemishes.

My goal has been for many years to have fresh tomato salad for Thanksgiving dinner. Some years a few tomatoes make it, some years they don’t .  So the perfect green tomatoes are wrapped carefully in newspaper and put gently in a cardboard box, then placed in a cool dark place.   They need to be checked every week or so. Take out any that show mold or black spots.  Put them on a sunny window sill and they will redden up after a few days. Cut out the bad parts of the tomato and use the good .

So, today I sorted  the tomatoes I kept in the garage and made a pot of chili with them.  This is the second time this fall that we have sorted through them . There’s still 1/4 to1/3 of them left for Thanksgiving.

Well, the tomatoes are simmering nicely.  I’d better get back to my chili making…  it smells delicious!

bye now, Judy

November 3, 2008

Warm Weather Respite

Filed under: Uncategorized — judy @ 9:36 pm

During this week of nice weather, we will do a lot of clean up.  Odds and ends of plants sitting around that didn’t get planted for some reason or other, such as too small or ran out of room in  a certain spot., etc.
 
We are fortunate to have at the Gardens some very useful coldframes.  They are dug down into the ground about 4 ft, enclosed with cement block with a dirt bottom.  The cement block extends a block high above the ground on the south side, and 2 blocks high on the north side.  We used to have glass windows that fitted over them but they deteriorated.  Now  we have translucent fiberglass panels that cover them up.  As deep as it is, it stills freezes in there, but that is okay. What we want them to prevent is wind burn drying out the over wintered plants.  Also it reduces the quick freeze and thaw that can cause disastrous effects for over wintered potted plants.  So cold frames are for hardy plants that, because they are still in pots, need a little extra protection.
So into the one coldframe that I use, which is about 12 ft by 5 ft wide, we will put in some leftover heuchera’s which didn’t get planted.  Plus some very small wood anemones that I thought might get lost (read: weeded accidentally out) in the big Gateway Garden.
More leftovers are mums, rudbeckias, 2 Alberta spruce trees 3 ft high, sedums that I use in pots on the terrace in summer and odds and ends of perennials that I can use to fill in holes when plants die in the Perennial Garden.
Homeowners can construct a temporary coldframe using haybales as walls and old storms door as covers.  In spring and fall keep an eye on the coldframe so it doesn’t overheat. In fact don’t put the covers on until things freeze which is probably in December.   Translucent covers are probably the answer to that problem.  Expensive plants (like the bonsai trees that a coworker takes care of here) can be further protected by putting sand around the individual pots in the coldframe.
Winter’s coming but we have a respite this week and I am trying to take advantage of it.
Bye now, Judy

October 21, 2008

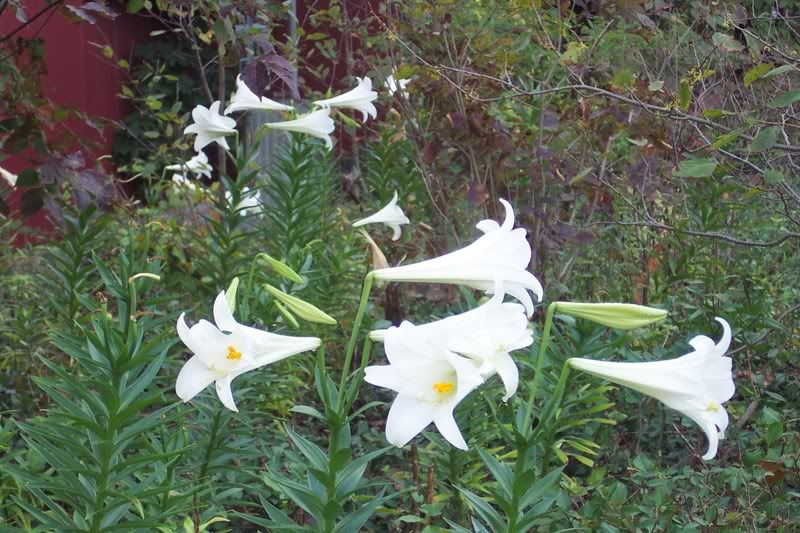
Lilies in the Graveyard

Filed under: Uncategorized — bob @ 6:52 pm

With Halloween right around the corner we are seeing all kinds of scary stuff; themes relating to goblins, jack-o-lanterns, graveyards…

We have a  graveyard here!  It’s not the scary  Halloween type of graveyard, but a flower bulb graveyard.

In this area outside, we plant all of the lily bulbs we grow out of season in the greenhouse that are left over from various projects or those that get returned to us after they are done flowering.

I just can’t bring myself to throw them away or even compost them, so I give them a  “decent burial” in the bulb cemetery that’s located in an out of the way corner. Since it used up most of its energy blooming while in a little pot, some times it takes a couple of years for a bulb to build up enough strength to bloom again. I’ve been doing this for at least 4 years.  It’s always fun to see what new flower will be blooming from one year to the next. 

Even  now, during Halloween season, the old Easter Lilies are still blooming!


They seem to have shook off the frosts we have had so far. It won’t be long until they finally give in to the cold weather and take a long winter’s nap.

Bob

October 12, 2008

Aloe vera re-potting

Filed under: Uncategorized — bob @ 1:18 pm

The Aloe vera plant has been popular for decades as a balm or salve used to treat minor burns, cuts, sunburn and other maladies. Every household should have an Aloe plant as part of their first-aid kit.

You can do your part to spread the good news about Aloe by dividing your plants and giving them away to folks who don’t have an Aloe yet. It’s very easy to do.

As an Aloe plant grows, it forms small plantlets or off-shoots around the base of the main stem. They may or may not have roots. These can be gently pulled apart from the main plant and transplanted into new pots.

In this post I’m using an old Aloe that needed to be renewed. The same process is used for making divisions of an Aloe that might not be this far gone. Here we go…

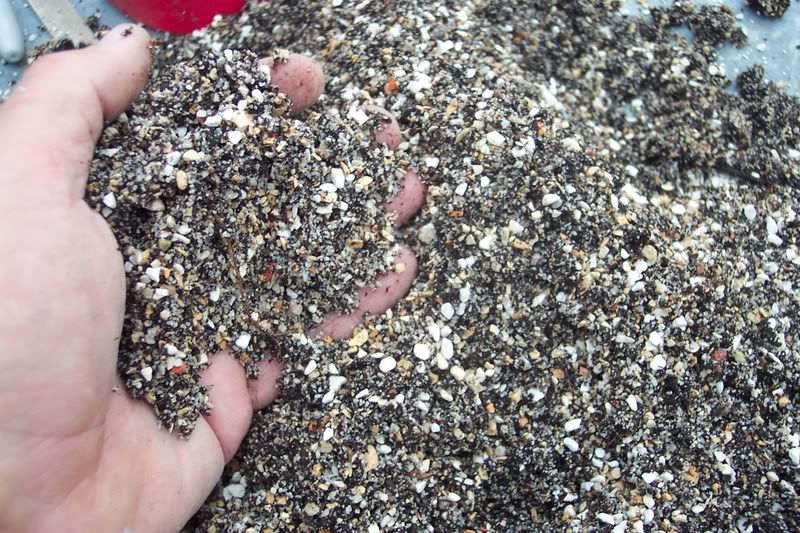
Start by getting a potting mix together. I like to use  fairly coarse potting mix to which I add sand, fine gravel and other grit to help the mix drain water well.  Aloe doen’t like to be in a soggy pot.


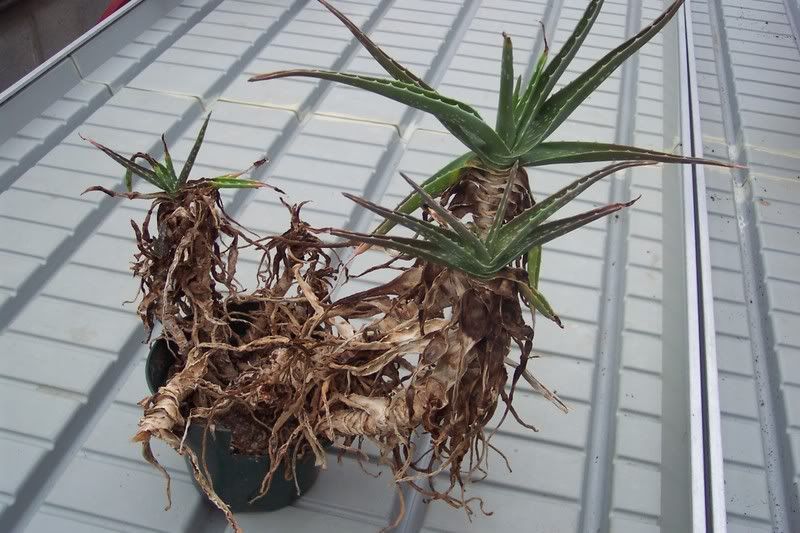
In this example, where the plant has grown too long between re-potting, the Aloe has developed a long, undesirable stem with a lot of dead leaves.


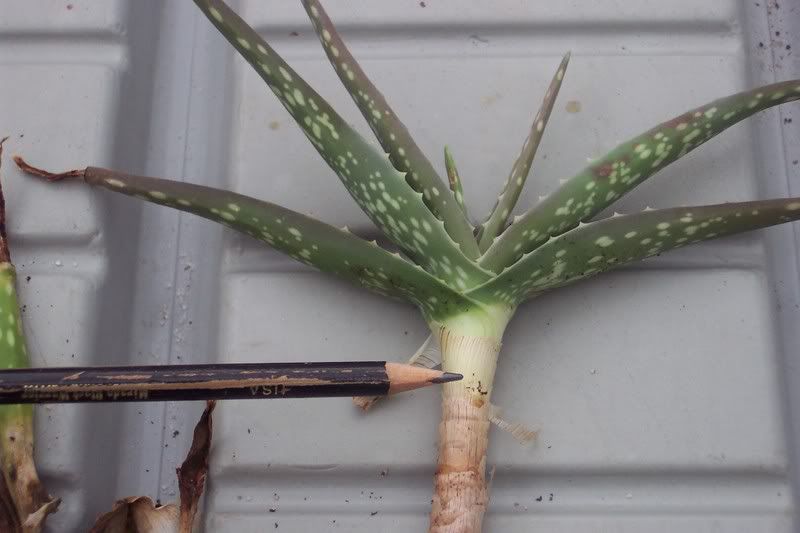
Fix this by cutting the stem an inch or so below the green active part of the plant. Peel off all of the “onion skin” until you reach the stem itself. Also, remove  any dead or dying leaves. The stem has dormant root buds that will sprout to form new roots to support the newly separated plant. A dormant bud can be seen just below the pencil point. If you rub your finger over the stem, the bumps you feel are the root buds.


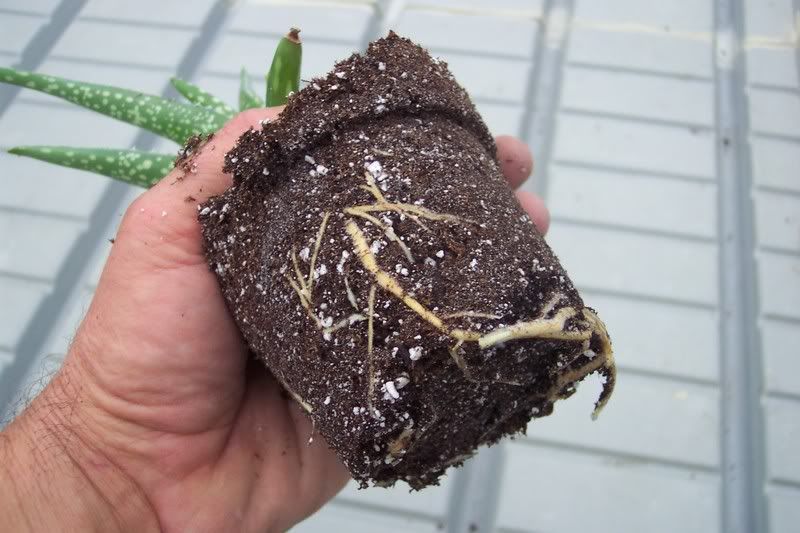
Then just fill a pot (be sure it has a drain hole in the bottom) with your potting mix and insert the prepared Aloe cutting into the soil. Water the new plant and that is it.  You now have a new Aloe plant that will soon take hold in it’s new home. Here is An Aloe I transplanted a few weeks ago.  Look how nicely the roots are growing.


You now have a plant that can be given away as a gift.  Everyone loves Aloe !

To use Aloe as a treatment for an injury, cut a leaf from your plant. Slit the leaf open and apply the jelly-like juice to your injury. You’ll feel relief immediately.

It’s medicine you can grow right on your window sill!

Bob

« Newer PostsOlder Posts »

Powered by WordPress