The Yellow Farmhouse Garden

August 13, 2008

Colors of Summer

Filed under: Uncategorized — judy @ 7:20 pm

The garden of annuals that I take care of at work is looking very good right now.  Its peak blooming season is July and August.  It will have color in it even as late as early October if we don’t get an early frost. 

Though with nighttime temperatures in August in the low 50′s , I wouldn’t be surprised if we had temperatures in the low 40′s in September and frost before October this year.  Be ready to cover your tomatoes!

The flowering annuals are all in good shape.  I haven’t noticed much downy mildew this season, which is usually a big problem for this garden.  And the Zinnias are only now starting to get a little browning of the bottom leaves.  That’s a disease called  Alternaria Leaf Spot.                 .

I am vey pleasantly surprised that the 12 ” tall reddish orange Cosmos called ‘Cosmic Red’ are blooming very heavily.  We’ve deadheaded them three times this summer.  So, they take a lot of work but each plant has 30 blossoms on it and looks quite stunning. 

Cosmos "Cosmic Red"


Next to it is the tall blue Ageratum ‘Blue Bouquet”.  The colors do well together, plus I like to use some blue in all  my gardens.


Next to it is a short 10-12″ bushy Zinnia called Zinnia ‘Profusion Apricot”.  It’s full of 1 1/2 – 2 inch single daisy-like blooms of various shades of apricot.  Just a little deadheading keeps the zinnia profusion series blooming well into the fall.  The description in the catalogs says it doesn’t need deadheading at all but I do a little just to freshen it up.
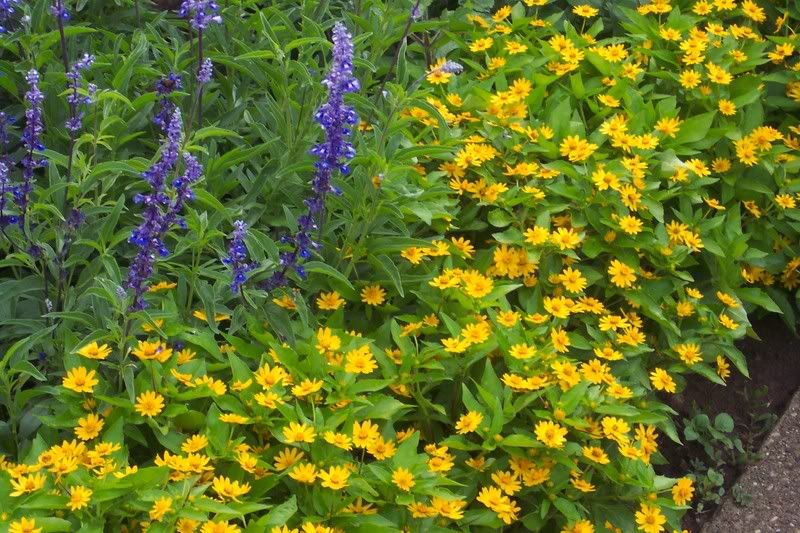
Zinnia "Profusion"

A King Fisher just “chuttered” overhead.  He flew so close and turned his head to look at me so that you would think that he was trying to figure out what a human was doing in that garden so early!


On the other side of this bed in front of  me is a new marigold( to me anyway).  It’s called ‘Fireball’.  It is 18″ tall, orangey yellow with a little bicolor shading it it.  It’s done very well and is full of blooms.  Marigolds are another flower that don’t need deadheading but we do  a little.  I probably planted it 12″ apart so it’s nice and thick. 
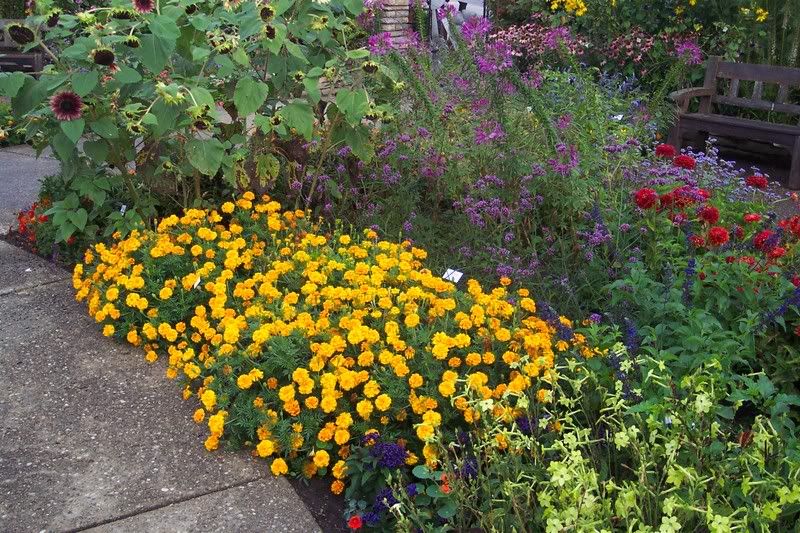
Marigold "Fireball"

That’s all for now.  I’ll tell you about some more annuals  in my next blog. 

Bye now, Judy


August 6, 2008

Onion Harvest

Filed under: Uncategorized — bob @ 9:17 pm

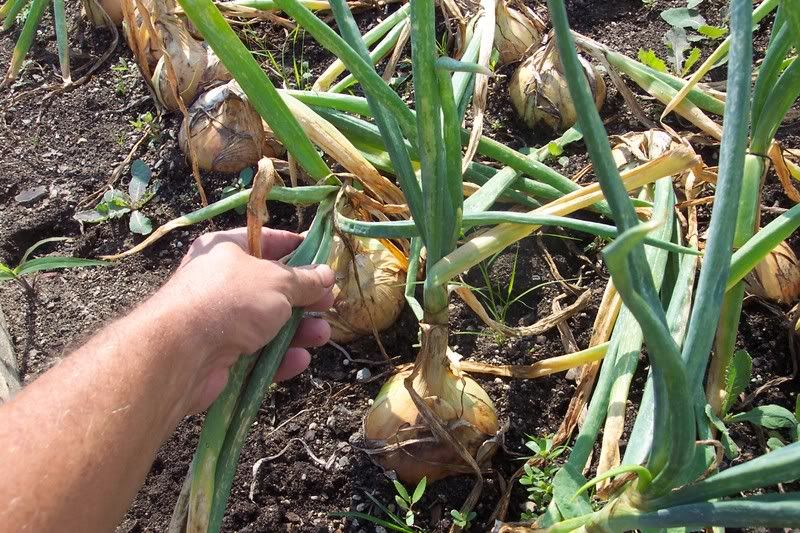
If your onion stalks are starting to look a little yelllow and are begining to fall over, it means they are just about ready to harvest. Once they get to that stage, they’re done growing.

Our white slicing onions are doing just that:

White Onion

To prepare our onions for harvest, we will knock over any stalks that haven’t fallen over yet on their own and let them dry a bit in the garden.

After lifting them from the garden, we partially dry them in an airy place out of the sun for a couple of weeks.  This drying process is called “curing”.  It helps the onion form that familiar onion skin which seals the inner part of the bulb and keeps it from damage.

After curing, we cut off the dried stalk (leaving a couple of inches) and store them in a cool, dark place until we are ready to use them. 

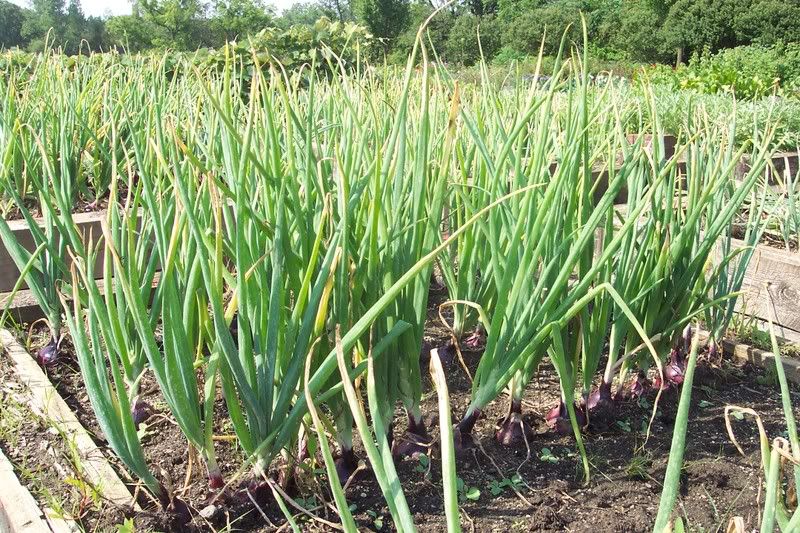
Not all onion varieties will be ready to harvest at the same time.  Take for example our red onions, which are still green and standing up tall. They are a couple of weeks or more away from harvest:

Red Onions 

If you store your onions, plan on using the ones with the thickest stalk first as they don’t keep as well as the thinner stalked bulbs. 

Also remember that some varieties will keep in storage longer than others.  We always plant the “Copra” variety of onion for long term storage. It is a yellow cooking onion which is very pungent when eaten raw.  When cooked, the Copra takes on a wonderful sweet flavor. 

The rest of our onions were selected for their taste, color or shape.

Bob


July 18, 2008

Squash Those Bugs !

Filed under: Uncategorized — bob @ 5:47 pm

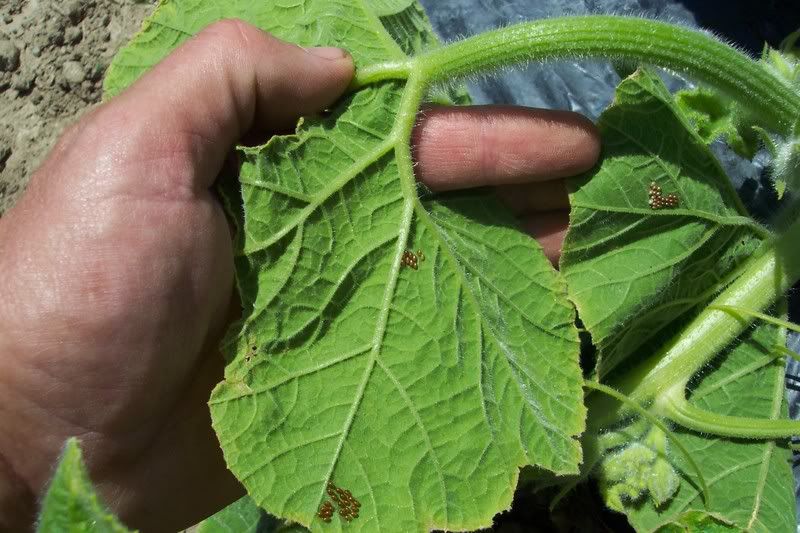
While we were out hoeing the pumpkins a few days ago, I came across a familiar but unwelcome site… a cluster of tiny,  hard objects on one of the leaves.  I knew what it was immediately, we have had these before.  It was a egg mass from a Squash Bug.

Squas Bug Egg Mass

I told my helpers to be on the look out for them. Usually the eggs  are found on the under side of a leaf.

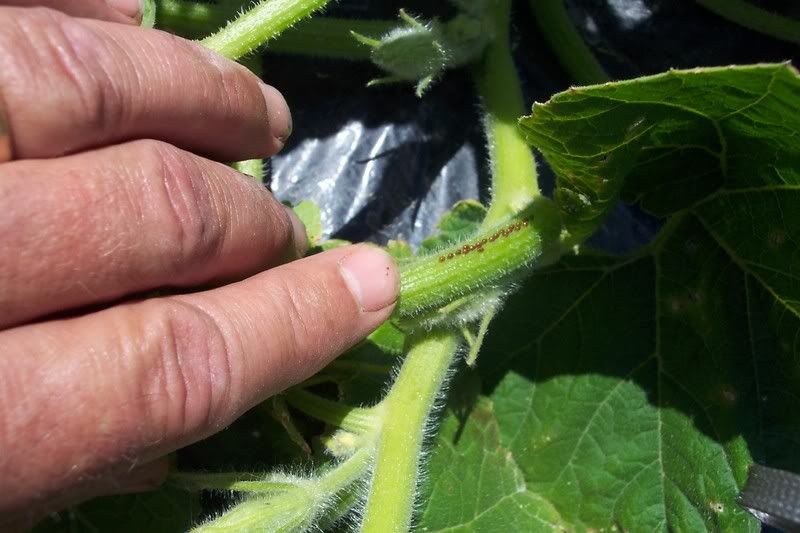
Eggs On Stem

They can also be found on a stem or anywhere else on the plant.

Squash Bugs feed on all members of the Squash family of plants, pumpkins included.

I asked my helpers to count the number of egg mass as we set out to smash them by hand.  I was curious about how many there were and thought that you might be interested as well.

We have three 75 foot rows of pumpkins planted into black plastic mulch. The first row had about 75 egg masses, the middle row had 45 egg masses, while the last row had 85 eggs masses.  Each egg mass ranged from a dozen to over 25 individual eggs per clutch.  Anyway you do the math, that would have been a lot of Squash Bugs feeding on our plants!

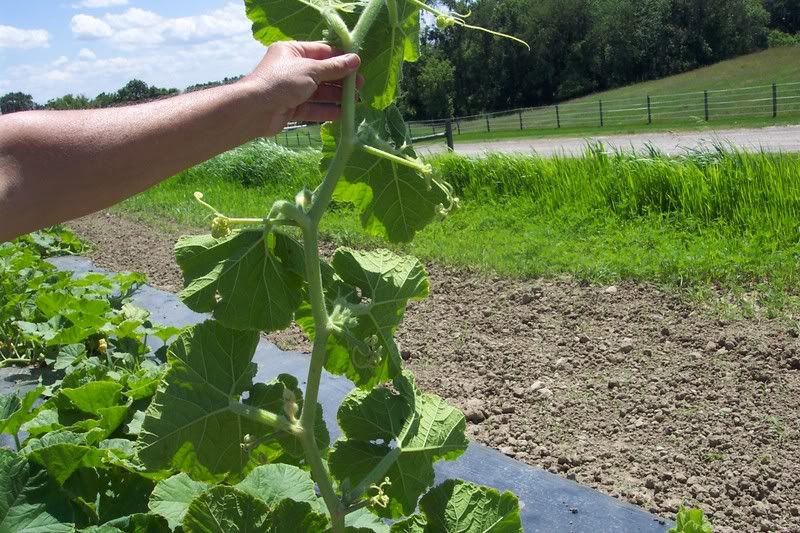
Our vines were about this long at the time of counting:

Pumpkin Vines

The easiest way to look for those bugs is to raise up the entire vine (or roll it over) and check each leaf.  The eggs are very easy to spot.

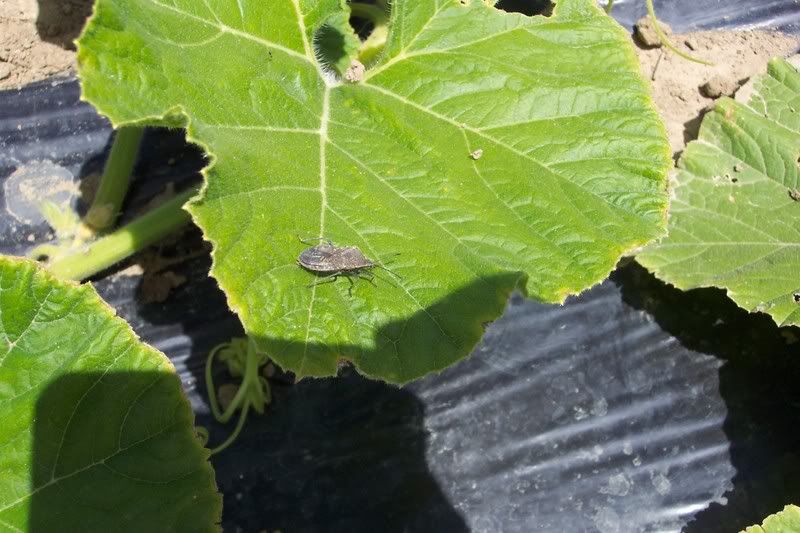
The Squash Bugs feed by sucking the juice out of the plant. after which the leaves turn brittle and begin to turn brown. The number of bugs that would have hatched could have caused us a major drop in yield or possibly even a crop failure.

Here’s a portrait of  Mama Bug:

Female Squash Bug

Smash her too while you’re at it !  This one oozed out an unusual iridescent blue color when crushed. I’ll spare you the gory photo :)

Squash Bugs like to hide  from their enemies by crawling under debris. You can use this to your advantage by placing a board near your plant and leaving it over night. By morning, the bugs will have crawled under the board to hide (not knowing that it was you who placed it there).  Lift up the board and dispatch any you find.

Our problem is that we have plastic mulch that they like to hide under and couldn’t  care less about any  board.

While they will do a lot of damage to your squash and pumpins, the good news is that they only breed once a year.

I’ll check the plants now and then to take care of any bugs we may have missed.

Bob

July 9, 2008

A Fun Perennial Flower

Filed under: Uncategorized — bob @ 5:47 am

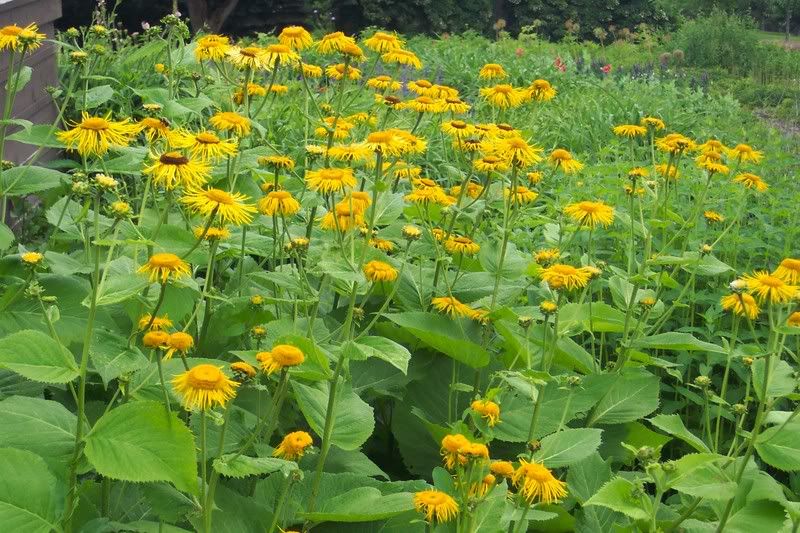
I’d like to share with you a new (to me anyway) flower that we are growing in the perennial garden. It’s called Bupthalum (sometimes spelled Buphthalum).

Our Bupthalum has been blooming since the last week of June and is still going strong.

The plants themselves stand over 4 feet tall, so you need to have a fairly large space for them or plant them at the back of your garden.

Bupthalum

We purchased the seed from Thompson and Morgan Seed company last winter. They seem to be fairly easy to grow. The packet had 50 seeds in it and I counted over 40 plants out in the garden this summmer… not a bad average. They also seem to be very hardy and are able to compete very well against weeds.  They will not wimp out and die back at the first sign of stress.

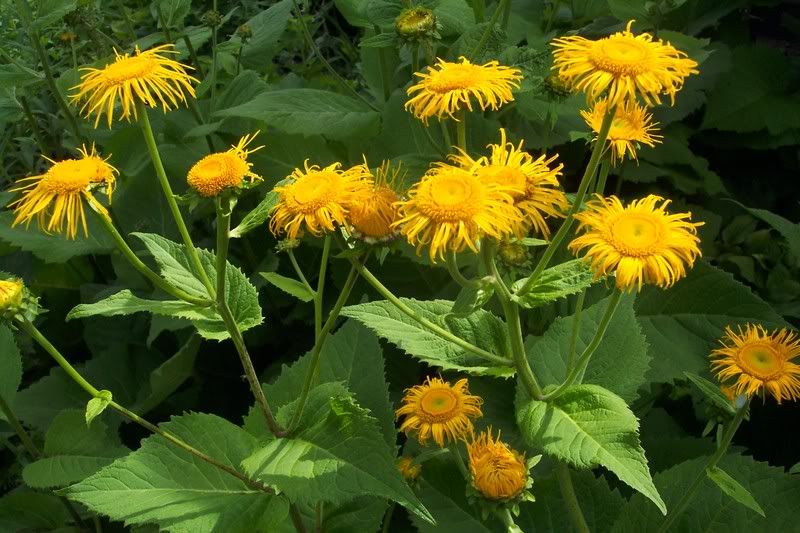
Close up Bupthalum

After three weeks of blooming the center of the blossoms are begining to turn a warm shade of brown, giving them a “whole ‘nother look”.

Bupthalum will give you plenty of enjoyment year after year for just a few cents for seeds and a little time to get them started.

Bob

June 19, 2008

Watch Out for Cabbage Worms

Filed under: Uncategorized — bob @ 6:04 am

I was out in the vegetable garden the other day and noticed that none of our Broccoli or other cabbage-type plants have any insect damage at all.

Apparently the weather conditions have not been very good for the Cabbage Looper or other cabbage pests which is very good news for the Broccoli plants.

I did happen to spot the first Cabbage butterfly in our garden on Tuesday. This is the culprit that lays the eggs that develops into those destructive cabbage worms.

Cabbage Butterfly

She and her sisters were not on the Broccoli just yet. I caught them feeding on nectar from our Salvia flowers. Here she alighted on a Hydrangea leaf just long enough for me to get this long distance snapshot.

Notice the distinguishing characteristics: all white with a dark spot on each wing. You often see them in small groups fluttering about in the garden.

If you see them landing on your cabbage and related plants, I guarantee that eggs are being laid and those destructive worms will start munching on your plants real soon.

You can deal with these insects in a couple of non-chemical ways. First you can cover your plants with a thin garden cloth called “floating row covers”, this will keep the butterflies from even reaching your plants in the first place, so no eggs will be laid on the leaves.  The other way is to spray the plants with a biological based material called BT.  BT will not kill the butterflies, but will kill the worms as they begin to feed.  Check at the garden centers for these products.

So…heads up.

Bob

« Newer PostsOlder Posts »

Powered by WordPress