The Yellow Farmhouse Garden

May 1, 2007

Cuttings

Filed under: Uncategorized — bob @ 4:14 pm

Whole books are written on the subject of propagating plants by cuttings. In today’s post, we’ll show what we do to propagate some of our favorite plants.

Here are two different “mother plants”, the plants that will provide us with the cuttings we need. On the left is a Strobilanthes (sometimes known as Persian Shield) On the right Iresine (also known as Chicken Gizzard):
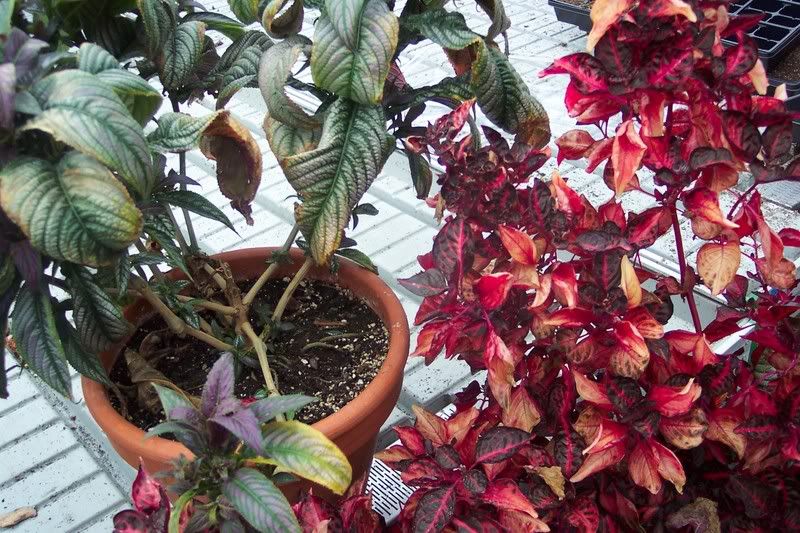
Mother Plants

It often helps to use a low concentration rooting powder to start these cuttings. In this case, we use #1 Hormex:
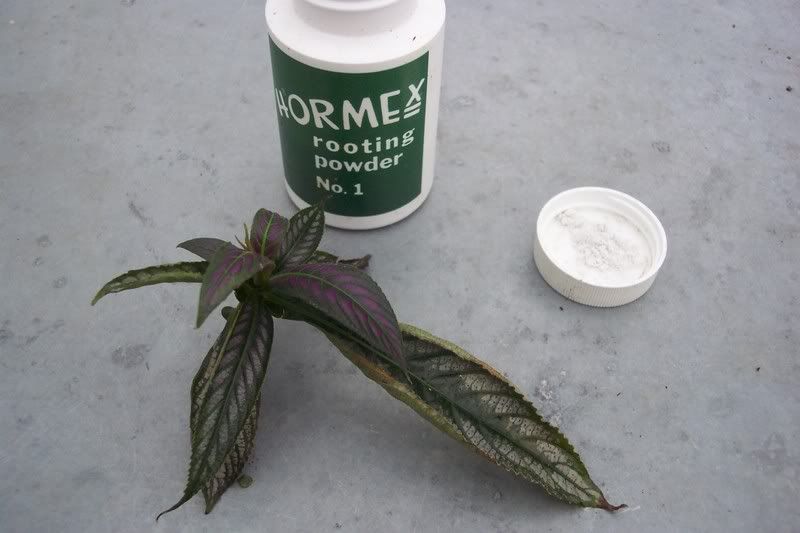
Rooting powder

Use only a small amount of rooting hormone, dip just the tip into the powder and knock off the rest of it with a tap of your finger. Don’t use as much powder as they show on the package, too much will inhibit rooting:
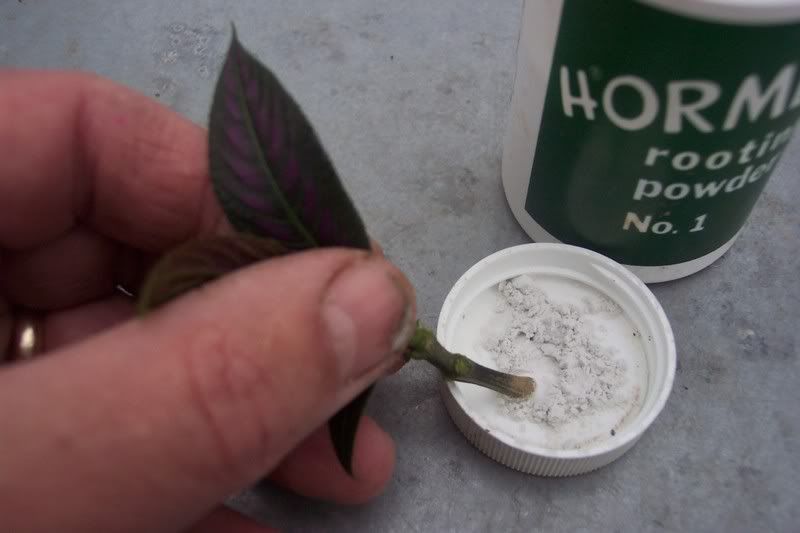
Not too much powder

For either of these plants, the cuttings can be taken from anywhere on the plant, just be sure to take at least two nodes:
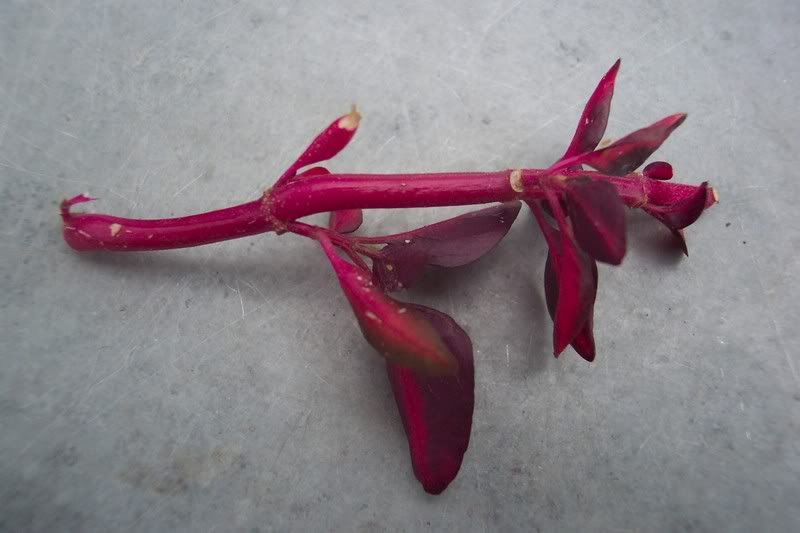
Cutting

For rooting medium, use sterilized sand, perlite, peat moss or a mixture of any of these. We use specially manufactured foam blocks, but you don’t need anything that fancy:
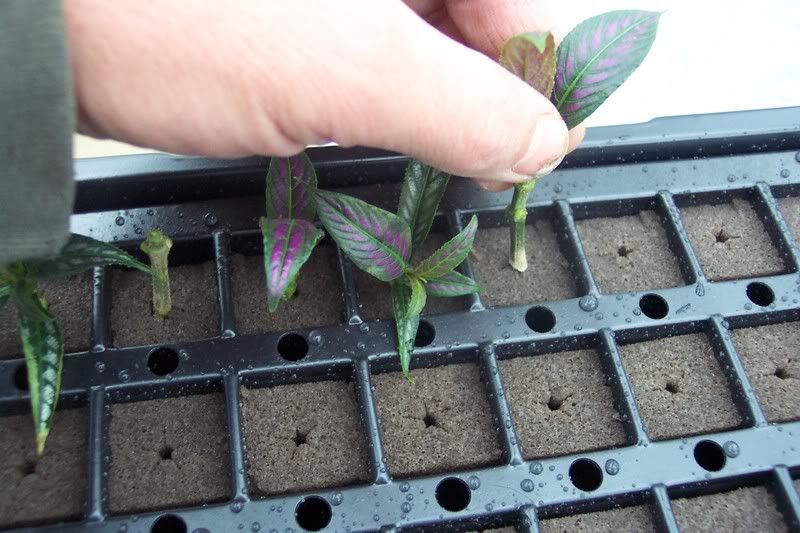
Rooting blocks

The cuttings are placed in the medium, covered with plastic and placed in a warm area out of direct sunlight. Open your plastic once, or better yet, twice a day to allow for air movement. When you see new leaves growing on top and roots growing out the bottom of the container, then you know it is time to move the cuttings into a bigger container using your regular potting mix. Then you can gradually expose it to more light.

Some easy rooting plants, like this Coleus, can just simply placed into water and rooted.
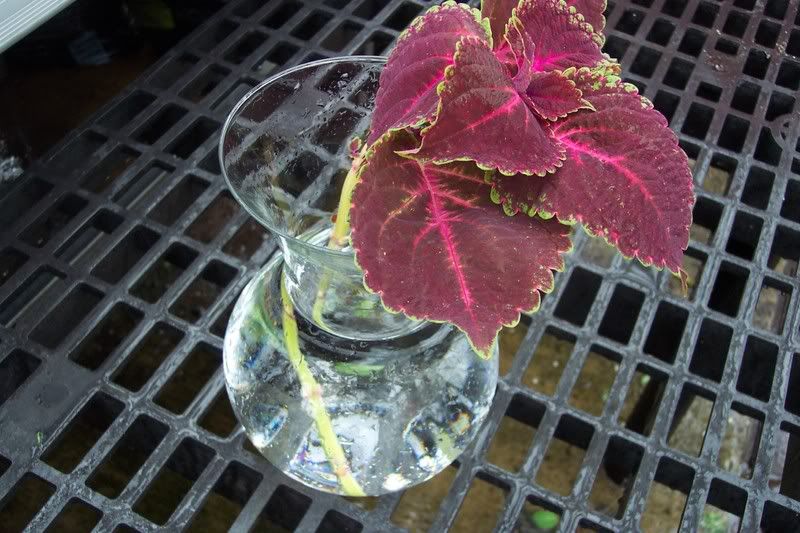
Coleus cutting

Just be sure to plant the cutting into a potting mix as soon as you notice roots forming. Cutings left too long in water have a hard time adjusting to growing in soil.

Softwood cuttings (from shrubs) cut from new growth made this spring can be taken after the leaves have fully opened but the stem is still soft…let’s say, maybe until early June. These type of cuttings wilt very easily so be careful not to let them dry out.

Fleshy plants such as Jade Plants only need a leaf to root and form a new plant. Just take a leaf off of the plant and place it on the surface of the soil and it will take root. These are called leaf cuttings.

Hardwood stem cuttings are taken after the leaves have fallen off of the plant in the autum, through winter and into spring. One year old wood is required for rooting, older wood will generally not work. Again you need 2-3 nodes with the cutting being about 4 to 8 inches long. Bury the cutting in the cutting medium so that the top node is an inch or so above the surface. These are the most difficult type of cuttings to root successfully.

Boy,oh boy, there is so much ground to cover on this subject…and we just don’t have the time right now to write an e-book about propagation by cuttings. ;) This gives you most of the basics, however. As the season progresses, we will try to post more suggestions regarding plant propagation.

In the meanwhile, have fun and experiment.

Bob and Judy
April 30, 2007

Plant Sale under the Big Top

Filed under: Uncategorized — judy @ 5:13 pm

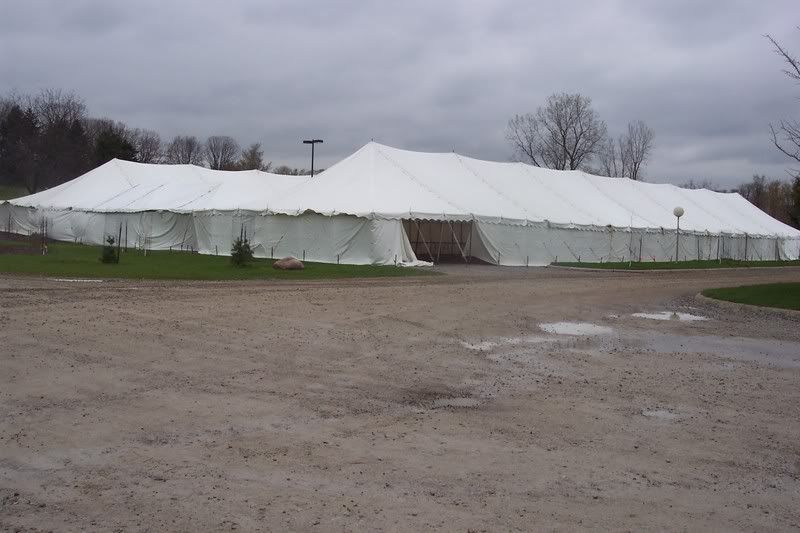
If you are looking for a good place to find hundred’s of perennials, then you’ll want to check out the Matthaei Botanical Gardens and Nichols Arboretum Spring Plant Sale this weekend, May 5 & 6.

Plants under the Big Top!

It’s located at 1800 N. Dixboro Rd. in Ann Arbor. Take US 23 north to Geddes Rd. Exit, turn right onto Geddes, then left onto Dixboro Rd. and go a mile or so. Look for the signs and flags on your right.

Some plants ready to go home with you

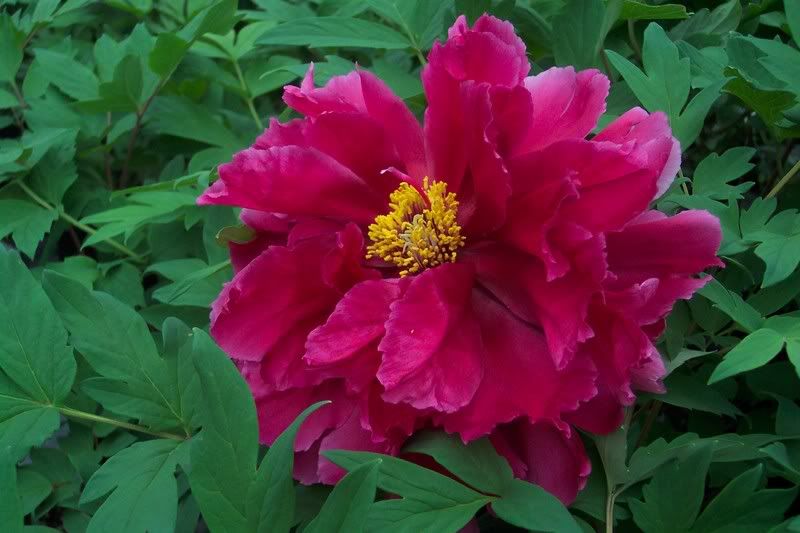
There’s plants for shade, sun, or rock gardens. Plus herbs, native plants, ferns, peonies and mini roses.

A Peony already in bloom

New this year is heirloom tomatoes and other veggies. Plus gardening demonstrations every half hour.

If you love plants then you’ll love this sale!

Bye now, Judy

April 26, 2007

Big Bouquet Of Hyacinths

Filed under: Uncategorized — bob @ 2:40 am

Have you ever wondered why you never see a big bouquet of Hyacinths for sale at the florist? They would make a beautiful arrangement and the scent is, well, absolutely wonderful!

You often see them offered for sale as potted plants. They make a very attractive potted plant. However, you can’t really use them in an arragement. Also, there are usually only three or maybe four Hyacinth bulbs to a pot.

Perhaps you have tried to cut Hyacinth stems and place them in water, only to be disappointed when they prematurely wilt in a day or so. That is the same reason the florists can’t use them…they just don’t last.

You see, most of the flowers florists sell these days come from South and Central America. They are shipped in by plane so they arrive at the florist pretty quickly, but they still have to stay fresh for a period of time from when they are cut out in the field, delivered to the florist, made into an arrangment, and finally sent to your home. After that, you still would like to enjoy them for several days. Hyacinths would be compost long before they ever made it to your home.

Well, I have for you today, the secret of obtaining long lasting cut Hyacinths.

You still need to plant them in the fall, there is no getting around that. And the flowering season is limited, they are blooming right now as a matter of fact. So the window of opportunity for enjoying Hyacinths is pretty small. That’s what makes them even more special.

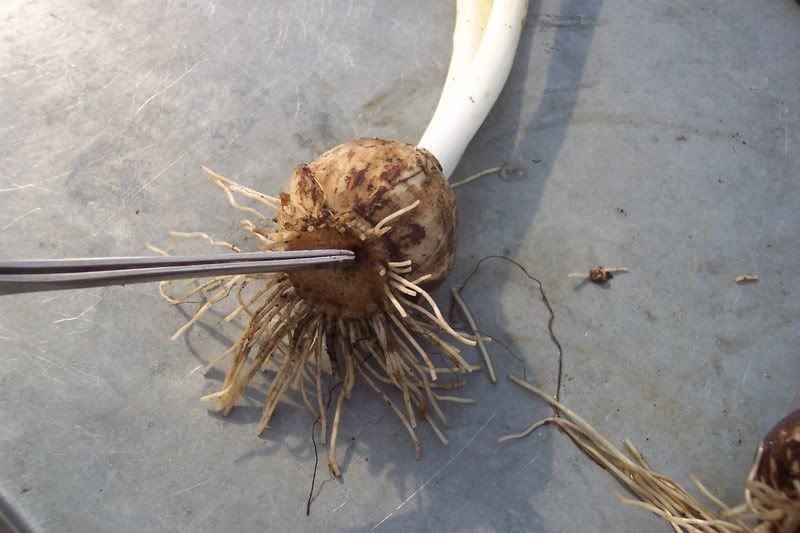
Let’s look at one critical part of a Hyacinth bulb. What I’m pointing to here is the bottom of the bulb called the “basal plate”:

Hyacinth basal plate

It is from the basal plate the roots emerge. Each cut stem of a Hyacinth flower needs to have a piece of this plate attached to it. The only way to get a piece of the basal plate is to dig the entire bulb.

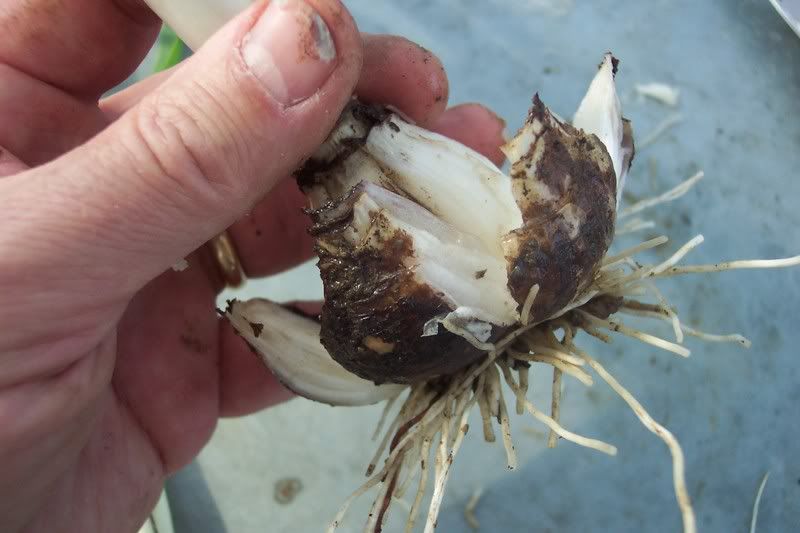
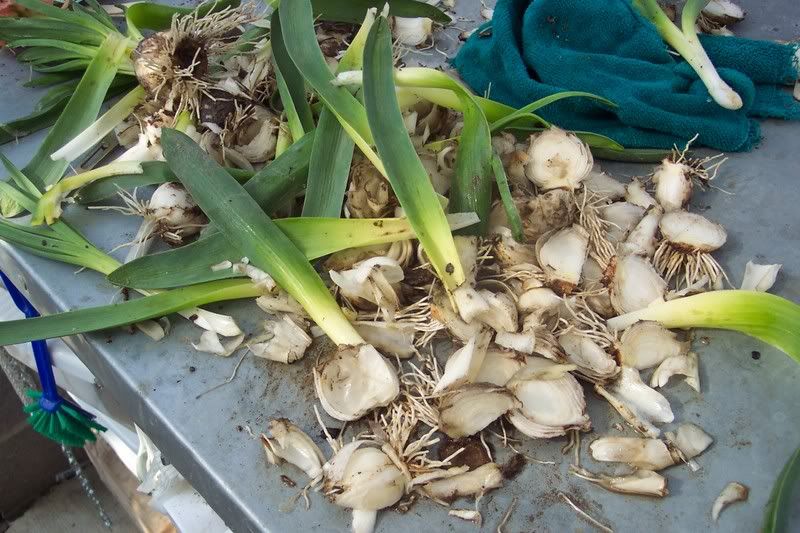
Then the scales of the bulb need to be peeled off, like the layers of an onion:

Bulb scales

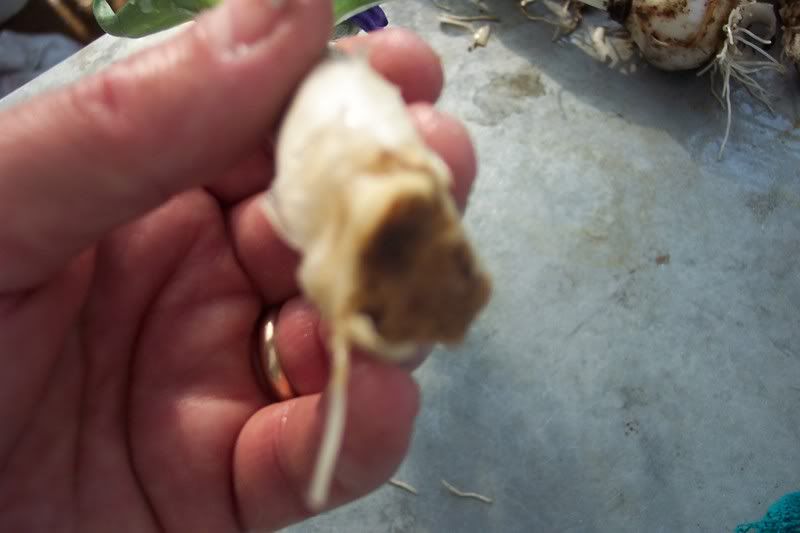
You can cut off most of the remaining basal plate and leave a small portion of it attached to the flower stem:

Portion of basal plate

Of course, this means that most of the Hyacinth bulb has to be discarded:

Discarded parts of bulb
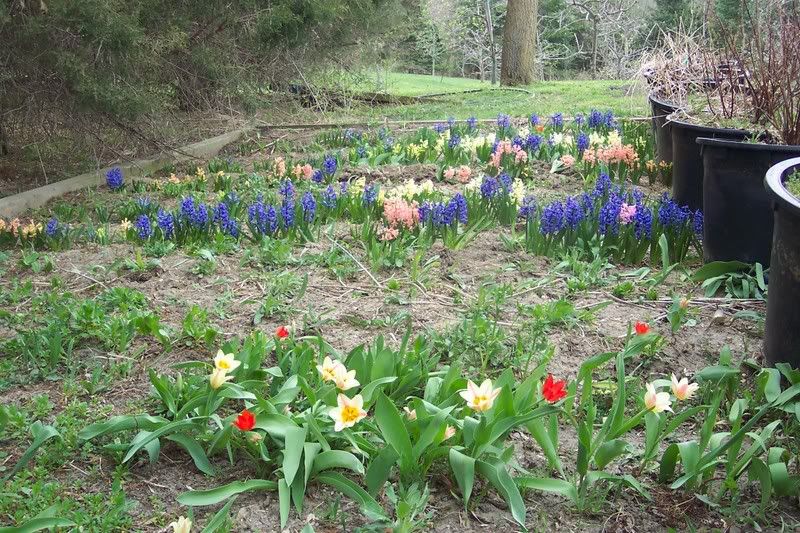
To me personally, I don’t worry too much about throwing away all of that Hyacinth just to get one stem. The reason is because after forcing them in pots, and enjoying them as potted plants, I re-plant them outside in what I call our “bulb graveyard”:

Bulb graveyard

This way each Hyacinth is used twice, once as a potted plant and then again as a cut flower in a subsequent year. It sometimes takes a couple of years for the outdoor hyacinths to bloom again, but once you have your graveyard going, something is bound to come up every year!

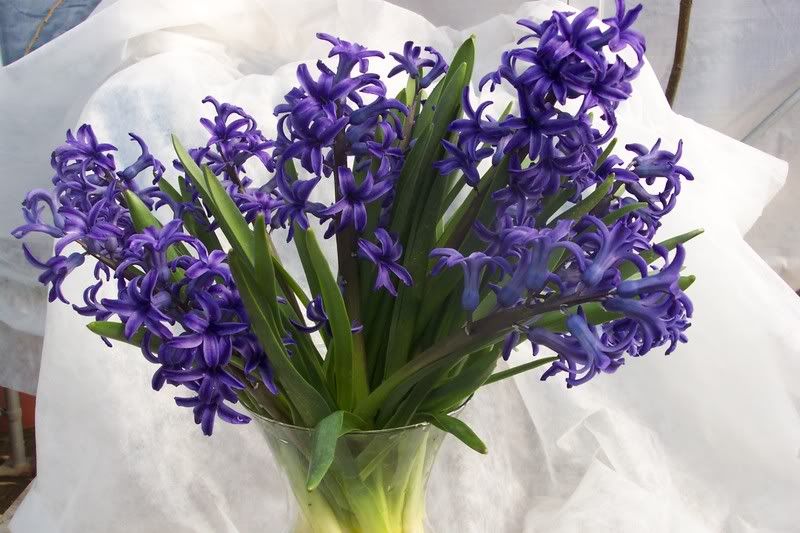
Once you have tried this process, you begin to realize how much labor is involved to get even one stem. The labor is too expensive, even when using poorly paid third-world laborers. Look at the results, though, and I’m sure you will agree that it was worth all the trouble. Besides, its fun! Isn’t that the reason why we do this stuff? :0 Here is a vase of some of those cut Hyacinths I gave away for Secretary’s Day:

Hyacinth arrangement

Now that the secret is out, its up to you to go out and suprise someone with a big bouquet of Hyacinths.

Bob

April 24, 2007

Pickerel Weed

Filed under: Uncategorized — bob @ 3:33 pm

We have a small pond in need of some help. Since it is a man made pond, no natural pond vegetation is anywhere close by. I decided this year to try to correct that problem.

Earlier on, about a month ago, I ordered twenty-five Pickerel Weed (Pontederia cordata) cuttings from Van Bourgandien Nursery.

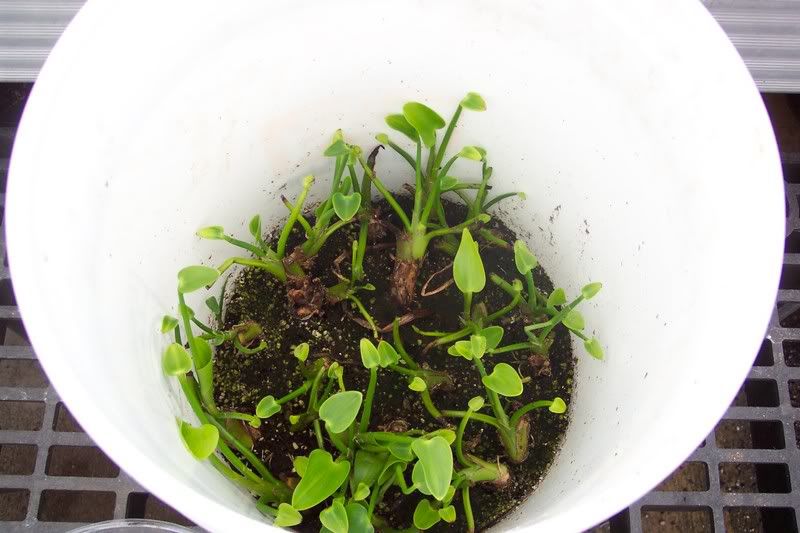
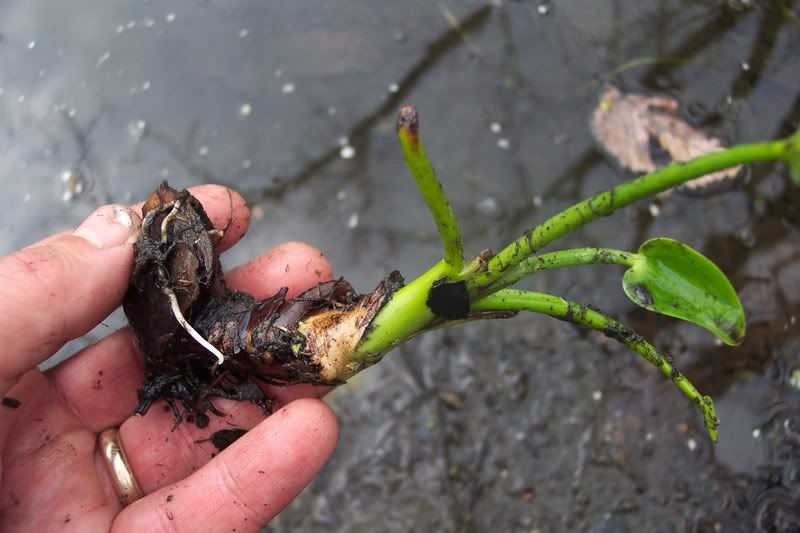
When they arrived, they were small pieces of roots about 1-1/2 inches long and the thickness of your thumb…they didn’t look very impressive. Since it was pretty cold outside, I put them into a bucket with 6″ of potting soil and added water until it was saturated. I was trying to imitate the natural growing conditions of the Pickerel Weed.

Here is a photo I took yesterday of those cuttings:

Bucket of Pickerel Weed

They have made good growth and look like real plants now:

Pickerel Weed

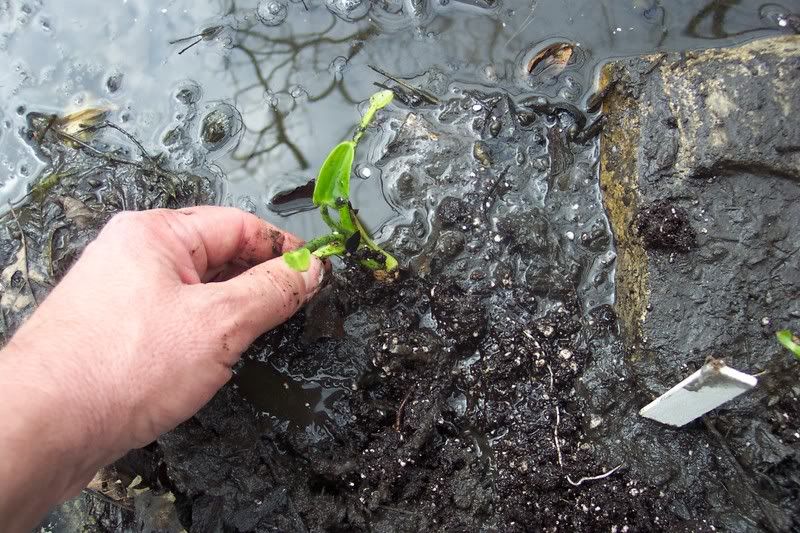
To plant them, I just dug away some mud along the shore and stuck them in:

Planting into mud

This summer I hope to see a wonderful display of blue flowers from this shoreline plant:

Pickerel weed
(image from the University Of Kentucky)

It’s still early enough to order cuttings for use in your wetland area. Plus, this plant is a native to our area and you won’t be introducing any noxious weeds into our local environment.

Bob

April 19, 2007

Grapes and More Grapes

Filed under: Uncategorized — bob @ 5:36 pm

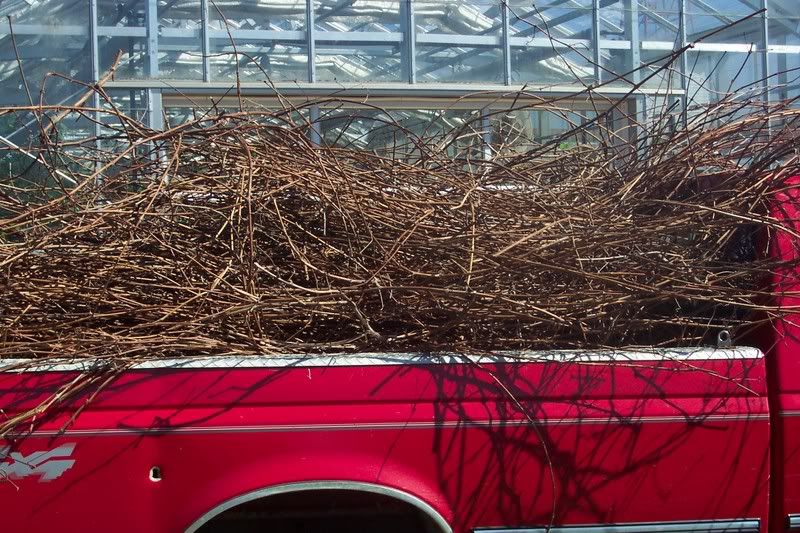
Before I hauled the grape prunings away yesterday…

Load of grape prunings

I decided to save a few for a special project. It was not for making wreaths, but for propagating more grapes.

Growing new grape vines from cuttings is easy and fun. This is the low-tech way I do it.

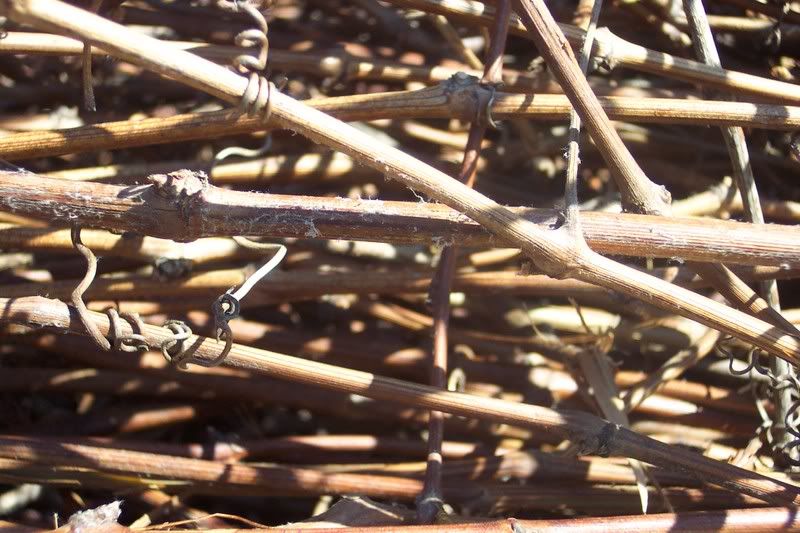
First, pick out some likely prunings from your pile:

Pile of prunings

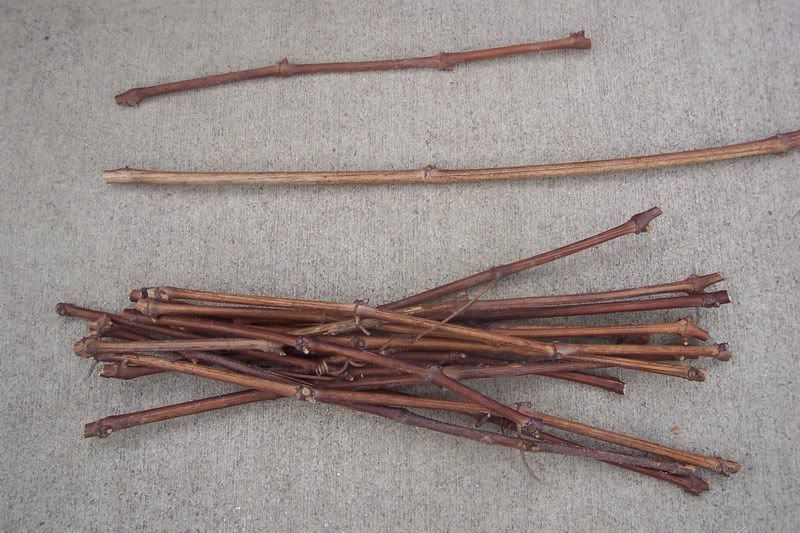
They should be about the diameter of a pencil and have 3 or 4 bud nodes. In the photo below, I show a nice collection of cuttings. See the one at the top? It has 4 nodes and is about 10″ long or so. The cutting in the middle has 4 nodes also but they are so far apart that you can only see two of the nodes and it is over 20″ long…no good.

Grape cuttings

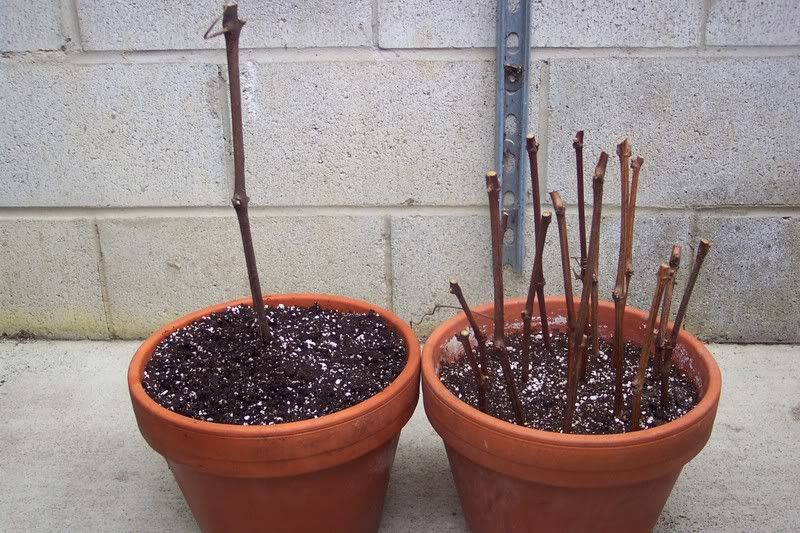
Then just stick them into a pot of moist potting mix so that two of the bottom nodes are covered with soil. Keep them misted or put them into a clear plastic bag to keep up the humidity. Make sure they are out of direct sunlight until after they have formed leaves. Then take off the bag.
Potted cuttings

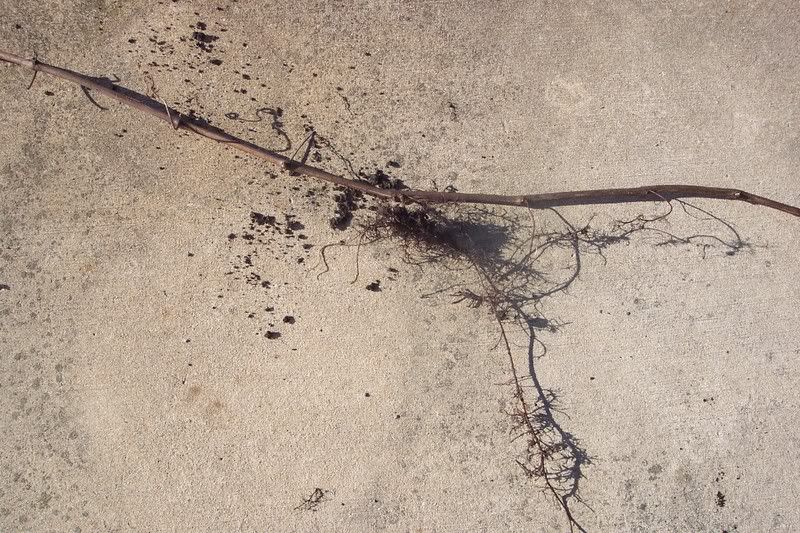
Now, here in this photo below, is a grape vine that slipped off of the arbor last season and rooted itself at three nodes. I just cut it off and stuck it into a pot…instant grape vine!

Naturally rooted

I even found a cane that I cut off last year and didn’t pick up…it rooted itself right there where it landed!

A couple of other things to keep in mind: take your cutting from the middle of the grape cane, not the tip or base (tips and bases don’t root as well), and make some kind of mark so that you know which end of the cutting is “up”, that is, closest to the tip and make sure that end stays above the soil.

That’s all there is to it. You don’t even need rooting powder, as a matter of fact, some grape growers feel that rooting powder can inhibit rooting in grapes.

Potted grape vines make great gifts for your gardening friends.

Bob

« Newer PostsOlder Posts »

Powered by WordPress