The Yellow Farmhouse Garden

January 28, 2010

Start of Seed Starting 2010

Filed under: Seed Starting,Uncategorized — bob @ 6:19 pm

The end of January signals the start of  seeding for the new year. Not everyone has to or wants to start their plants from seed but we do for a lot of different crops.

This week is a good time to seed onions to grow your own transplants. Do worry if you haven’t ordered onion seeds yet, seeding for onions can go on until mid February.

Onion transplants are pretty east to grow and don’t require any special supplies except sterilized planting mix.  Sterilized planting mix is an absolute must for starting seeds.  Baby seedlings are very susceptible to fungus diseases that can wipe out your whole young  crop overnight.  Planting mix,  sometimes called potting mix, can be found at any garden center and most hardware stores.

We usually use a greenhouse tray (or “flat”) to start seeds and can get 300-400 onion transplants or more out of a tray.  You can use any other container as long as it has holes in the bottom for drainage.

I simply scatter the onion seeds randomly over the soil surface and then cover them with about a 1/4 inch of the planting mix. They land on the soil mix at a distance of about 1/8 to 1/4 inch apart. I don’t worry at all about trying to get them into rows, it’s not necessary.  Here’s a guide as to how close they are sown:

Onion seed compared to lines on notebook paper.

Then I’ll gently water them in and place them in a warm spot to germinate (sprout).

Onion seedlings  start to appear after several days.  Move your planting container into a sunny spot if you haven’t already done so.

We start these so early in the season because it takes so long for then to reach a size which they can be transplanted into the garden.

Let your seedlings grow until spring, there’s no need to separate them or move them into bigger pots. They will grow in the container such that they resemble a “lawn” growing in the pot.

Fertilize them once a week with soluble plant fertilizer. Don’t let them dry out and don’t drown them either.

That’s about all there is to it.

You’ll be able to grow the varieties you like and not be at the mercy of someone else who decides which onions you have to grow.

My favorites are: Evergreen Hardy White, for green onions; Copra, for long term storing; Red Burgermaster, for burgers.

Bob

April 25, 2008

Tips about Starting Seeds

Filed under: Seed Starting — Tags: — judy @ 7:49 pm

There’s only 4 weeks left until Memorial Day! And yet they are forecasting snow showers for Monday and Tuesday!

My tomato seedlings are up and 3″ tall already. Pepper’s are up, too. I’m lucky to have a heated bench at the greenhouse. That speeds germination along . It makes such a difference. But a heating mat at home would do as well. Johnny’s Select Seeds and Seeds of Change both carry heating mats in their catalogs. You’ll want to keep that in mind for next year. Though who knows we may have a late cold spring.

If you started tomatoes and peppers right now, they should be big enough by the 2nd week of June. Which the way we’re going this year may be just the right time to put them out. If you put tomatoes and pepers out and they get chilled , it can stall their growth. Wait till the nights stay above 50 degrees. Unless you have protection that will keep the soil’s heat in.

For the past 16 years I have only used “soilless” potting mix for starting seeds and potting up my seedlings. so I’ve never had to worry about “damping off”, a disease that causes the stems of brand new seedlings to collapse and the plant to die. If you use garden soil or potting mix with real soil in it, (unless its been totally sterilized) you will be taking the chance that the “damping off ” disease organism is there in the soil and may infect your seedlings.

Once your seeds have germinated they need as much sunlight as you can give them in the house. Other wise they will get long and weak stems.

Don’t keep your seedlings too moist. Let the very top of your soil look a little dry before you water again.

If you notice little black “flies” coming off your soil around your seedlings (or any other houseplant for that matter), they you are keeping your soil too wet. Those are fungus gnats. If the infestation gets too severe it will stunt your seedlings because the larvae of the fungus gnat is a grub in the soil that may chew on your seedlings roots.

With 4 weeks to go till Memorial Day, it’s time to start seeds like annual coreopsis, cleome, zinnia, marigolds 4 O’Clocks, nasturtium and annual phlox.

During last weeks warm spell it was probably tempting to buy some annuals at the garden centers. If you did, keep those plants away from the frost. It’s forecasted to go down to 34 degrees Monday night.

Bye for now. Happy growing! Judy

March 31, 2007

Canna From Seed

Filed under: Flowers,Seed Starting — bob @ 1:03 pm

Most seasoned gardeners know that generally  Cannas are grown from roots that are stored from one year to the next, much like potatoes.

Cannas can also be grown from seed, just like a Marigold or any other type of flower. We have grown Cannas from seed for the past four or five years, always sowing a couple dozen or so. This year I decided to do a large planting of these flowers. So I ordered several packets of the variety; ‘Indian Shot’ from Thompson & Morgan Seed Company. ‘Indian Shot’ has various colored blooms ranging from yellow to red, set on green or bronze foliage.

We sowed the seeds back in late January into one of our greenhouse flats. They germinated in about 2-1/2 weeks with about a 60% germination rate, which is typical for this species. The seedlings were moved into 1-1/2″ cells about a month later. In early March they were transplanted into 4″ round pots.

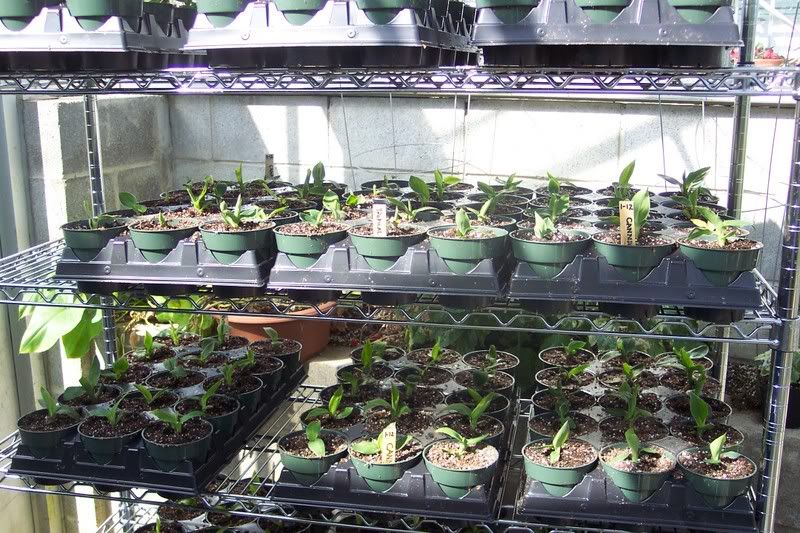
Here is the stage at which our Cannas are now:

Canna seedlings.

After Memorial Day, when then soil has warmed up, they will go into the long flower bed that is located next to a driveway. The same 90′ long bed that has crocus flowering in it right now.

Often Cannas from seed will make a first flush of blossoms after reaching a height of about 3′. As the season progresses, they will continue to grow and bloom again at their final height of around 4 to 5 feet.

After the growing season has ended, these Cannas can be dug up and stored just like any other Canna and replanted next spring.

The seeds sure take up a lot less space than the roots!

Bob

March 23, 2007

How We Sow All Those Seeds

Filed under: Greenhouse,Seed Starting — bob @ 4:32 pm

Someone asked me a couple of days ago how do we manage to sow all those different seeds each spring. You see, we sow thousands of seeds, involving dozens of varieties. Each type of seed is a different size and shape.

Other than our fingers, we have some tools and devices that help the process along.
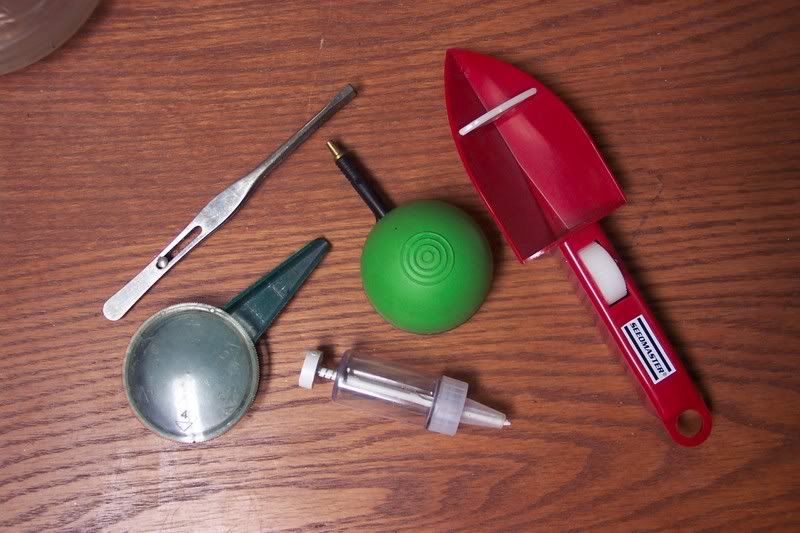
Here we see the five main tools we use in the greenhouse; tweezers, a suction-type seeder, a hypodermic-type seeder, a vibrating seeder, and a seed holder.

Seeding tools.

Tweezers are used quite a bit for medium sized seeds, we just place a small pile of seeds in the palm of our hand and pick them out one by one. It is a slow process but you can develope some speed with practice.

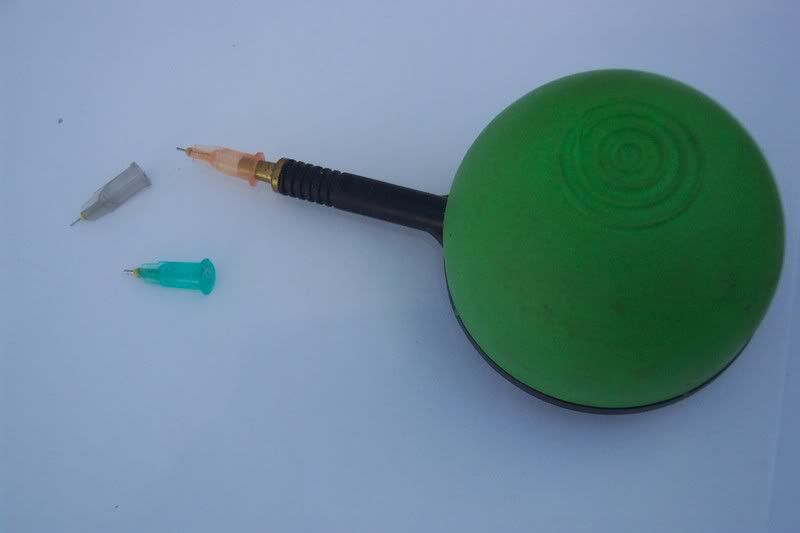
The suction-type seeder is used for the smallest of our seeds, begonia, petunia and the like. The device comes with three different size tips. You use the one closest to the size seed you are working with.

Suction-type seeder.

The suction seeder also picks up one seed at time. You just squeeze the bulb and release, it creates a vacuum that is used to pick up the seed. Many times the seed we sow with this tool is very small and hard to see. It helps to place the seed on a piece of white paper. This tool occasionally will get plugged up with debris. The manufacturer sends along three stiff pieces of wire that you use to unclog the tip. Don’t do what one of my helpers did and throw away that little 1″ piece of paper. That is how the cleaning wires are packaged!

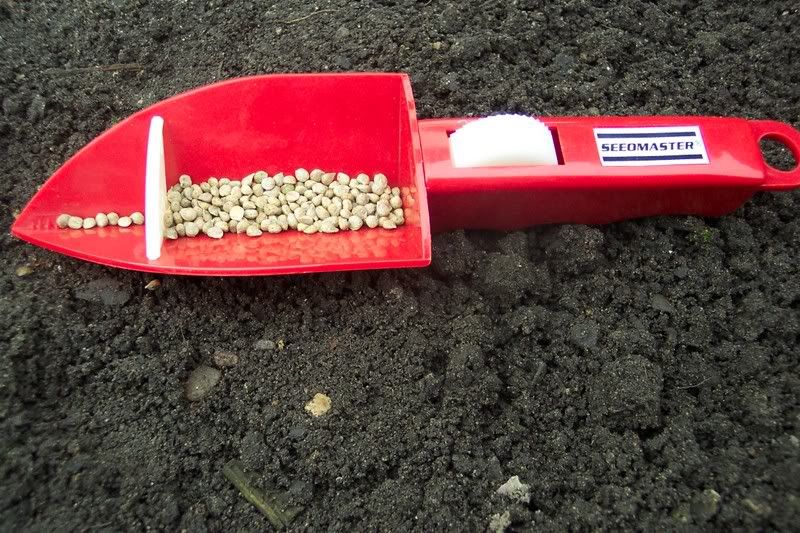
The vibrating seeder is used for medium sized seed that are some-what heavy. The vibrating action of the tool can flip light weight seeds right off your table and on to the floor ! This device has a knurled wheel on the handle that you turn with your thumb. The wheel rubs on an internal part of the seeder causing it to vibrate thereby shaking off the seeds from the tip. A set of interchangeable baffels with different sized openings keeps too much seed from collecting at the tip.

Seedmaster vibration seeder.

The “hypodermic” style seeder has a plunger with a groove cut into it. As you press the plunger up and down it picks up a seed from inside the seeder and deposits it on the soil.

The tool we use the most is the seed holder. This simple tool has a round part to place your seeds into. A clear cover that has different sized holes cut into it, keeps too many seeds from moving into the spout. To use this tool you just tap the side with a pencil or rub the ridges molded into it. This causes a slight motion that moves the seed. If you have it slanted down at just the right angle, the seeds can be placed very accurately onto your potting mix.

We use a variety of containers for sowing seed into.

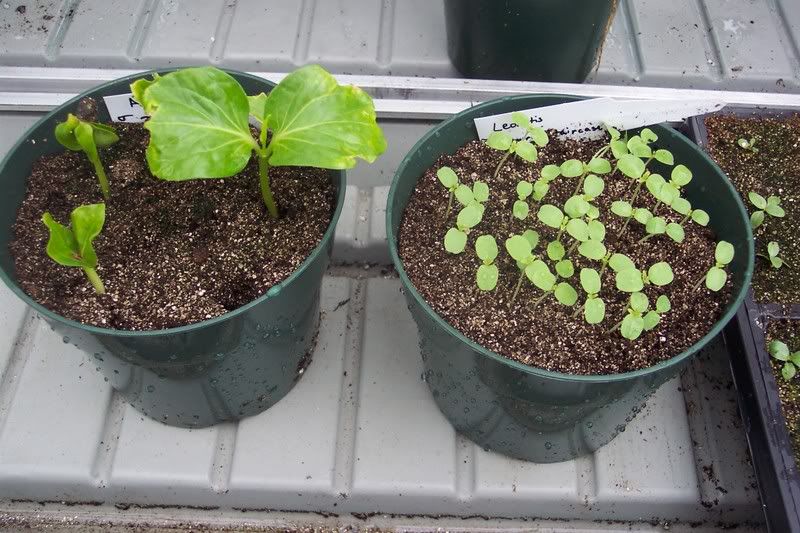
A six inch pot works great whenever we have just a few seeds to sow; anywhere from a half dozen to a maximum of about 60 or so.

6 inch plastic pots.

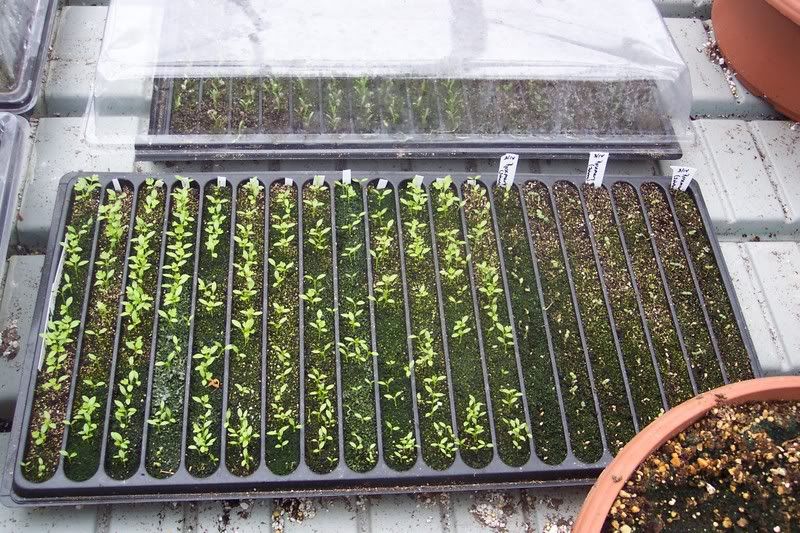
The divided-row flat is used for a greater quanity of seed, twenty five to fifty seeds fit in each row. It is also used to sow different varieties that you would like to keep apart but have the same germination requirements.

Divide row flat.

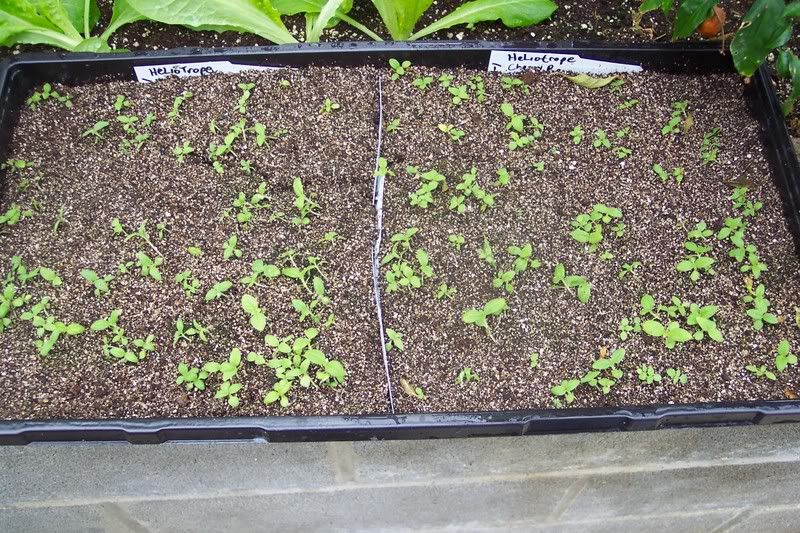
An undivided flat is used when we want to sow the seeds thickly as in the case of onions. Here we divided the flat in two using plastic pot tags.

Standard flat with two varieties sown into it.

On occasion we sow the seeds directly into “cells” that range from 48 to 128 cells per flat.

We also have sown into Jiffy pots and other containers. The old stand-by, a cut down milk carton works wonderfully as do yogurt containers with drainage holes cut into the bottom.

Next time we will discuss starting mix and seeds.

Bob

« Newer Posts

Powered by WordPress