The Yellow Farmhouse Garden

July 21, 2016

Too late to stake tomato plants

Filed under: Vegetables — bob @ 11:00 am

Here we are, it’s the middle of July. The tomatoes have made good growth so far but some of them don’t have cages around them. Right now the plants are so big, you couldn’t get a cage around it no matter how hard you tried. What’s a gardener to do?

The first idea that comes to mind is to stake the plants to get them off of the ground. That sounds good, but at this point in time it is not the best thing to do for tomatoes.

Staking and pruning works great for small areas or when a gardener wants to cram as many plants as possible into a given area. In other words it makes efficient use of garden space.

In order for tomatoes to be staked properly however, they must be pruned from an early age. Pruning must continue regularly until the plant is fully grown or when the plant reaches the size you want. All of that pruning actually reduces the tomato yield per plant but it can increase the yield over a certain area because you can fit more plants per square yard.

If you haven’t caged your tomatoes by now, I’m willing to bet you haven’t been pruning them either, so for that reason alone, staking is out of the picture. Not only that, driving stakes next to a plant this time of year can cause serious damage to the roots.

In this case the easiest solution is also the best solution.

Tomato plants by nature have a sprawling growth habit, they don’t climb like cucumbers or melons. They don’t prop themselves up against objects to grow upward either, which is why we have to train them and tie them to supports.

You can simply let tomato plants do their thing and sprawl over the ground — if you mulch them. One of the best mulches to use for this is straw.

Mulch the plants by gently lifting the plant and tucking the straw beneath the foliage. Use about six to eight inches of straw and make sure you cover the entire space under the plant.The deep mulch will raise the foliage and fruit away from the ground and drastically reduce the possibility of disease and rotting fruit compared to letting it grow directly on the garden soil.

Tomato plants can take up a lot of “floor space” when left to grow over the ground. That means they may get crowded if they were planted close together with the idea of staking in mind.

There are some advantages to using this method. One is an increase in yield per plant. Another is less work because no pruning or tying  is required. Plus there is a reduction in cracked tomatoes and blossom end rot because of more even soil moisture in the root zone.

On the negative side, the fruit is more apt to have an uneven color on the side resting on the straw.  The fruit may somewhat smaller and not quite as even in shape compared to staked tomatoes.

Bob
 

June 23, 2016

Cabbage worms are in the garden

Filed under: Vegetables — bob @ 9:11 am

Earlier this week I spotted some small, white butterflies flitting around in our garden.  They were the easy to recognize adult stage of the imported cabbage worm larva. Now, a few days later,their larvae are voraciously eating our cabbage.

Curiously, I haven’t seen any on the broccoli or kale yet, but they will show up there soon too. These pests eat any and all plants in the cabbage family including broccoli, cauliflower, kale, turnip and rutabaga. They are said to attack radishes as well but I’ve never seen it in all my years of gardening. Maybe it’s because our local population would rather eat the other plants if given the choice.

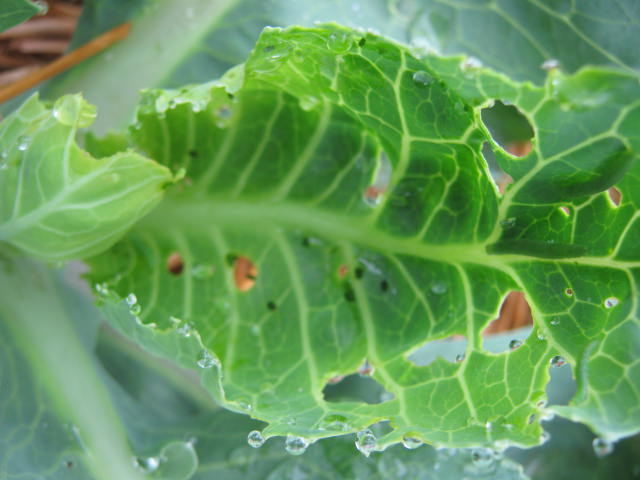
Holes in the leaves and frass, caterpillar droppings, are typical cabbage worm signs.

Holes in the leaves and frass, caterpillar droppings, are typical cabbage worm signs.

BTW, it’s not the baby caterpillar that makes the choice what to eat, it is its mother. The female butterfly flies all around looking for the ideal spot to lay her eggs so her offspring have the best food to eat. That way they can grow up to be big and strong and healthy. That is good for the cabbage worms but can be disastrous for a garden.

Farmers know that within days a few cabbage worms can chew so many holes into a cabbage that it will be unfit for market. Even in a home garden cabbage worms will ruin large portions of a cabbage.

Within a few days this young cabbage worm will quickly grow and eat large volumes of  cabbage plant parts.

Within a few days this young cabbage worm will quickly grow and eat large volumes of cabbage plant parts.

There are a couple of different species of cabbage worms in our area, one is the imported cabbage worm, the other is the cabbage looper. They are both green and color and do the same damage. Imported cabbage worms are very slow and sluggish when they move. Cabbage loopers move along like inch worms.

Both species of cabbage worm are easily controlled by insecticides labeled for chewing insects on vegetables. Bacillus thuringiensis, or Bt,  is a favorite worm killer among organic gardeners. It is made up of spores from a bacteria that infects only caterpillars and is harmless to other insects.

Controlling them now while they are still small is much easier than waiting until they get bigger and really start chewing away large chunks of your crop.

Bob


June 16, 2016

Thin vegetable seedlings for better crop

Filed under: Vegetables — bob @ 7:47 am

One major job in the garden this week is thinning our vegetable seedlings. It’s one of those things that is hard to do sometimes. Plucking all those little seedlings after waiting so long for them to germinate seems drastic but it needs to be done.

Most of us have no compunction when taking out weed seedlings but have very mixed feelings when it comes to removing vegetable seedlings. After all, we paid good money for those seeds and now we’re going to pull them out just as they are getting going?


Beet seedlings are easy to transplant after thnning.

Beet seedlings are easy to transplant after thnning.

When growing too close together, vegetable seedlings compete with each for nutrition, water and sunlight just like weeds.

Over crowded seedlings will grow and produce but will never live up to their full potential. Gardeners who have never thinned vegetable seedlings before are often shocked at the improvement that happens the first time they thin. Vegetables are larger in size, better quality and have a higher total yield.

Seed packs have information printed on them that give final plant spacing which is very helpful to beginning gardeners. Experienced gardeners are able to estimate spacing by envisioning the plant when it is full size, then leaving the right amount of space between seedlings.

Most thinned seedlings can be transplanted to another part of the garden, the exception is carrots. A carrot’s shape is determined by its main taproot. If the root gets bent during the transplant process, the resulting carrot will develop that shape defined by the bent root.

Bob

November 5, 2015

Best tasting brussels sprouts ever with some help from El Nino

Filed under: Vegetables — bob @ 3:35 pm

I had someone ask me last week when she should pick her brussels sprouts. Most experienced gardeners will tell you that Brussels sprouts are best after a hard freeze, and that is certainly true.

Cool temperatures help the sprouts develop a complex flavor with more sweet notes and less bitterness. We’ve had a hard freeze a few weeks ago — the one that put an end to the gardening season. That was probably enough to start improving the flavor.

Brussels sprouts can tolerate fairly cold temperatures. Many years, I’ve been able to leave the plants out in the garden at least until Thanksgiving and during strong El Nino years, until Christmas.

The cool damp growing season this year was not good for tomatoes and peppers but was perfect for brussels sprouts. Ours are nearly four feet high.

The cool damp growing season this year was not good for tomatoes and peppers but was perfect for brussels sprouts. Ours are nearly four feet high.

Since a strong El Nino has developed,we most likely will have one of those seasons where brussels sprouts can be left out in the garden well after Thanksgiving. This is important if you want to get the absolute best tasting brussels sprouts possible.

Brussels sprouts start losing their flavor just three days after picking. On the other hand, the flavor keeps improving as long as the sprouts stay on the plant. So you can see the advantage of leaving the sprouts on the plants until you are ready to cook them.

There are millions of people who will never eat brussels sprouts because they were forced to eat them when they were a child. They wonder why they were ever invented in the first place.

At one time, brussels sprouts were always picked by hand and those old commercial varieties tasted halfway decent. Then in the 1970′s and 80′s machines were engineered to harvest the sprouts. That meant physical changes had to be made to the brussels sprout plant itself in order to accommodate machine harvesting. In the rush to breed machine harvest-able plants, the cost came down drastically but the flavor was lost in the process. They became strong-flavored and bitter.

Things have changed in the past 20 years or so. Big improvements have been made by plant breeders to improve the taste of brussels sprouts, they’ve gained back the flavor that was lost during the early years of mechanization. It may be time to re-try brussels sprouts if you haven’t tasted them since you became an adult and now make your own food decisions.

Pick brussels sprouts by snapping them off the plant with a twist. Remove the outer layer of leaves. Some gardeners dig up the whole plant and save the sprouts on the stalk to pick off later.

The best way to cook brussels sprouts is to steam them until they are tender enough to be pierced by a fork, about 7-14 minutes. Some people cut a small “x” in the bottom of each stem to help them cook more evenly. Overcooked sprouts turn mushy and loose flavor and nutrients.

I plan to leave my plants in the garden as long as possible this season. And when very cold weather finally arrives, I’ll pick the remaining sprouts, blanch them and store them in the freezer.

October 8, 2015

Be sure onions are well dried before storing

Filed under: Vegetables — bob @ 7:27 am

With plenty of rain this season, I ended up a fairly decent crop of onions even without irrigation. Now it’s time to harvest and dry them for storage.

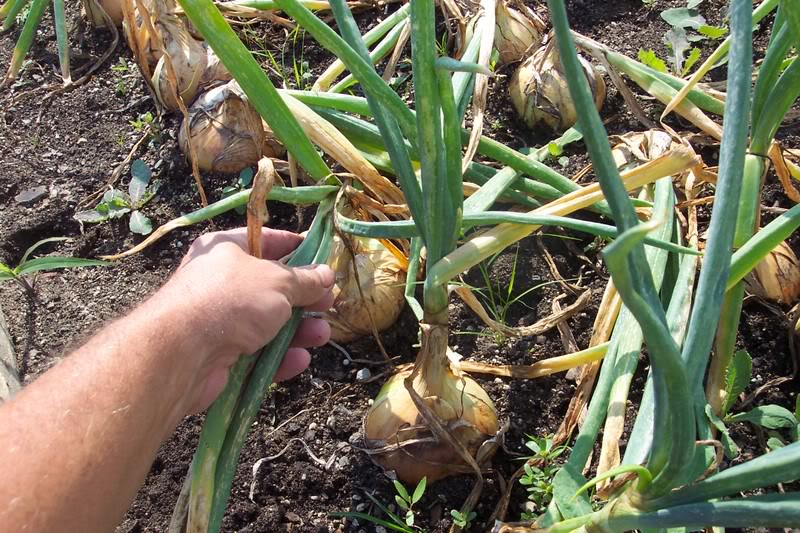
Onions have a built in signal to let you know when they’re ready. Once the stalks begin to fall over,  they’re done. Even the ones still standing will not make any more growth.

I usually knock down the standing plants to help them dry a little faster in the garden.

I usually knock down the standing plants to help them dry a little faster in the garden.

Once the stalks have just started to dry a little bit, I dig the bulbs with the stalks still on and dry them for two or three weeks in a spot where they won’t get rained on.

There is usually a little garden soil stuck to the bulbs. I have sandy soil, most of it falls off eventually. So I usually leave the dirt on during drying unless there are large clumps hanging on.

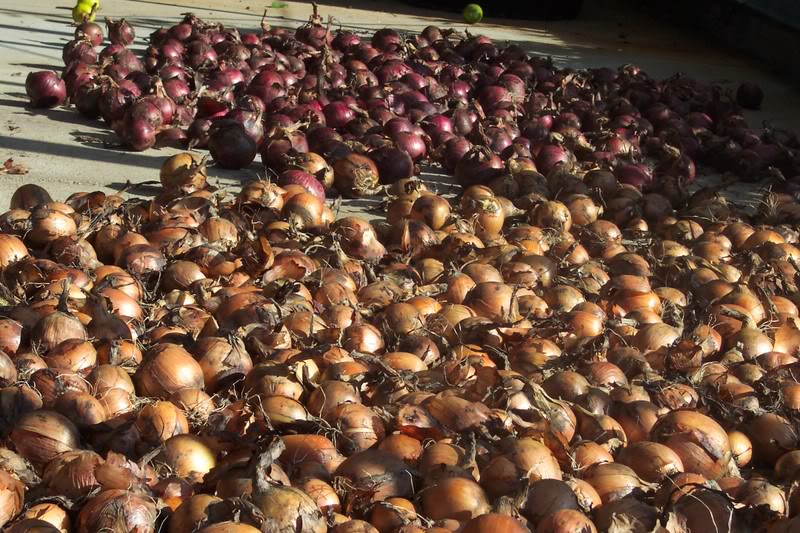
These onions are nearly dry enough to be put into storage.

These onions are nearly dry enough to be put into storage.

Drying is over after the outer skin turns brown and crispy. It’s at that time when I trim off all but an inch or so of the stalk. Most of the roots get trimmed off at the same time. I have in the past left the stalks on and braided the onions. Braided onions make a great homegrown gift from the garden.

I separate the onions with extra wide necks and use them first. They don’t store as well as onions with narrow necks.

I’ve accumulated a large collection of mesh bags over the years and use them to store onions. The onions need to be kept cool but can’t be frozen. They also need good air circulation. At one time I had a special building that I kept around 45 degrees, it was perfect for onions and other crops. But those days are over and I now I keep them in my garage.

The sweet onions don’t keep well so they get eaten right away. The yellow varieties store very well, sometimes lasting almost until spring.

During the winter, some onions invariably will start to decay. Those have to be removed to keep the other onions in the bag from going bad.

As many years as I have been gardening, I still get a kick out of going to the storage area in the middle of the winter and picking out onions for the kitchen.

Bob


« Newer PostsOlder Posts »

Powered by WordPress