The Yellow Farmhouse Garden

May 30, 2019

Epsom salts for better roses

In order to grow  and flourish all plants, including roses, require basically the same nutrients. One is carbon which is supplied to the plant by carbon dioxide in the air. Another, even though we may not think of it as a nutrient, is water.

In the soil, there are three primary nutrients that plants use in large quantities: nitrogen (N), phosphorus (P) and potassium (K). Together the primary nutrients are known as NPK. Good garden soil usually contains much of the required NPK . But sometimes soil is low in one or more of the primary nutrients so we supplement it with either organic or conventional fertilizers.

Secondary nutrients are need but in far less concentrations. They include calcium, magnesium and sulfur.

A long time ago rose growers noticed, even though roses were growing in very fertile soil, sometimes their blossoms still weren’t as nice as roses in other gardens. After much trial and error they found by adding Epsom salts, roses blooms would be noticeably improved. The missing ingredient was magnesium supplied by magnesium sulfate, more commonly known as Epsom salts.

The same Epsom salts you use in your bathwater can be used for your roses.

The same Epsom salts you use in your bathwater can be used for your roses.

There are other sources of magnesium but some of them like dolomitic limestone can raise the soil pH. That would cause problems if your soil pH was already on the high side.

Add Epsom salts at the beginning of the growing season. For each mature rose bush apply a half cup of Epsom salts to the soil around the bush. You can do this either in dry form and water it in or dissolve it in water and apply as a solution. Do this every year to replace any magnesium used by the plant or leached out of the soil.

Bob


March 8, 2019

Checking stored flower tubers

Several weeks ago I blogged about how I store dahlias. Did you keep some of yours too? If you haven’t already done so, now’s the time to check on them to see how they’re doing. Serious dahlia growers begin planting their tubers in mid-March, in pots and in a greenhouse of course.

I opened mine up right after the polar vortex blew through a couple of weeks ago. They were in a spot that normally stays cool but never freezes. However, this fall I rearranged boxes and stuff in the garage. Without realizing it, doing that must have changed the airflow pattern and allowed cold air to settle in the spot where I stored my dahlia tubers. I didn’t have a thermometer in that area but I knew it got cold because the storage bags were partly frozen. That’s not a good sign.

They didn’t look too bad when I opened them up to take a peek, but some looked to be partly frozen. The outside layer of damp sawdust was lightly froze. Instead of warming the tubers up to thaw, I moved them to another more temperate part of the garage to slowly warm up. Today I finally brought them out to see how they were doing.

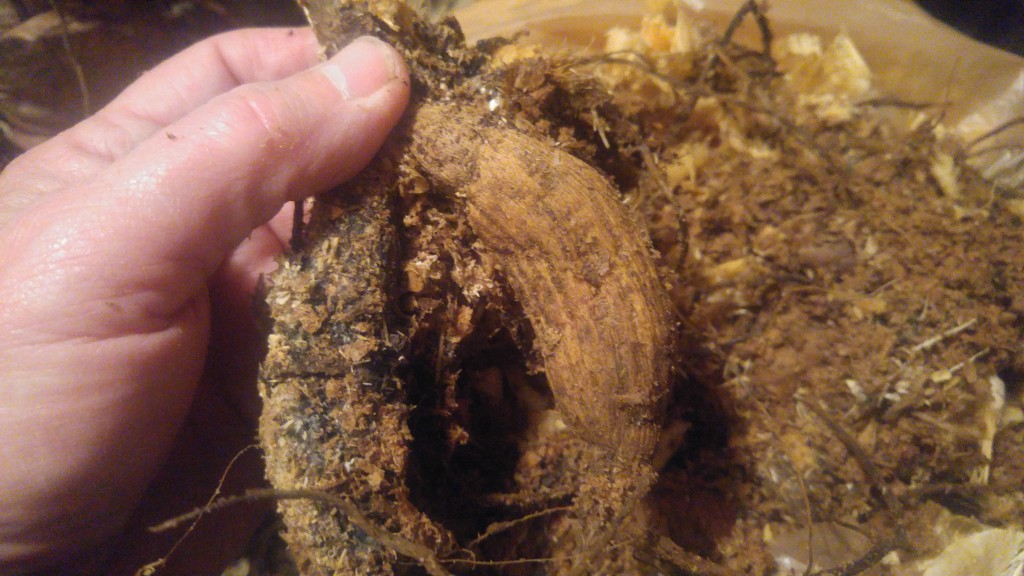
It's very easy to tell the damaged tubers from the undamaged.

It’s very easy to tell the damaged tubers from the undamaged. The one on the left was frozen.

As suspected, most of them were damaged beyond salvaging, I’m looking at about an eighty percent loss. The ones that survived look healthy though. I’ll re-pack the good ones in fresh sawdust and compost the rest.

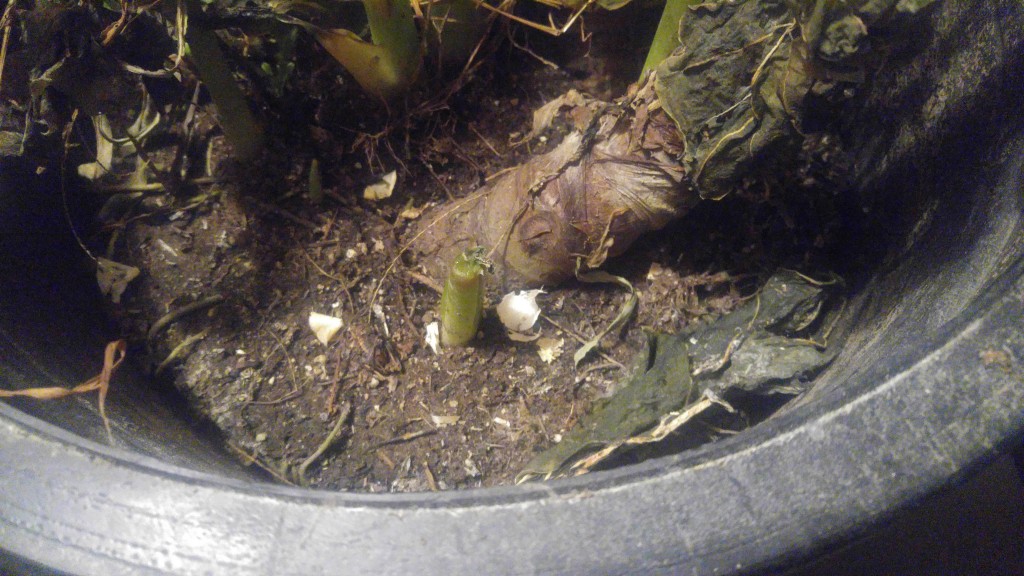
I also had some elephant ears tubers in storage, those I kept in the pots that they grew in last summer. They look pretty good. I gave them a small amount of water whenever the soil looked really dry — maybe once every other week or so. In the spring I’ll knock them out of the pot, divide them and replant.

You can't see much in this photo but the elephant ear roots are looking good.

You can’t see much in this photo but the elephant ear roots are looking good.

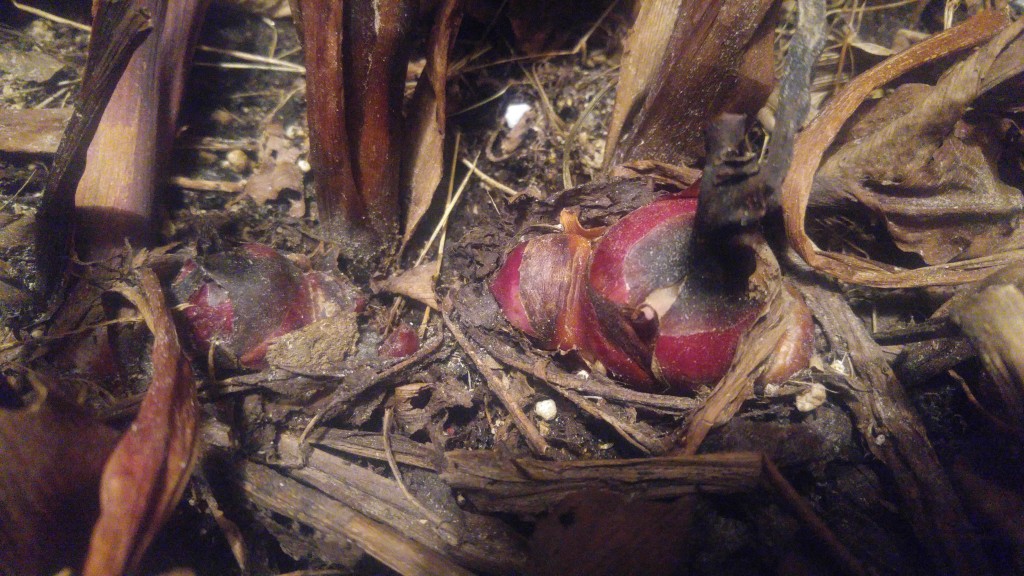
Other large pots have cannas that I stored the same way as the elephant ears, right in the pots they grew. They got some water through the winter too but not as much as the elephant ears. I wanted to keep them a little on the dry side so they wouldn’t get water logged and rot. Remember, they are dormant and not growing so they don’t really need much water. On the other hand you don’t want them to dry out and shrivel up. It’s something you have to learn trough experience. I usually ere on the side of less water.

The canna bulbs are in fine shape at this point in time.

The canna bulbs are in fine shape at this point in time.

Unfortunately, we lost a large geranium to the cold. It was one that we’ve been saving and taking cutting from for years and years.  During the most recent warm-up, we set the potted plant out on the front porch and — you guessed it — forgot it was there and it froze overnight. There may be some dormant buds that survived, I’ll let you know how that turns out.

Bob


February 26, 2019

Forcing spring tree and shrub branches

We’re getting an early taste of spring at our house by forcing branches into bloom. It’s something gardeners have done for centuries ever since someone figured out if you cut some branches and bring them into a warm room during the winter, they will bloom.

When I was in elementary school, forcing pussy willow branches in the classroom during the winter was a regular thing. Do they still do that?
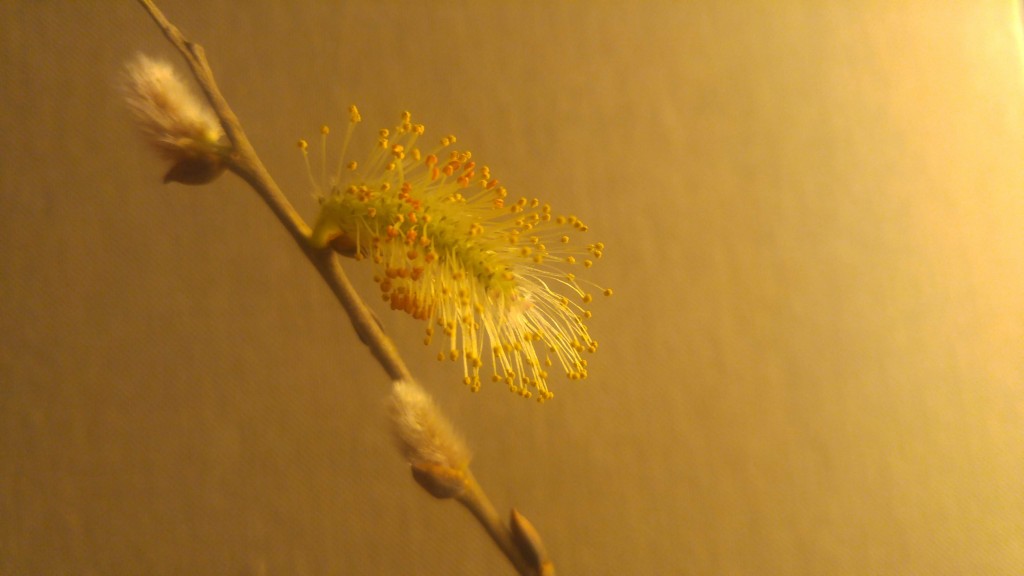
Right now we have willow branches blooming that Judy cut a couple of weeks ago. They’re not the large-budded pussy willows but they are still attractive. They just happened to be the ones growing in our yard.

Our willow branches have buds that range in color from light pink to yellow all on the same branch.

Our willow branches have buds that range in color from light pink to yellow all on the same branch.

In addition to willows, just about any kind of spring-blooming tree or shrub will work including, forsythias, vernal witch hazel, most fruit trees and many others.

In its simplest form , all you really do is cut off some branches and stick them in some water. You can improve the odds of getting better blooms by choosing branches that have more closely spaced buds — more buds means more flowers. Branches that are thicker than the average on the plant, work best too since they contain more of the nutrients the buds need to open and grow.

It's a lot of  fun watching the buds slowly progress through their development.

It’s a lot of fun watching the buds slowly progress through their development.

Cut the branches you want to force two to three feet long for best results. Once cut, remove all buds and side twigs that would be under water in your vase or other container.

Sometimes making a slit at the bottom of the stem will help it take up water more easily. Branches from lilacs and possibly other plants benefit from being lightly crushed at the bottom, best tool for that is a hammer. Just put the end of the branch on a scrap of wood and tap it until it is crushed.

Placing the entire branch in lukewarm water will help jump-start the process. The only big enough container we have to do that is the bath tub, plus there’s plenty of warm water handy right from the spout. A couple of hours in the tub will do it.

Change the water in the vase every couple of days or so to prevent mold and algae from growing and clogging up the water-conducting parts of the branch.

When forcing branches, keep in mind that not only are the flowers fun to see but the shape of the branch itself is also part of the arrangement. Don’t be tempted to cram too many branches into the vase or you may lose the pleasing design effect the branches add.

To extend your forcing season, cut new branches every week now until spring to have a fresh set of buds opening all the time.

Bob

January 3, 2019

Poinsettia care after the holidays

For a vast majority of people Christmas poinsettias are a disposable commodity. There are a few of us however, who adopt them as part of our permanent plant collection.

A while back, for several years in a row, I kept one particularly bright red poinsettia that eventually grew to almost four feet tall. You can imagine it was pretty impressive at Christmas time while in full bloom. Unfortunately, I don’t have any pictures of it to share with you. The computer I was using at the time crashed and took all of my plant photos with it. I learned a hard lesson that day.

To keep your poinsettia going for as long as possible,  keep a couple of things in mind.

Most poinsettias die from over-watering and that is related to growing conditions. Your home probably has a lower quality of sunlight than the greenhouse from which it came, so your plant will be less actively growing and therefore need less water. So, let the soil dry out some before watering. Then water the plant thoroughly until water flows out of the bottom of the pot.

Pour out excess water after every watering.

Pour out excess water after every watering.

Most poinsettias come with a waterproof foil or plastic wrapper to keep water from leaking onto furniture. After watering, dump out any water that remains in the wrapper. It is this extra water held in the foil that is the main reason poinsettias die prematurely. Poinsettias standing in water develop waterlogged roots. Eventually the roots begin to rot and the plant rapidly declines.

Don’t worry about fertilizing your plant, it won’t really need much until spring. A half-strength dose of water soluble houseplant fertilizer once in a while should be more than adequate until growth resumes in the spring.

Also, bear in mind that poinsettias weren’t meant to last too much longer than the Christmas season.  They were bred for color, not hardiness. On the other hand, I’ve seen some poinsettias growing under abysmal growing conditions that survived until spring when the owners set them out in the sunlight to grow again.

At the very least, enjoy your poinsettia as long as possible this winter as a reminder of wonderful Christmas memories.

Bob

December 6, 2018

Digging dahlia tubers late

Last week I talked about my potatoes that I dug up very late in the season. What I didn’t mention was that same day I also dug my dahlia tubers that were still in the ground. Turns out they where in fine shape shape as well.

It makes perfect sense that the tubers would look so nice.  The ideal storage temperature for dahlias is around forty degrees Fahrenheit and that’s about what the soil temperature was. I checked the soil temperature in my garden again this morning and found that even now, during the first week of December, it’s running about 40F.

What kind of surprised me was how warm the soil is even with the colder than normal November we experienced. Looking back on the several weeks,  a pretty good set of circumstances lined up for my dahlias. First, the tops were froze back by the frost back i October. Then I left them in the ground for well over a month. That allowed the tubers to develop healthy “eyes”, just like the eyes on a potato. With strong eyes, my tubers should make good, strong growth next spring — that is if I take good care of them over winter.
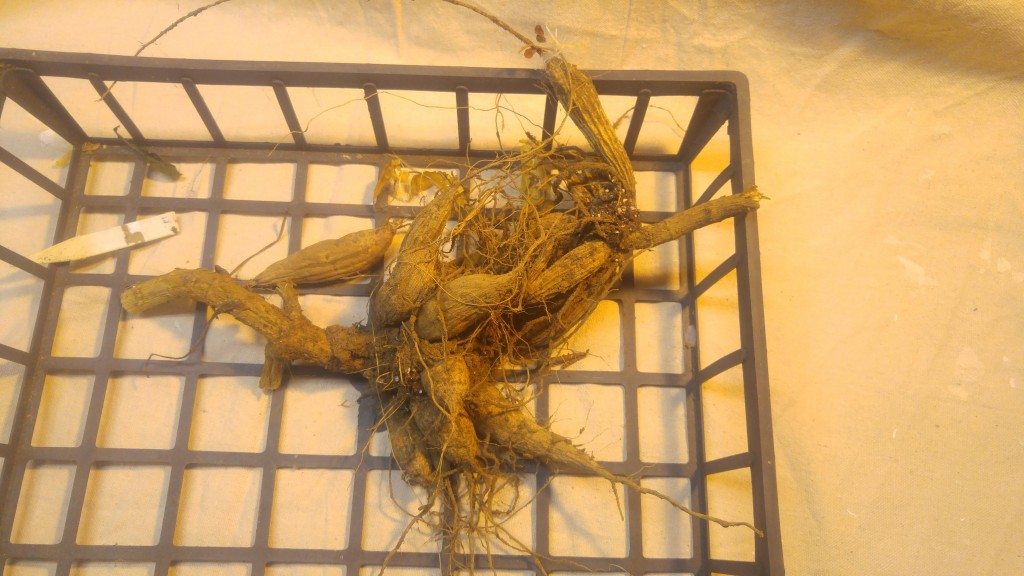
Tubers before separating.

Tubers before separating.

There’s a few simple tricks to keeping dahlias over winter. The first is to store them at the proper temperature and we already know what that is — just don’t let them freeze.

The second crucial factor is humidity. If left out in the air during storage, the tubers will dry out due to the low humidity we typically have in our homes in the winter heating season. So the solution is to store them in air tight containers. For a small amount of tubers, maybe under a hundred or so, I find keeping them in zip-loc bags is a good way to go. I usually separate the clumps of tubers into singles, then place one or two in each bag. To maintain good humidity I add moist sawdust to the bag. If you have more that one tuber per bag, the sawdust also keeps the tubers from touching each other. While you’re at it, add a tag so you know what variety it is.
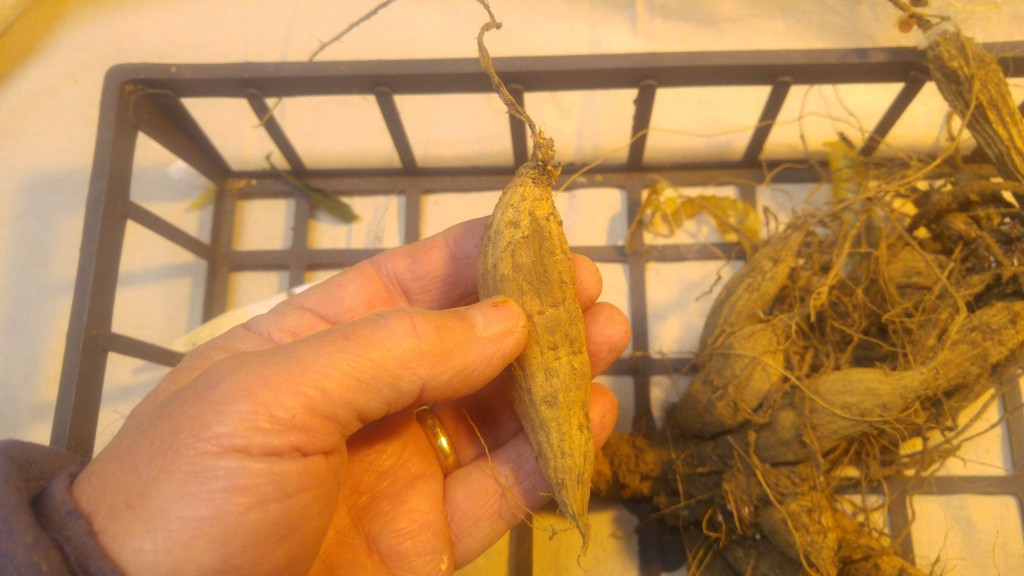
This is a typical dahlia tuber but they come in wide variety of other shapes and sizes.

This is a typical dahlia tuber but they come in wide variety of other shapes and sizes.

Even though I had success in the past using peat moss, potting mix or garden soil, I’ve found that sawdust works best for me. I’ve heard of people using shredded newspaper but have never tried it. However, with so many people opting to get their news online, printed newspaper is getting harder and harder to find these days . You can easily solve that dilemma by subscribing to Detroit News home-delivery, but I digress.

The third and final secrete is to check on them once in a while. Open them up and make sure the packing material is still moist. Also, toss any rotting tubers you might find. It’s pretty disappointing to open them up in the spring only to find out your tubers were ruined due to neglect over winter.

Those plants you bought from the garden center and planted in your garden, most likely grew a set of usable tubers. Since soil temperatures are still hovering around 40 degrees F, it may be fun to check in your garden to see if your dahlia tubers are still good. Dahlia farms are asking $3.00 and up for each tuber (not including shipping) so it may be worth your while to poke around in the garden. Let us know in the comment section what you find.

Bob


« Newer PostsOlder Posts »

Powered by WordPress