The Yellow Farmhouse Garden

October 21, 2008

Lilies in the Graveyard

Filed under: Uncategorized — bob @ 6:52 pm

With Halloween right around the corner we are seeing all kinds of scary stuff; themes relating to goblins, jack-o-lanterns, graveyards…

We have a  graveyard here!  It’s not the scary  Halloween type of graveyard, but a flower bulb graveyard.

In this area outside, we plant all of the lily bulbs we grow out of season in the greenhouse that are left over from various projects or those that get returned to us after they are done flowering.

I just can’t bring myself to throw them away or even compost them, so I give them a  “decent burial” in the bulb cemetery that’s located in an out of the way corner. Since it used up most of its energy blooming while in a little pot, some times it takes a couple of years for a bulb to build up enough strength to bloom again. I’ve been doing this for at least 4 years.  It’s always fun to see what new flower will be blooming from one year to the next. 

Even  now, during Halloween season, the old Easter Lilies are still blooming!
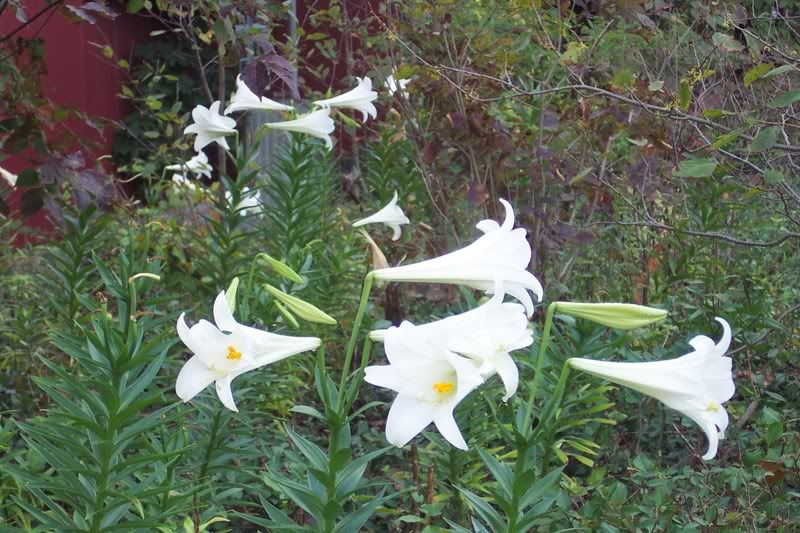
 

They seem to have shook off the frosts we have had so far. It won’t be long until they finally give in to the cold weather and take a long winter’s nap.

Bob
October 12, 2008

Aloe vera re-potting

Filed under: Uncategorized — bob @ 1:18 pm

The Aloe vera plant has been popular for decades as a balm or salve used to treat minor burns, cuts, sunburn and other maladies. Every household should have an Aloe plant as part of their first-aid kit.

You can do your part to spread the good news about Aloe by dividing your plants and giving them away to folks who don’t have an Aloe yet. It’s very easy to do.

As an Aloe plant grows, it forms small plantlets or off-shoots around the base of the main stem. They may or may not have roots. These can be gently pulled apart from the main plant and transplanted into new pots.

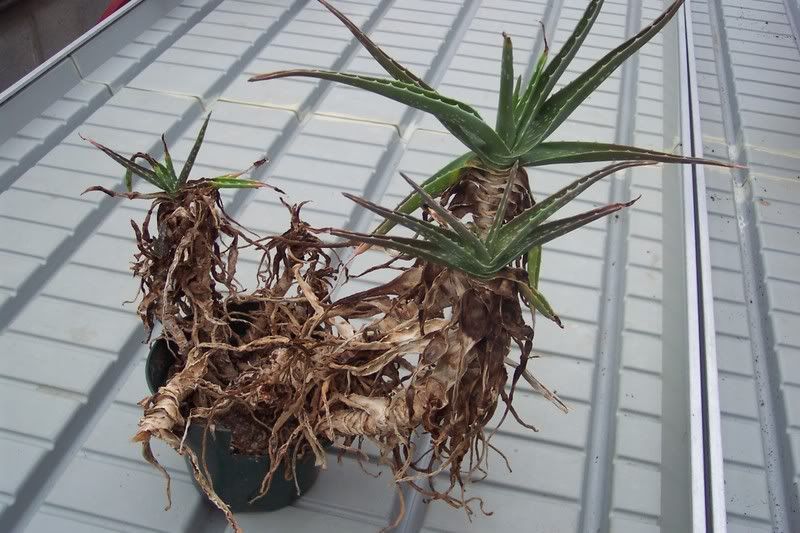
In this post I’m using an old Aloe that needed to be renewed. The same process is used for making divisions of an Aloe that might not be this far gone. Here we go…

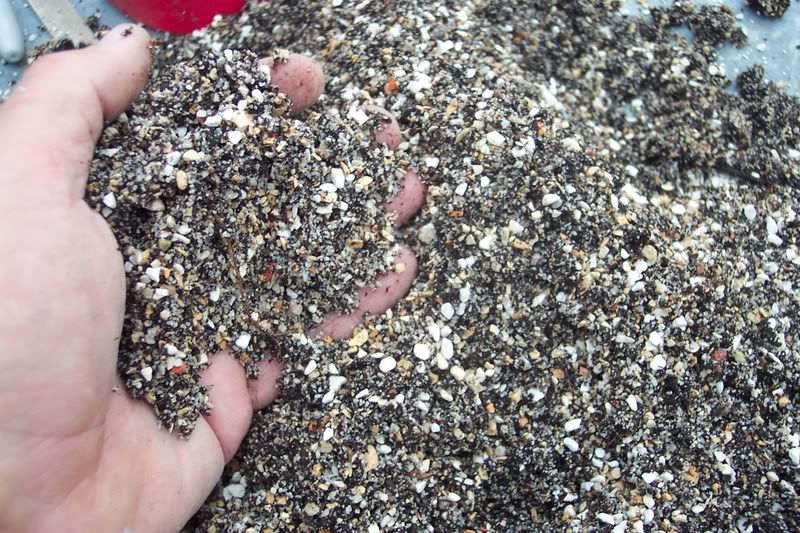
Start by getting a potting mix together. I like to use  fairly coarse potting mix to which I add sand, fine gravel and other grit to help the mix drain water well.  Aloe doen’t like to be in a soggy pot.


In this example, where the plant has grown too long between re-potting, the Aloe has developed a long, undesirable stem with a lot of dead leaves.


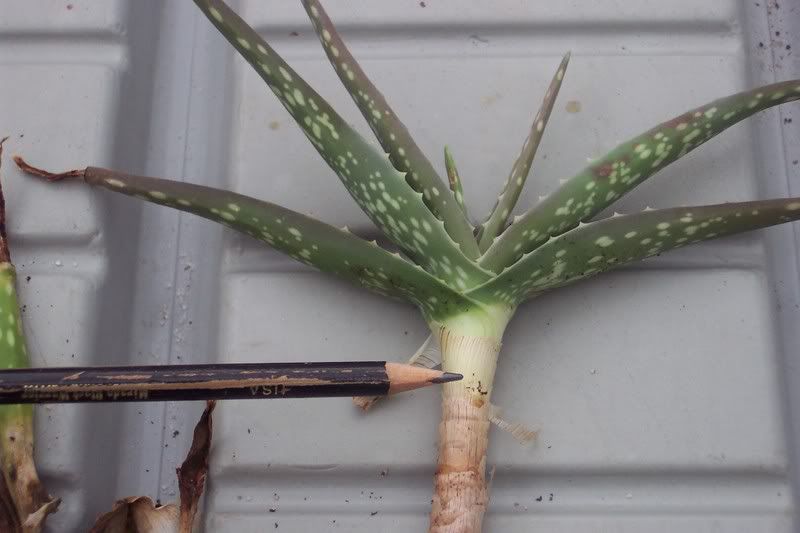
Fix this by cutting the stem an inch or so below the green active part of the plant. Peel off all of the “onion skin” until you reach the stem itself. Also, remove  any dead or dying leaves. The stem has dormant root buds that will sprout to form new roots to support the newly separated plant. A dormant bud can be seen just below the pencil point. If you rub your finger over the stem, the bumps you feel are the root buds.


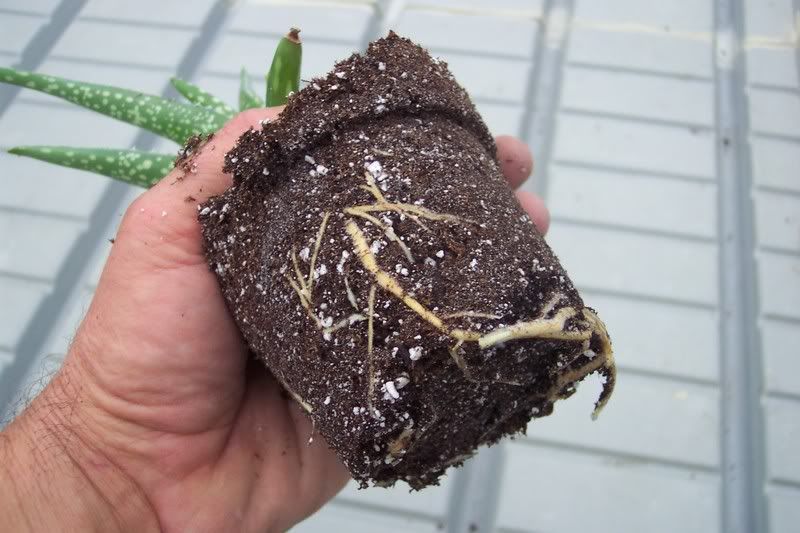
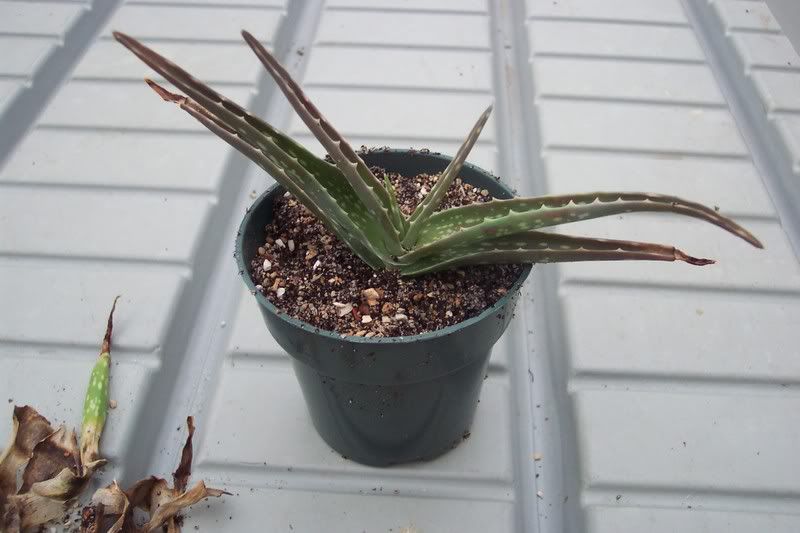
Then just fill a pot (be sure it has a drain hole in the bottom) with your potting mix and insert the prepared Aloe cutting into the soil. Water the new plant and that is it.  You now have a new Aloe plant that will soon take hold in it’s new home. Here is An Aloe I transplanted a few weeks ago.  Look how nicely the roots are growing.


You now have a plant that can be given away as a gift.  Everyone loves Aloe !

To use Aloe as a treatment for an injury, cut a leaf from your plant. Slit the leaf open and apply the jelly-like juice to your injury. You’ll feel relief immediately.

It’s medicine you can grow right on your window sill!

Bob

October 1, 2008

Grape Jelly Surprise

Filed under: Uncategorized — bob @ 6:41 pm

A few days ago Judy and I decided to replenish  our grape jelly supply. Of course to do that, you need grapes. As I was getting out the  kettles,sugar and pectin, Judy went out to pick grapes.

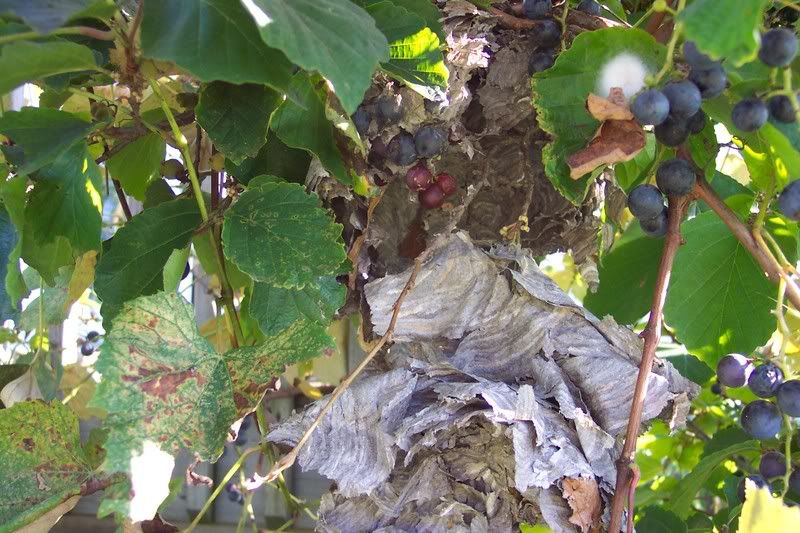
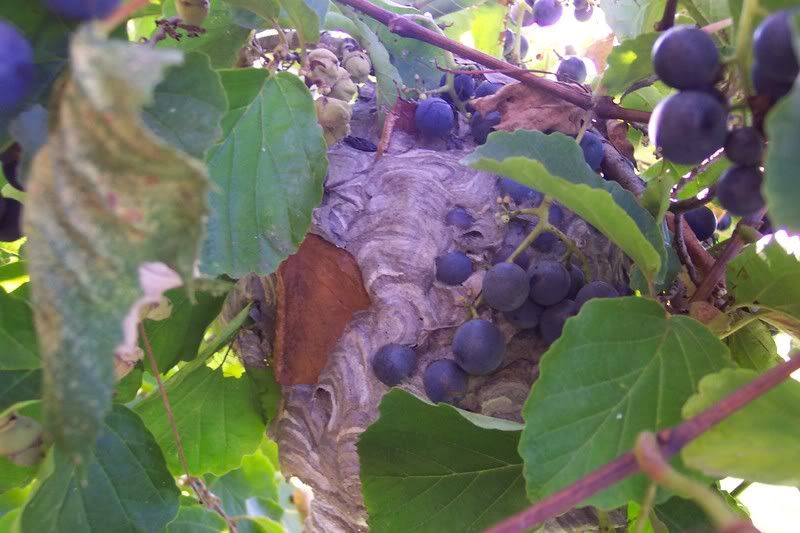
She had almost a basketful when out of the corner of her eye she was startled by an alarming sight, a hornet’s nest just inches away  from her head!

After regaining her composure, she realized there was no activity around the nest at all.

Apparently an animal, most likely a skunk, had torn into the nest looking for hornet larvae to eat. By now, all of the hornets were long gone.

Look at both photos and you will see that the hornets built their nest right on a grapevine.  As the nest grew larger, it engulfed the grapes until the grapes themselves became part of the nest.  You can see the grapes ripening both inside and outside of the nest!

Working outside in your garden, you never know what wonder of nature you are going to find next!

And, yes, we did go on to make a couple of batches of jelly.

Bob

Powered by WordPress