The Yellow Farmhouse Garden

January 3, 2019

Poinsettia care after the holidays

For a vast majority of people Christmas poinsettias are a disposable commodity. There are a few of us however, who adopt them as part of our permanent plant collection.

A while back, for several years in a row, I kept one particularly bright red poinsettia that eventually grew to almost four feet tall. You can imagine it was pretty impressive at Christmas time while in full bloom. Unfortunately, I don’t have any pictures of it to share with you. The computer I was using at the time crashed and took all of my plant photos with it. I learned a hard lesson that day.

To keep your poinsettia going for as long as possible,  keep a couple of things in mind.

Most poinsettias die from over-watering and that is related to growing conditions. Your home probably has a lower quality of sunlight than the greenhouse from which it came, so your plant will be less actively growing and therefore need less water. So, let the soil dry out some before watering. Then water the plant thoroughly until water flows out of the bottom of the pot.

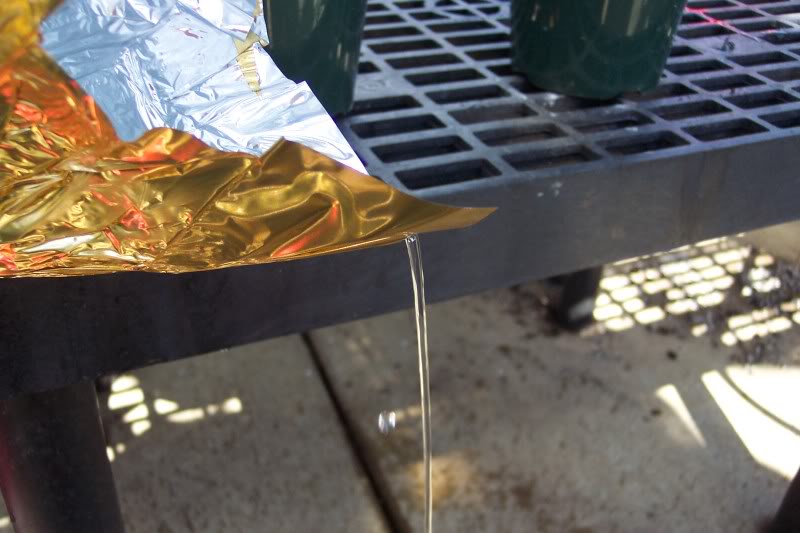
Pour out excess water after every watering.

Pour out excess water after every watering.

Most poinsettias come with a waterproof foil or plastic wrapper to keep water from leaking onto furniture. After watering, dump out any water that remains in the wrapper. It is this extra water held in the foil that is the main reason poinsettias die prematurely. Poinsettias standing in water develop waterlogged roots. Eventually the roots begin to rot and the plant rapidly declines.

Don’t worry about fertilizing your plant, it won’t really need much until spring. A half-strength dose of water soluble houseplant fertilizer once in a while should be more than adequate until growth resumes in the spring.

Also, bear in mind that poinsettias weren’t meant to last too much longer than the Christmas season.  They were bred for color, not hardiness. On the other hand, I’ve seen some poinsettias growing under abysmal growing conditions that survived until spring when the owners set them out in the sunlight to grow again.

At the very least, enjoy your poinsettia as long as possible this winter as a reminder of wonderful Christmas memories.

Bob
December 20, 2018

Protecting my bonsai from bitterly cold winter temperatures

There’s some talk among weather prognosticators about a speed bump developing in the polar vortex this winter. Some are saying very cold, below normal temperatures are just over the horizon and heading our way. If you haven’t already done so, now’s the time to finish up prepping your garden for winter.

I’ve done all I can for my gardens making sure they are all set for the cold weather . The last item I had on my outdoor things-to-do list was winterizing my bonsai trees. Usually I have them all tucked in around the first week of December but this year it’s been so mild that I left them out until this week.

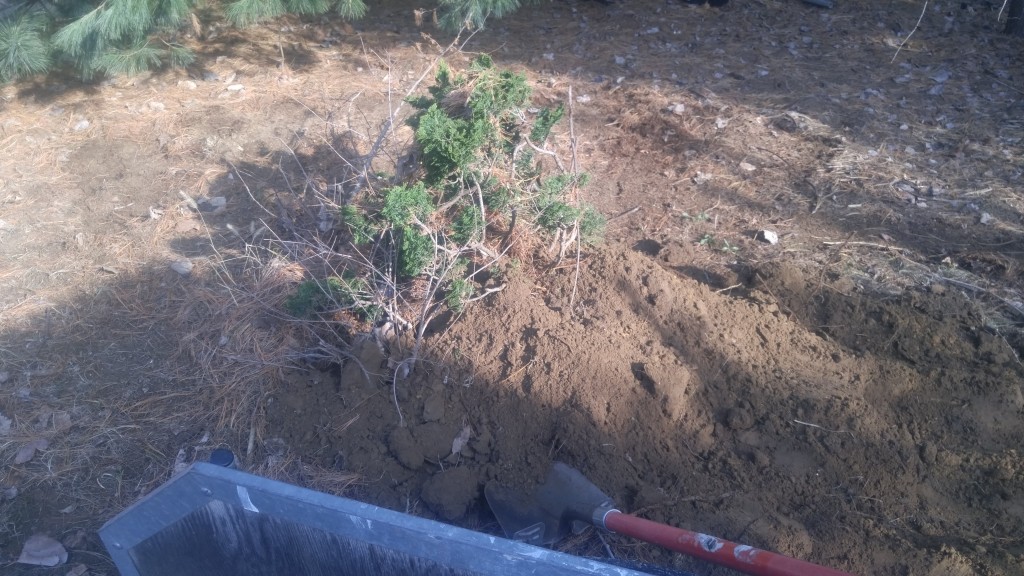
Every year I change the way I winterize them but there are a couple of important things I always make sure happens. First, the roots and tops are protected from the extreme cold and fluctuations in temperature. I do that by digging an over-sized  hole in a protected area big enough to bury my pots.

The second thing is to make sure melt water doesn’t settle in to the pots. Re-freezing of water in the pots can cause them to break due to the expansion that occurs when water freezes. So, I tip the pots on their sides keeping the water out.

Placing them on their sides also allows part of the top branches to be in the hole. The surrounding soil helps moderate the temperatures that they are exposed to.

This year I dug my hole in a well-drained area near a group of white pine trees. The trees will slow down brisk winter winds lessening the chance of desiccation.

After placing the trees in the hole I covered them with a layer of white pine needles. That will help insulate them and make it easier to clean off the soil when I take them out in the spring. Then I took the soil that was left from digging the hole and covered the needle covered plants.  I also banked up the soil on the pot end of the hole giving additional protection to the roots.

Here the plants are in the hole and partially covered.

Here the plants are in the hole and partially covered.

Finally, I hauled in tree leaves and covered the entire area including the plants. A small amount of branches are still peeking up through the leaves. Later, when the Christmas tree comes down I’ll cut off boughs from it and lay them over the mound. The boughs will help catch snow allowing it to drift over the spot and provide even more insulation.

I know this sounds like a lot of work for a few plants but my bonsai are valuable to me. I’ve been caring for one tree for seventeen years so I sure don’t want to lose it now.

Bob

Last minute gift idea for chicken fancier

Regular readers of this blog know that I have a flock of chickens that not only provide eggs but also help out in the garden. For example, in the spring I let them out to weed fallow areas and to dig up grubs and other underground garden pests before I plant.

I’ve had hens for eighteen years and in that time have become very familiar with their behaviors, habits and even personalities. Yes, chickens have individual personalities that become easy to spot once you get to know them.

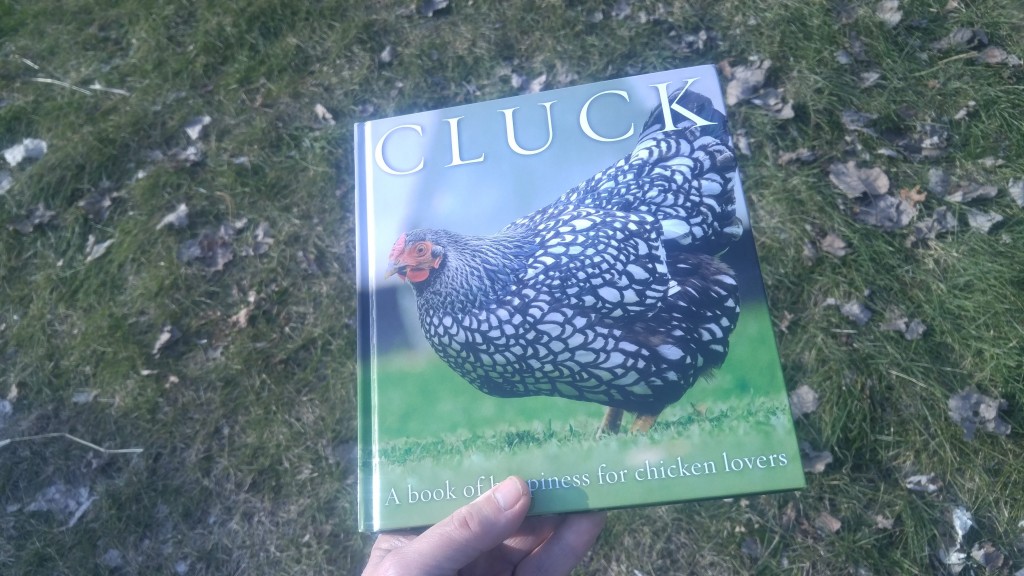
Through the years I’ve read a lot of articles and books about chickens, so good and some not so good. Most I read or skim and never go back to them again. Recently, a book from New Zealand caught my eye, “Cluck A book of happiness for chicken lovers” edited by Freya Haanen.

"Cluck" is the perfect gift item for the chicken enthusiast who has everything.

“Cluck” is the perfect gift item for the chicken enthusiast who has everything.

It’s loaded with charming photographs of chickens in their natural habitat, which is just about everywhere and anywhere. What tickles me is how she was able to capture those chicken personalities perfectly through her selection of photographs.

The book also contains memorable quotes about chickens from philosophers, poets, scholars and great thinkers throughout history. Some serious, some amusing and some just leave you scratching your head.

This is not the type of book filled with facts, figures and how-to’s. It’s one that you keep around the house and keep coming back to. Folks who long for a flock of hens of their own but can’t swing it right now, for what ever reason, will love it.

Bob


December 6, 2018

Digging dahlia tubers late

Last week I talked about my potatoes that I dug up very late in the season. What I didn’t mention was that same day I also dug my dahlia tubers that were still in the ground. Turns out they where in fine shape shape as well.

It makes perfect sense that the tubers would look so nice.  The ideal storage temperature for dahlias is around forty degrees Fahrenheit and that’s about what the soil temperature was. I checked the soil temperature in my garden again this morning and found that even now, during the first week of December, it’s running about 40F.

What kind of surprised me was how warm the soil is even with the colder than normal November we experienced. Looking back on the several weeks,  a pretty good set of circumstances lined up for my dahlias. First, the tops were froze back by the frost back i October. Then I left them in the ground for well over a month. That allowed the tubers to develop healthy “eyes”, just like the eyes on a potato. With strong eyes, my tubers should make good, strong growth next spring — that is if I take good care of them over winter.

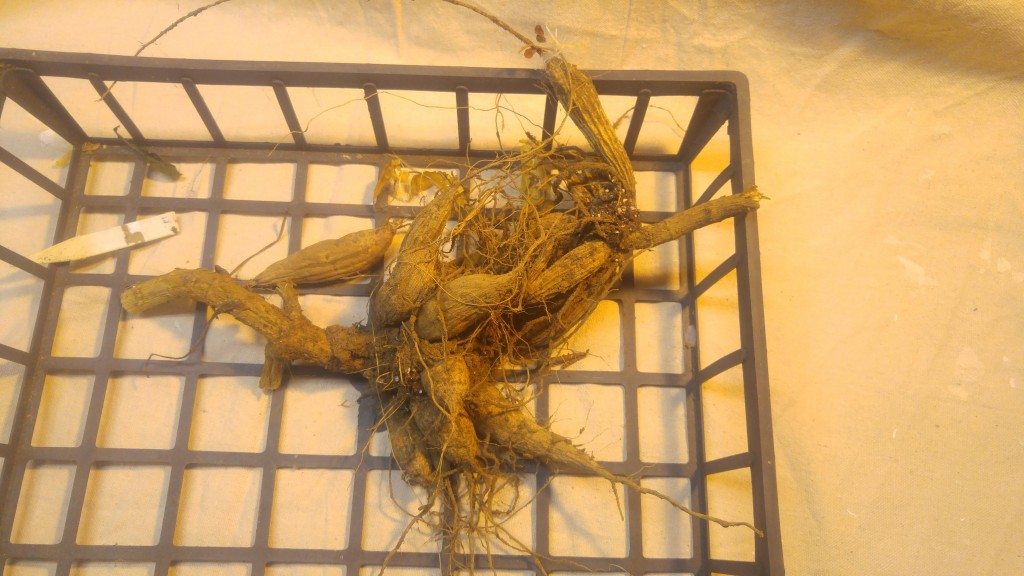
Tubers before separating.

Tubers before separating.

There’s a few simple tricks to keeping dahlias over winter. The first is to store them at the proper temperature and we already know what that is — just don’t let them freeze.

The second crucial factor is humidity. If left out in the air during storage, the tubers will dry out due to the low humidity we typically have in our homes in the winter heating season. So the solution is to store them in air tight containers. For a small amount of tubers, maybe under a hundred or so, I find keeping them in zip-loc bags is a good way to go. I usually separate the clumps of tubers into singles, then place one or two in each bag. To maintain good humidity I add moist sawdust to the bag. If you have more that one tuber per bag, the sawdust also keeps the tubers from touching each other. While you’re at it, add a tag so you know what variety it is.

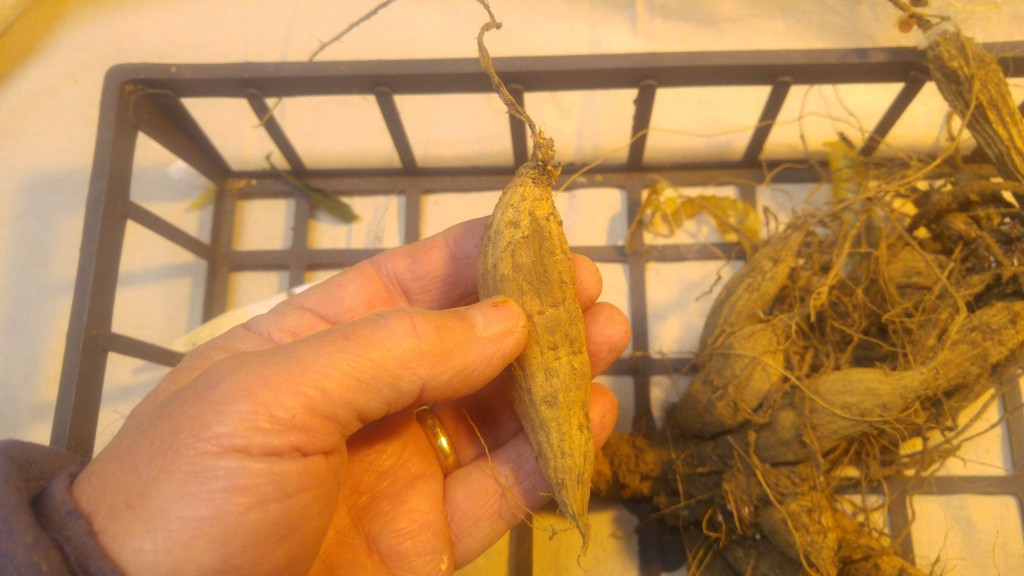
This is a typical dahlia tuber but they come in wide variety of other shapes and sizes.

This is a typical dahlia tuber but they come in wide variety of other shapes and sizes.

Even though I had success in the past using peat moss, potting mix or garden soil, I’ve found that sawdust works best for me. I’ve heard of people using shredded newspaper but have never tried it. However, with so many people opting to get their news online, printed newspaper is getting harder and harder to find these days . You can easily solve that dilemma by subscribing to Detroit News home-delivery, but I digress.

The third and final secrete is to check on them once in a while. Open them up and make sure the packing material is still moist. Also, toss any rotting tubers you might find. It’s pretty disappointing to open them up in the spring only to find out your tubers were ruined due to neglect over winter.

Those plants you bought from the garden center and planted in your garden, most likely grew a set of usable tubers. Since soil temperatures are still hovering around 40 degrees F, it may be fun to check in your garden to see if your dahlia tubers are still good. Dahlia farms are asking $3.00 and up for each tuber (not including shipping) so it may be worth your while to poke around in the garden. Let us know in the comment section what you find.

Bob


November 21, 2018

Finally finished digging potatoes

Filed under: Vegetables — Tags: , , — bob @ 9:37 am

Earlier this week I was out working in my vegetable garden. I finished off the season by digging the last of my potatoes.

Since we’ve had a cold November,  I was somewhat concerned about the shape they might be in. Now, I have occasionally found potatoes in the spring that have gone through an entire winter with no apparent damage so my concerns were not that great. On the other hand, I’ve had potatoes freeze over winter and ended up frost damaged tubers that were completely unusable. I debated whether or not to even bother with them since I had so many other things on my plate with the Holiday season ramping up.

On Sunday the weather was more seasonal so I got out my garden fork and dug into the first row. The potatoes were in perfect shape and the yield looked promising too. This was the patch of “near no-till” potatoes I blogged about this spring.

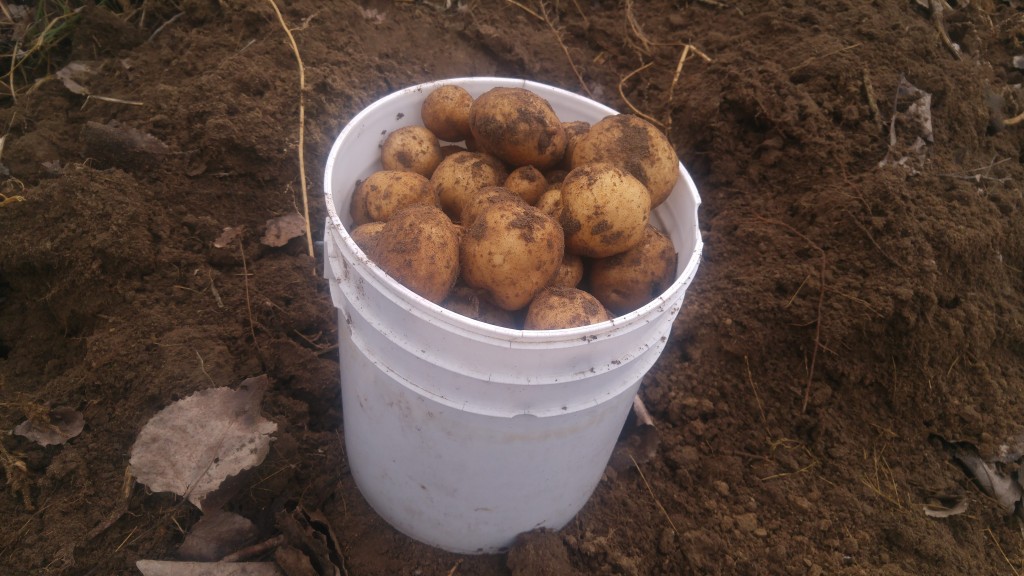
My first bucket of potatoes from this patch.

My first bucket of potatoes from this patch.

The ground had a covering of tree leaves that I’m sure helped insulate the soil. There must have been enough residual heat stored in the ground to keep the soil around the potatoes from solidly freezing despite the fact we had temperatures down into the teens and frozen soil at the surface. I didn’t check the soil temperature but it was probably in the mid to upper thirties which is close to the ideal storage temperature for potatoes.

The yield was halfway decent, maybe a little on the low side, but that was because of nearby trees competing with the potatoes for light and water. Plus, I never irrigated this patch but it did have a layer of dried grass mulch that helped conserve the soil moisture.

All in all, I call it a successful experiment. My “no-till plus mulch” combination along with an inadvertent late harvest worked out well.  If you are thinking the potatoes you left out in the garden are a lost cause, I suggest you try digging them even though these’s snow on the ground, you may be pleasantly surprised by what you find.

Bob

« Newer PostsOlder Posts »

Powered by WordPress