The Yellow Farmhouse Garden

May 15, 2018

An iris that blooms near the end of daffodil season

Filed under: Flowers — Tags: , , , — bob @ 3:10 pm

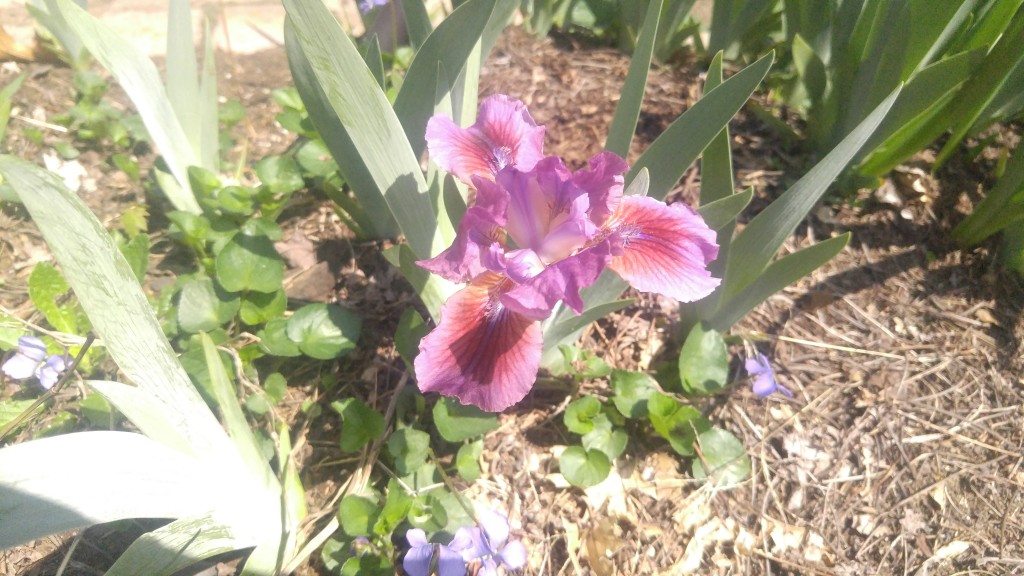
Our Pumila iris, also called dwarf iris, has been putting on a colorful show for several days now. Each spring we look forward to them coming into bloom just as the daffodils are fading, weeks before other irises even think about blooming

We have a hot, dry, sandy area right along our walkway that closely mimics their original habitat in eastern Europe. Our soil is fairly acidic with a pH right around 5.4. Dwarf iris prefers the soil to be slightly acidic, 5.5 to 6.5. That may explain why ours wants to grow toward the sidewalk and not in the other direction. The sidewalk is slowly leeching calcium from the concrete slightly raising the pH in the process. It’s fascinating to watch how a plant like this reacts to its surroundings. They’re slowly but surly expanding their cluster.

Dwarf iris flower stems are quite short compared to the irises we normally see.

Dwarf iris flower stems are quite short compared to the irises we normally see.

Pumila iris come in a wide variety of color due to a a lot of cross breeding done by horticulturists, those are not the true wild species types. On the other hand, even wild species populations exhibit a wide variety of color depending on local growing conditions.

The Pumlia we have are probably a wild species type — I say that because of their unique history. There’s a population of dwarf iris that has been growing at Matthaei Botanical Gardens perennial garden for at least thirty years.  Several years ago the irises needed to be divided and renewed. Ours were rhizomes from that project that were rescued before going the compost.

If you have a “problem area” with the right growing conditions, you might want to try planting some dwarf iris. They’re available at plant nurseries and garden centers.

Bob


Planting almost no-till potatoes

This year I’ve decided to try a minor experiment with my potatoes. I guess you might call it a kind of no-till planting.

There are a couple of reasons I thought it might work well. First, the spot where they’re going was recently an area where some of my older chickens were penned in. I purposely kept them confined to a relatively small area to help clear it from weeds. They did a great job eliminating all of the existing weeds and keeping new ones from getting a foothold. Chickens enjoy grazing on fresh green plants and those wild greens provide plenty of vitamins.

Even though they are small, chickens can disturb a lot of soil in a short period of time. That makes them destructive if they get loose into a flower garden or other valuable spot and start scratching. Believe me, I had plenty of experience shooing chickens out of  flower gardens. It’s that relentless scratching that makes them such good helpers in the garden before planting time.

The area where my no-till potatoes are going there were no visible weeds. Under the surface however, there were thousands of recently germinated seedlings ready to pop up into the sunlight. Instead of using my rototiller, I used my sharpened swan hoe to skim along top half inch or so. I was able to cut off the weed seedlings before they had a chance to get started.

The theory is that while roto-tilling will destroy young weeds, at the same time it also drags up new seeds to the soil surface where they will germinate and grow. Shallow hoeing will kill weeds but not drag up new seeds. That Sounds like a good idea but there are plenty of dormant weed seeds waiting to take the place of their lost cousins. But over time, if done consistently, you can eventually reduce the number of viable seeds.

Back to my potato patch.

The second reason why I feel my quasi-no-till will work is because the soil is a sandy loam that really doesn’t need tilling to provide a good seed bed. If it was a finer textured soil with more clay content, I would probably not plant them without tilling.

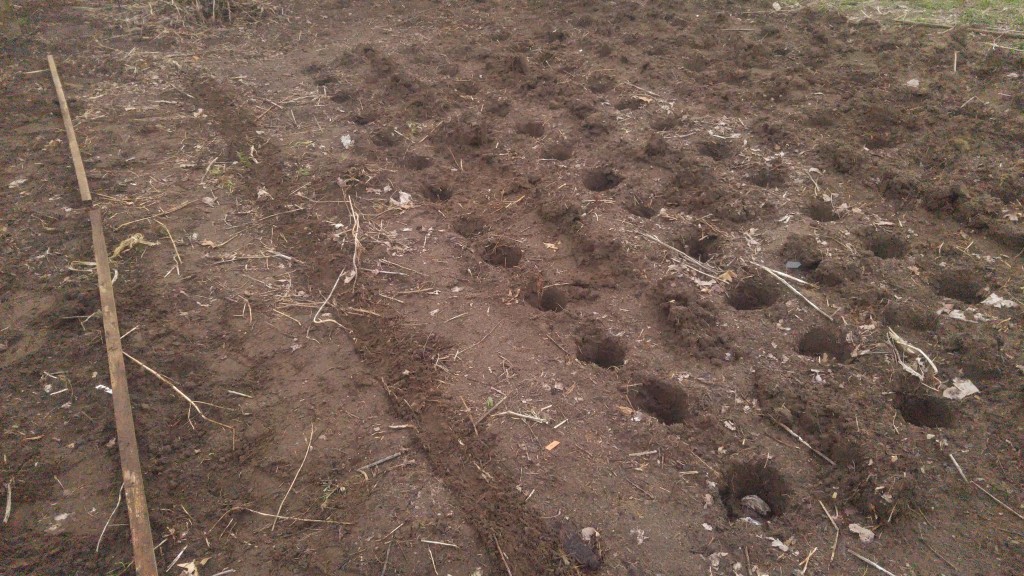
Instead of using a trowel or shovel to dig the planing holes, I got out my two-handled post hole digger. That way I was able stand straight up to do the digging and I got a great upper body workout to boot.

Marking the rows with a hoe first made digging the holes go faster.

Marking the rows with a hoe first made digging the holes go faster.

The holes are plus or minus a foot apart with the rows around 28 inches apart.  At that planting density, the potato plants should eventually grow together enough to shade the soil surface keeping it cool and shading out weed seedlings.

I know I’ll have to keep up with my hoeing through the season, “no-till” doesn’t mean “no-work”. I’ve seen many inexperienced gardeners learn that the hard way. Real no-till involves the use of herbicides to control weeds but I’ve never used herbicides in my vegetable garden and plan to keep it that way.

While hoeing will be my main method of weed control, I’ll mulch what I can.

Bob

May 1, 2018

Two weeks behind schedule in April

Filed under: Weather — Tags: , , , — bob @ 8:47 am

The colder than normal April has been a topic of conversation with just about everyone. Mostly I hear people complaining about it but when I talk to people who spend a lot of their leisure time outdoors, the conversation gets much more interesting.

Fishermen I’ve talked to have mentioned how far behind their season is. Mushroom hunters are wondering about their upcoming picking season. Other outdoors people are saying much the same thing. As a gardener, I have to concur, we’re about two weeks behind normal. The agricultural weather people at MSU have measurements and statistics backing up observations made by us outdoors types. The statistic they look at is “growing degree days”.

The growing degree days system is a way of calculating when a crop should be planted and at what stage of growth it should be during the growing season. This is much more accurate than looking at the calendar and expecting “the corn will be knee-high by the fourth of July”. A month like the April we’ve been experiencing demonstrates just how inaccurate simply looking at the calendar date can be.

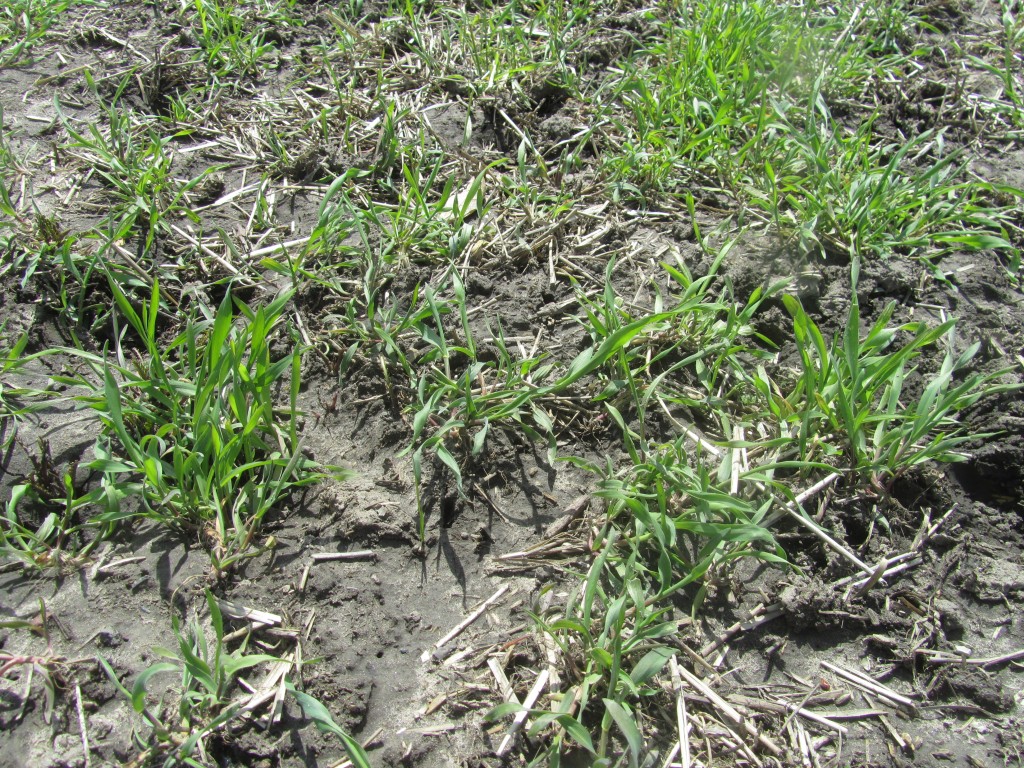
Late April the rye cover crop was way behind last years growth.

Late April the rye cover crop was way behind last years growth.

RyeCroppedPic

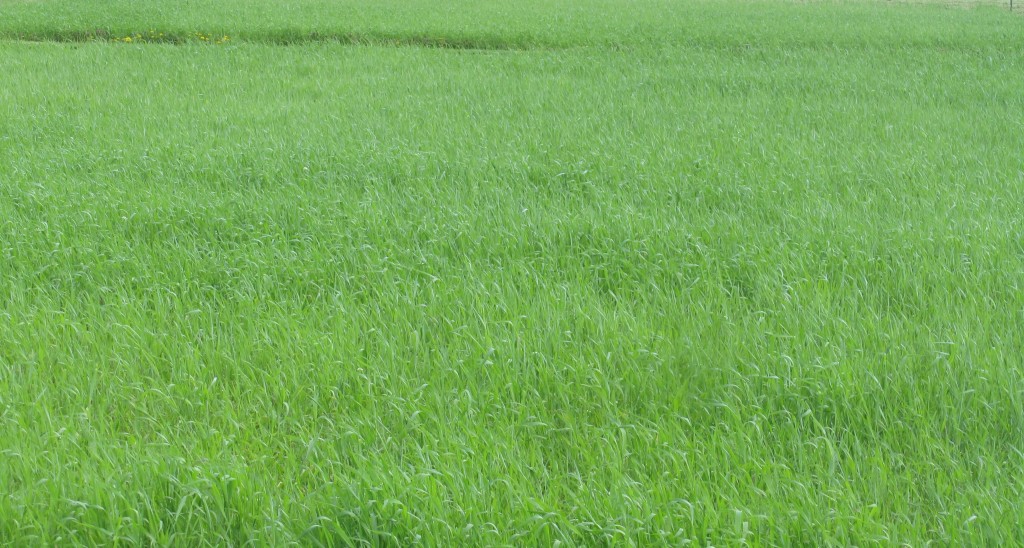
The photo above shows the rye in 2017 was over a foot tall at the same date.

Plants require a certain amount of heat in order to grow and reach their different developmental stages. For example, corn seed germinates, then the seedling grows and forms leaves. The plant later forms silk and tassels out. After fertilization, ears of corn form and eventually ripen. A certain number of growing degree days will have accumulated at each one of these stages.

Insects, since they are cold-blooded, also require heat to grow and progress through their stages of growth: egg, larva, pupa and adult. Like plants, at each stage a certain number of degree days must have accumulated before that particular stage is reached. That gives farmers and gardeners a tool to help predict when an insect pest might arrive and cause damage.

So now that we are two weeks behind at the very beginning of the growing season according to the calendar, what does that mean for us in a practical sense? One way of looking at it is: insect pests have no choice in the matter. They are already two weeks behind in any development they might have made during a normal year and even further behind if this were a warm April. Gardeners will most likely be planting their gardens at pretty much the same time, say near the end of May. If the trend continues, conceivably it would mean gardeners will have a two week head start ahead of the insect pests.

It will be interesting to see how this cold start to the season plays out.

Bob


April 24, 2018

An intensive way of building garden soil

A couple of posts ago I discussed a hands-off style of flower gardening that works some in established gardens. In those cases the soil is usually in pretty good shape after having had plants growing in the same spot for many years. Not everyone is fortunate enough to have such a garden space.

Sometimes the soil in a potential garden spot requires a lot of work before it is fit to grow vigorous plants. Take for example the case of the typical yard of a newly constructed home. It’s not unusual for the builder to remove the existing topsoil and haul it away to be sold. Then, usually, soil excavated for the basement is spread over the new yard area leaving the new homeowner to struggle with the poor soil. The homeowner often ends up buying topsoil (most likely from a different housing project) to add to the yard.

New topsoil may be adequate to grow a lawn but not necessarily good enough to grow flower and vegetable plants. In that case, the laissez-faire method of gardening will have to be put on hold until the garden has built up fertility and the soil structure has improved. That may take years or decades without major help from the gardener.

There’s a way to drastically improve a garden spot so it can be in tip-top shape the first year. It’s a method called “double digging”. Double digging is not for the faint of heart. I did it one time many years ago for a problem area and I can tell you it’s a heck of a lot of work but the results were impressive.

I suggest starting with a small garden bed in case you run out of energy or patience before the project is done.

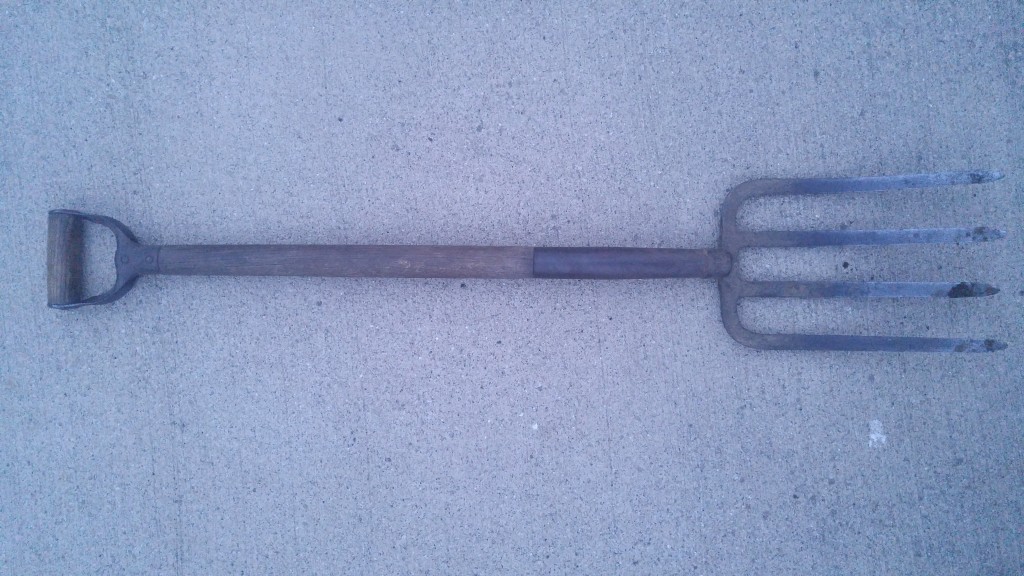
A sturdy garden fork is an essential tool for double digging and general garden work.

A sturdy garden fork is an essential tool for double digging and general garden work.

Start by digging a trench about a foot wide and the depth of of your shovel along the entire lenght of one side of your new bed. Pile the soil from the trench along side your excavated area. Then insert a garden fork into the soil of the bottom of the trench. Use the tines to break up that layer of dirt and incorporate some compost as deep as you can.

Dig another trench along your original trench, again over the entire length of that same side. Take the soil  that you remove from digging  your second trench and place it into your original excavation, right on top of the loose soil and compost. Once the second trench is done, dig another and another until you eventually reach the far side of the bed. Fill the final trench with the soil that you took out of your very first trench.

The final step is to spread more compost over the entire garden bed and deeply dig it in to the soil with your garden fork. If you plan to add fertilizer, now would be the time.

The soil will be fluffy and full of air-pockets so you’ll need to water the area a few times to help settle the soil before planting.

In some gardens, double digging seem like over-kill but in certain circumstances it’s the ideal way to build a garden bed.

Bob


April 15, 2018

Spring planted garlic

Filed under: Herbs,Planting,Vegetables — Tags: , , , , — bob @ 8:48 am

Garlic is normally planted in the fall. Planting at that time of the year allows the garlic bulb to be exposed to several weeks of cold temperatures which stimulates bulb production. Missing the fall date can be disappointing, it means waiting an entire year before planting a crop.

If you are the type of person who doesn’t mind experimenting a bit, spring planting may be a option. Bulbs grown from spring planted garlic are significantly smaller which is why it is not recommended. Farmers would never be able to make a profit with an undersized crop, but in a garden it is worth having some fun with.

The other thing with spring planted garlic is finding bulbs to plant since most seed companies ship their garlic in the fall. One solution is to plant garlic from the supermarket produce department. You’ll never know what variety you’ll be getting but look at it this way, someone had a good enough crop with them to grow enough to sell.

Even though spring planted bulbs will be smaller, that doesn’t mean they will not be usable. You’ve probably eaten green onions before, you can eat green garlic too. If you’ve never tried fresh green garlic right from the garden, you’re in for a treat. The garlic taste is quite unexpected when your taste buds are expecting an onion flavor.

Don’t let them get too mature though. Green onions or scallions that swell up at the root end as they get older are still quite usable. Green garlic at that stage will start to develop the separations that eventually become cloves. When that happens tough membranes form that eventually become the papery wrappings over each clove that you see in full sized garlic. Those membranes make the young garlic too chewy to enjoy eating. At that point you just let them grow.

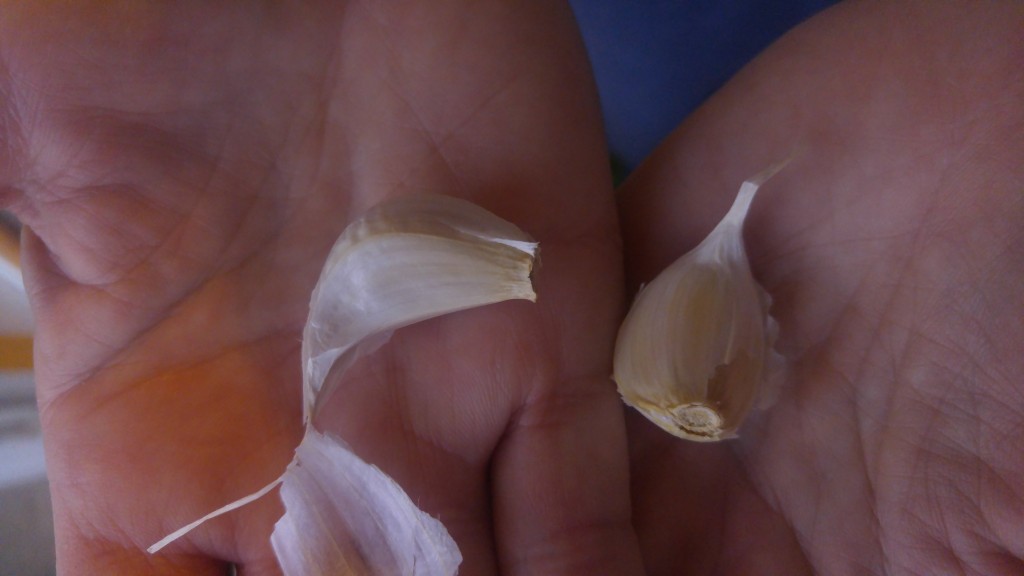
This is about the smallest size clove I would plant in the spring.

This is about the smallest size clove I would plant in the spring.

Since your spring planted garlic is late, you’ll have to give it every advantage to make growth. The first important thing to remember is garlic hates to be planted on it’s side. It’s critical that you plant the garlic clove with the bottom pointing down, don’t just toss it into a hole otherwise you’ll reduce the size of the mature bulb even more.

In your richest area of your garden, dig your planting hole so that top of the clove is covered by about two inches of soil. Plant the cloves between 3 and six inches apart; the closer spacing for green garlic, the more distant for garlic bulbs.

Early and season long weed control is essential, garlic just doesn’t compete well with weeds. Kill those weeds while they’re still little and keep it up all through the season. Make sure the soil is kept evenly moist but not soaking wet. The object is to try to encourage the garlic to grow as much as it can early in the season so that it will have plenty of green leaf area for photosynthesis.

If you’re going to do this thing, do it now — don’t wait until May. Garlic needs as much cool soil as you can provide during the early stages of growth.

With some care and persistence, you’ll end up with a culinary conversation piece that will surprise your garlic loving friends.

Bob

Bob

« Newer PostsOlder Posts »

Powered by WordPress