The Yellow Farmhouse Garden

November 21, 2019

Save your gladiolus cormels to grow more flowers

Filed under: Flowers — Tags: , , , , , , — bob @ 12:49 pm

Gladiolus are one of the most popular flowers in the world.

Typically, glads are used to fill floral arrangements providing lots of color and their upright spikes add a vertical element.

Many gardeners from the baby boomer generation think of funerals whenever they see glads. That’s because the flowers were ubiquitous in funeral homes back when they were children. In addition to the general solemn atmosphere of a funeral, all of those huge funeral floral arrangements everywhere could make a lasting impression on a young child. So you can understand why gladiolus fell out of favor for awhile.

Nowadays the younger generations are embracing retro flowers of all kinds including glads for outdoor flower beds as well as cut flowers.

Glads are summer flowering bulbs, meaning they can’t stay in the ground all winter. They have to be dug up and stored over winter in an area protected from freezing temperatures.

Even though glads are called flowering bulbs the bulb is actually a “corm”, not a true bulb. The corm is what is dug up and stored for planting next spring.

Each year the gladiolus plant produces a new corm and discards the old one. In addition to a new corm, the plant produces a number of miniature corms called “cormels”.
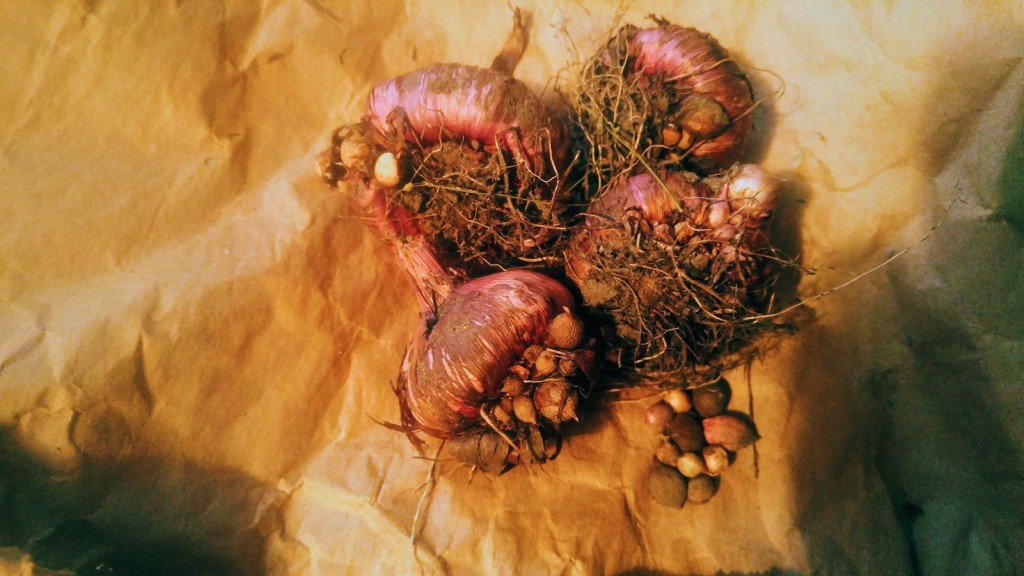
Here are a few corms after drying and before cleaning. They were dug around the first of November. The dark-colored area is the old corm which, along with soil, will be removed and discarded before storage. The cormels are picked off and kept a paper bag until spring.

Here are a few corms after drying and before cleaning. They were dug around the first of November. The dark-colored area is the old corm which, along with soil, will be removed and discarded before storage. The cormels are picked off and kept a paper bag until spring.


A new gladiolus plant can be grown from each cormel but it takes patience. The larger the cormel, the sooner the flowers.

The smallest cormels are about the size of a pea seed and may take three or even four years before full size flowers are produced. Larger cormels, about the diameter of a dime, will produce flowers in two to three years.

The small cormels can be planted in rows almost like seeds, about an inch or so deep. Then they are tended through the growing season much like any other garden plant and dug back up in the fall.

Three or four years may seem like a long time to wait for flowers but gardeners, as a general rule, are a patient bunch. It’s always a big kick to see flowers growing from those cormels you grew yourself. Plus you can increase your crop of flowers each year if you want.

On the other hand, if you are not patient enough to wait that long, you can always buy fully grown corms to plant.

Bob
 

November 14, 2019

Witch Hazel blooming in the snow

Even though the meteorologists had it in their forecasts, the recent big snow and cold temperatures still took us all by surprise. With normal highs in the low fifties and lows in the mid-thirties, some parts of the natural world were caught unprepared too.

I’m sure our witch hazel bush wasn’t expecting over a half-foot of snow and temperatures down in the single digits. Late fall is the normal blooming time for witch hazel. Sure enough, there it was, blooming in the middle of all that extreme weather.”"

We have our witch hazel planted near a window so we can enjoy its flowers indoors while looking outside.

In addition to flowering in November, witch hazel is kind of unusual for a native plant in that it has both seeds and flowers on its branches at the same time.

The seeds that are present this fall are from flowers that were pollinated last fall. They begin developing in late fall then over-winter on the plant. The following spring the seeds begin growing again and develop into a full-mature seed in the fall. Once the seeds are mature, they are ejected from their seed capsules with a pop! that sends them many feet away. It really is a fascinating plant.

One question you might have is,if witch hazel flowers in the fall when it’s cold outside, how are they pollinated ? All of the bees, wasps, flies, ants or other usual pollinators are not flying or dormant this time of year.

It turns out there are moths that stay active during freezing weather. These moths belong to the owlet moth family (Noctuidae). They fly at night looking for sources of nutrition such as tree sap. And it just so happens witch hazel nectar is a perfectly acceptable food for them. Just like bees, when the moths feed on the nectar, they also inadvertently move pollen around allowing pollination to occur.

We rarely see these moths because they fly at night. I remember back when I was a young kid, I once saw some moths flying in the cold weather. It struck me at that time as being pretty odd.

So did the early snow bury the owlet moths and prevent witch hazel pollination this year? Probably not, the witch hazel was blooming well before the snowstorm and probably were already pollinated by that time.

Bob


November 7, 2019

Planting bulbs in the fall for spring color

Filed under: Flowers — Tags: , , , , — bob @ 4:47 pm

Beginning gardeners may not realize that all of those beautiful tulips and daffodils that we see in the spring started out as bulbs that were planted in the fall.

Why couldn’t someone just get some bulbs and plant them in the spring like a potato and let them grow and bloom? Plants need certain conditions in order to grow and reproduce.

Flowering is part of the reproductive process, a distinct part of the life cycle of a plant. In order for that to happen, some plants require a cold period of a certain length. Bulbs need at least 12 weeks or even longer in order for the reproductive process to be triggered. Horticulturists call this cold treatment of plants “vernalization”.

Bulb producing plants that are planted in the fall are sometimes called “hardy bulbs”. Spring flowering bulbs like tulips, daffodils, crocus, hyacinths and many others fall into this category.

With just a few exceptions, all hardy bulbs should be planted in a well drained site where no standing water occurs at any time. If they’re kept high and dry, they will be more likely to survive from year to year.

I’ve had very little success in keeping a population of tulips going for any more than a few years even in sites that seemed to be perfect. However, years ago I had one small planting that did quite well in a sandy spot with very little topsoil. Daffodils and other bulbs are a different story, they can establish themselves permanently much easier.

Bulbs often come with instructions on the package on how how deep to plant and how far apart. The instructions will say something like, “plant the bulbs six inches deep”. Even gardening books and websites give the same advice. But what does that mean? Six inches to the bottom of the bulb or to the top of the bulb?

If the directions say “six inches deep”, that means the bottom of hole itself is about six inches deep. So larger bulbs like daffodils or tulips get covered with about four inches of soil. Small bulbs are planted shallower and are covered with about two inches of soil.

It may seem like a simple detail but always plant bulbs right-side up with the root end at the bottom and the top facing up, not sideways or upside-down.

There are gardeners who like to dig out the entire bulb planting area to the required depth and place their bulbs where they want them in the dug out area. They then cover everything back up. This works fine if the soil in the area has good tilth and is easy to dig. How big an area that is practical mostly depends on the gardener’s stamina.

Most gardeners prefer to dig small individual holes for each bulb. Many kinds of tools have been invented for this chore but the humble garden hand trowel is still the most used.

A garden knife or “hori-hori” works great to cut through plant roots in the soil. This one has depth markings.

Before planting, open up your package of bulbs and place each on the surface where you intend to plant it. To most people, bulbs look best if they are placed to look like they came up on their own rather than in straight rows. Resist the suggestion to toss the bulbs randomly to achieve that result, bulbs are somewhat fragile and may be bruised when dropped.

Place the bulbs in the spots where you intend to plant them. Here’s a mix of tulips and daffodils.

Once you’ve decided on a planting scheme, dig a hole to the proper depth and place the corresponding bulb at the bottom of the hole and cover it up. After a while you get a feel for it and will fall into a rhythm so the job is not so tedious.

If you are planting thousands of bulbs like I used to do, you may have to break out the big guns to help you with the job. An electric or gas powered drill with a two-and-a-half or three inch diameter soil auger chucked into it is a good investment for large expanses of bulbs.

Happy gardening! Bob


October 25, 2019

Evergreen needles turning yellow

Our 2019 growing season is over. The Detroit/Pontiac National Weather Service office made the official announcement declaring October 18th as the date, so no more frost/freeze advisories until next spring.

So now we are into the third week of October and the leaves on the trees are all turning color except for the evergreens. “What? Wait!, the needles on my pine trees are turning yellow. What’s wrong?”

Even though pines, spruces, arborvitaes, firs, hemlocks and others are called evergreens, that doesn’t necessarily mean all of the needles are always green all of the time, forever.

A certain amount of color change on evergreens is a normal event this time of the year. Some years it is more pronounced than in other years. This year many of my white pines are turning a vibrant yellow that can be seen from quite a distance away. The yellow-colored needles next to the fresh green are very attractive but could be a cause of concern for those not aware of this natural occurrence.

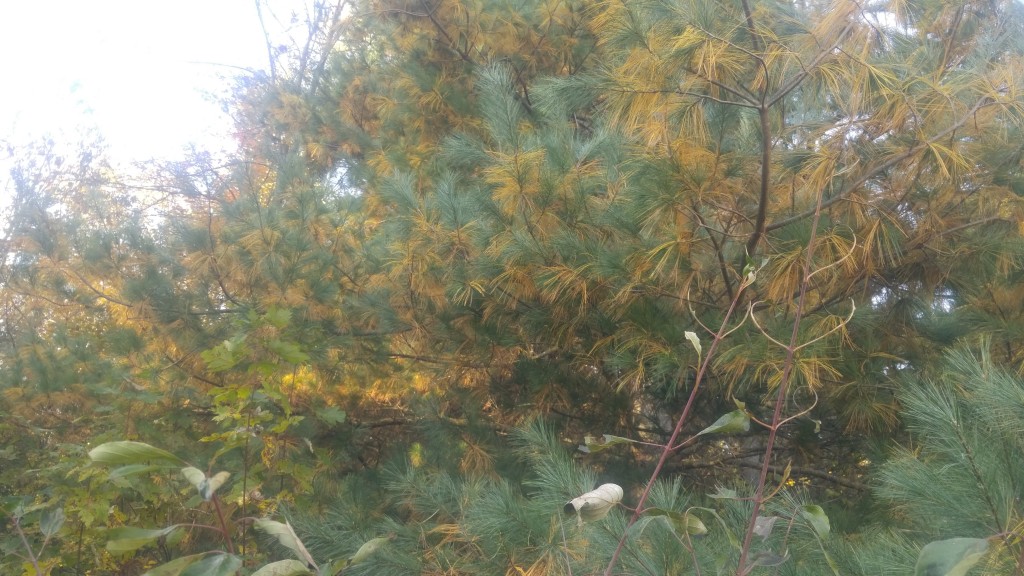
This particular white pine tree has a large number of yellowing needles. The needles on the ends of the branches are all green indicating a healthy tree.

This particular white pine tree has a large number of yellowing needles. The needles on the ends of the branches are all green indicating a healthy tree.

Later on in the season, all of the yellow needles will drop from the trees and add to the pine needles collected at the base of the trees contributing to a healthy mulched layer. It’s nature’s way of making sure pine trees have a healthy soil environment. Very few, if any, other plants will grow in this mulched area eliminating competition for growing space and nutrients.

All of that mulch started out as green needles that eventually turned yellow and fell. Because needles are thin they are not blown around as far by the wind like the leaves from deciduous trees. Once they land, they tend to stay put.

My cedar trees, on the other hand, are not turning color this year. During some years, some of their leaves will turn a tan color.  Virtually all evergreens go through this process in one form or another.

Don’t confuse this with pest problems. Things like bud worms will cause symptoms of yellowing or die back from the very tips of the trees where the leaf buds are located. The natural seasonal yellowing takes place on needles located away from the tip of the branches. I’ve also seen evergreens damaged by lawn weed killers. Trees poisoned by an overdose of lawn chemicals will drop needles too.

Bob

October 18, 2019

An unusual way to keep deer out of your garden

Of all the complaints I hear about problems in the garden, damage done by feeding deer ranks near the top.

Deer hunter numbers across the state continue to decline. As a result, the overall size of the deer population is getting harder to manage. It’s not just the rural areas that are seeing more deer either. Every year we hear about deer in cities causing so many problems that sometimes they resort to special hunts to thin the herd.

In the meantime, gardeners are trying all kinds of things to minimize deer damage to their gardens. They can all be effective to varying degrees depending on the circumstances. The more common methods include: hanging scented bars of soap; hanging bags of human hair; applying hot pepper sauce or other assorted repellent sprays; motion detector activated devices; and others.

Fencing is really the best way to keep them out, but effective deer fencing can be cost prohibitive and usually doesn’t look all that attractive..

This summer, a friend of mine stumbled across a low-cost alternative to fencing that has kept the deer out of his vegetable garden all season. He used moderately heavy monofilament fishing line to create a barrier around his garden.

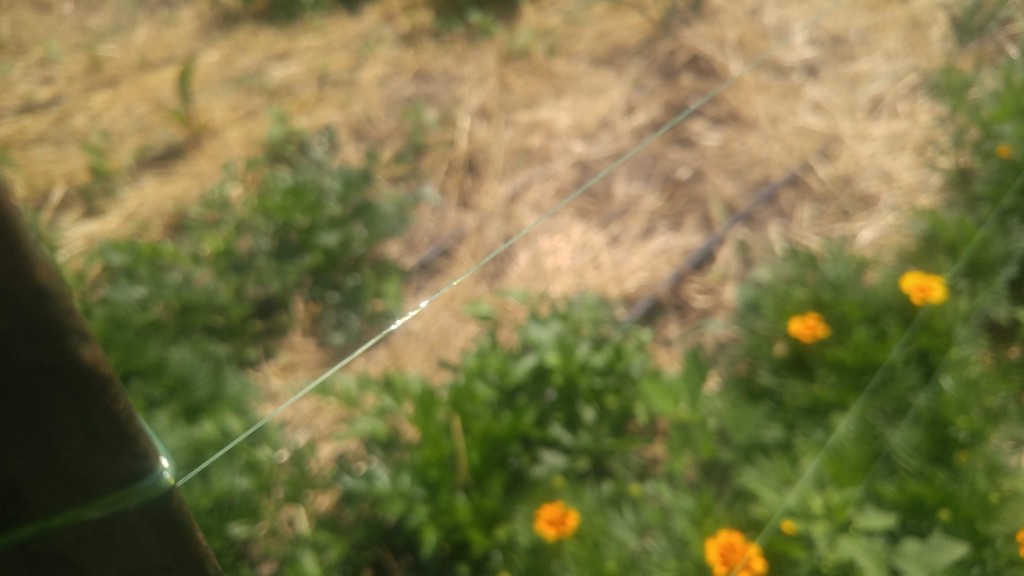
Although the thin line is hard to see, it’s high tensile strength makes it quite sturdy.

Although the thin line is hard to see, it’s high tensile strength makes it quite sturdy.

When deer approach the line, they stop and seem confused. Apparently, they just don’t know what to make of it. Even the smallest deer could easily snap the line by just walking through it but for some reason they don’t.

This was for a vegetable garden and there were other gardens nearby. It could be the deer just moved on to easier pickings. I’m not sure how well this would work for a single garden alone by itself.

To make a monofilament barrier, just set some fence posts around the perimeter of your garden. Attach the line to the posts stretching it fairly tight so it doesn’t sag. Run four strands of line about a foot apart with the first one a foot above the ground. Of course, you’ll need to have some way of getting in, I’ll let you figure out how you want to build a gate.

Deer are smart in their own way. I’m wondering if after a season or two the deer will figure out what’s going on and ignore the line, but for now it’s working.

Bob


« Newer PostsOlder Posts »

Powered by WordPress