The Yellow Farmhouse Garden

June 16, 2016

Thin vegetable seedlings for better crop

Filed under: Vegetables — bob @ 7:47 am

One major job in the garden this week is thinning our vegetable seedlings. It’s one of those things that is hard to do sometimes. Plucking all those little seedlings after waiting so long for them to germinate seems drastic but it needs to be done.

Most of us have no compunction when taking out weed seedlings but have very mixed feelings when it comes to removing vegetable seedlings. After all, we paid good money for those seeds and now we’re going to pull them out just as they are getting going?


Beet seedlings are easy to transplant after thnning.

Beet seedlings are easy to transplant after thnning.

When growing too close together, vegetable seedlings compete with each for nutrition, water and sunlight just like weeds.

Over crowded seedlings will grow and produce but will never live up to their full potential. Gardeners who have never thinned vegetable seedlings before are often shocked at the improvement that happens the first time they thin. Vegetables are larger in size, better quality and have a higher total yield.

Seed packs have information printed on them that give final plant spacing which is very helpful to beginning gardeners. Experienced gardeners are able to estimate spacing by envisioning the plant when it is full size, then leaving the right amount of space between seedlings.

Most thinned seedlings can be transplanted to another part of the garden, the exception is carrots. A carrot’s shape is determined by its main taproot. If the root gets bent during the transplant process, the resulting carrot will develop that shape defined by the bent root.

Bob

June 2, 2016

Use drip irrigation to maximize yields

Filed under: Water,Weather — bob @ 8:43 am

Weather conditions in the Pacific ocean always have an effect on our weather here in the Great Lakes area. Because of changing conditions in the Pacific, the  National Weather Service is predicting a warmer than normal summer with normal or slightly below normal rainfall.

That means as gardeners, we may have to irrigate our gardeners this year if we want to maximize our vegetable yields.

There are many ways to water a garden. Some are very inefficient uses of a gardener’s time and effort such as carrying watering cans. Other methods are inefficient by wasting water such as spraying water into the air with a sprinkling system. The most efficient way to irrigate is to use a trickle or drip irrigation system.

The simplest way to describe a drip system is to imagine a flat, thin-walled hose with tiny slits cut into it at regular intervals. Those tiny slits allow water to slowly drip out of the irrigation line rather than spray out into the air.

Unlike other types of irrigation that wet the entire soil surface and rest of the garden from top to bottom, drip irrigation places water only where it is needed, at the root zone of the garden plant.

As water drips out from the irrigation line, it travels straight down onto the soil for a short distance. It then begins to spread out providing moisture to the area of the soil profile where the plant roots are.
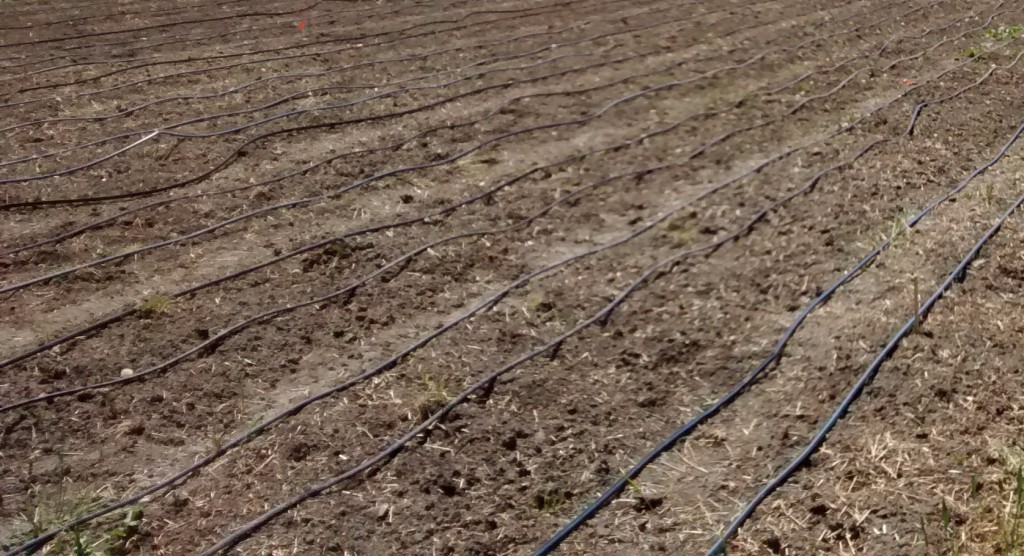
Install irrigation lines before or shortly after planting before the garden plants get too big and in the way.

Install irrigation lines before or shortly after planting before the garden plants get too big and in the way.

Looking at an area irrigated by a drip system, the soil may appear to be dry with just spots of moisture at the perforations. Underneath however, down in the root zone, moisture spreads out horizontally becoming available to the entire root zone. Soil texture affects the shape of the moist area somewhat. In sandy soil, water will travel further down into the soil before beginning to spread out compared to loamy or clay soils.

A dry soil surface also means fewer weeds since weed seeds need water in order to germinate.

Drip irrigation keeps the plant leaves dry giving plants some protection against diseases since many plant diseases can spread when leaves are wet. That’s why so many Golden Delicious apples come from the state of Washington. Out there very little rain falls and the air is dry — too dry to support plant disease. A drip irrigation system provides all the water the trees need. That is the perfect combination of growing conditions to minimize plant disease and maximize apples production. Here in Michigan our farmers grow wonderful apples but it is more difficult for them to do.

A battery-powered automatic timer coupled with  a valve system makes watering your garden a virtually hands-off process once it is installed. It also takes the worry out of leaving your garden to fend for itself while you are away on vacation during the hottest part of the growing season.

With care during installation, removal and storage, irrigation lines can be used over and over again year after year.

A warmer than normal growing season coupled with an efficient irrigation system will produce a bumper crop of garden vegetables this year.

Bob

May 19, 2016

Remove burlap and twine from balled and burlapped trees

Filed under: Planting,Trees — bob @ 9:49 am

The balled and burlapped method of planting trees is very popular because it allows nurseries to dig, move and sell larger specimens than if the trees were bare-root or potted. It also makes it easier for homeowners and landscapers to plant. In landscaping, like in any other business, time is money which is why it can be tempting for some to cut corners when planting trees.

The most common of these cost-cutting items is dropping a balled and burlappped tree into a hole, replacing the soil, then mulching the new tree. From the outside everything looks wonderful but not taking care of the burlap or twine can prove to be devastating to a tree.

Wire, burlap and twine does not decompose in the soil as readily as some landscapers would like you to believe. To keep roots growing to their full potential, wire must be cut and removed from the root ball. It will not “rust right away” as we are often told.

I had an experience many years ago when someone asked me to move a tree for them that was planted five or more years earlier. It was going to be a big job. When I uncovered the top layer of soil I discovered that the landscaper had left the wire basket on the rootball. It was a simple matter for me to hook a chain onto the wire basket and just lift the entire tree out of the hole with a front end loader on my tractor and carry it to its new location. The tree looked like it just came from the nursery. The wire was still sturdy and the burlap was sound with no roots growing through.

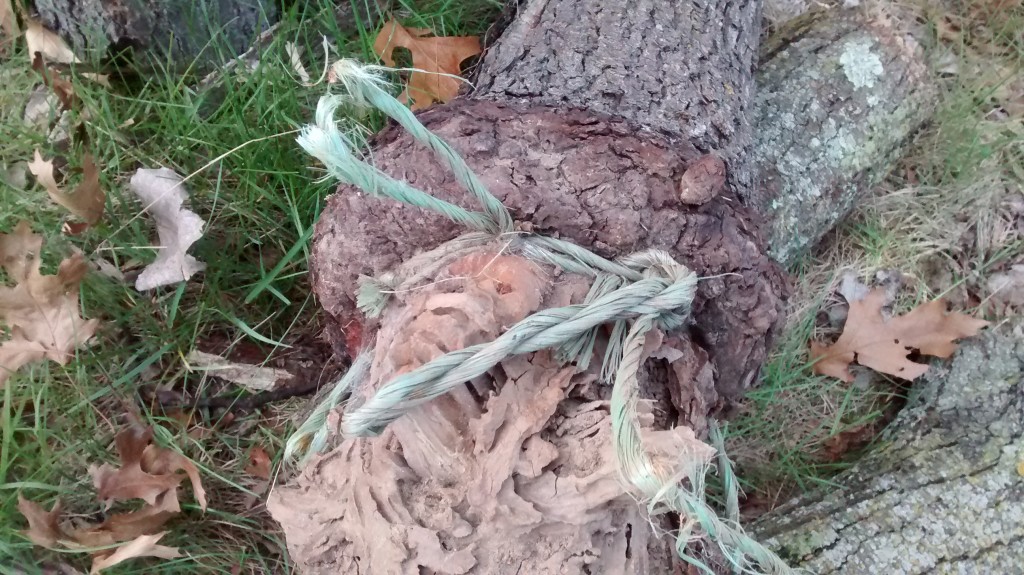
Damage by twine left on root ball.

Damage by twine left on root ball.


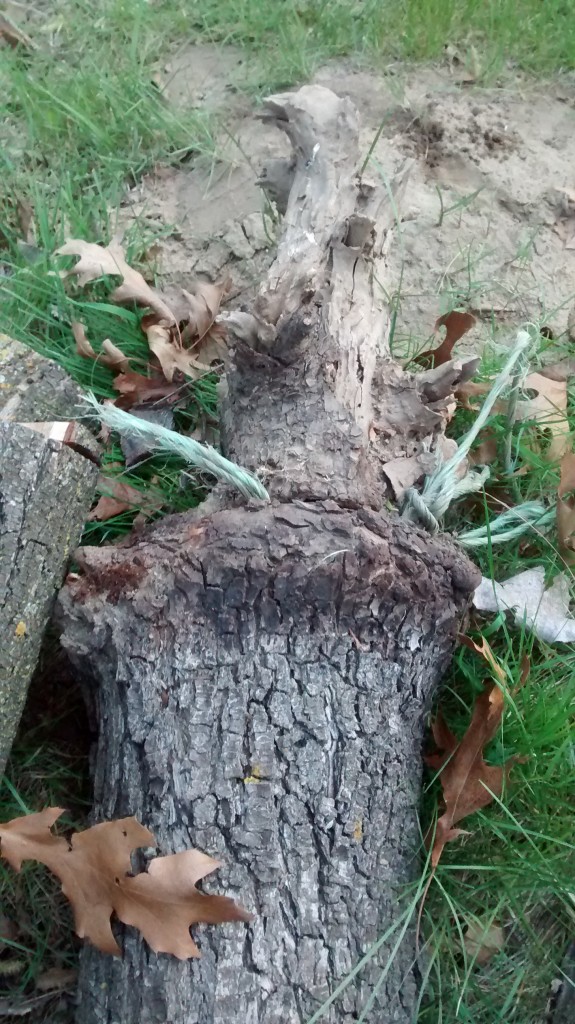
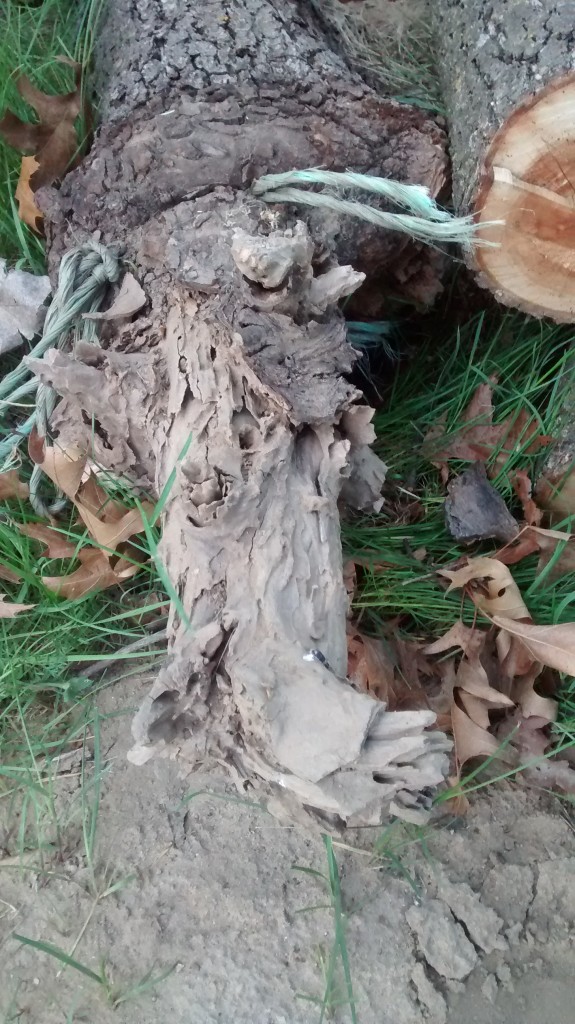
The twine tree growers use to tie the top of the burlap does not deteriorate very fast either and will eventually cause major damage to or even kill a tree if it is not removed. As the tree grows in diameter, the twine stays in place and acts as tourniquet strangling the tree. It may take many years for symptoms to show.

The tree formed a callus around the twine as it tried to minimize the damage.

The tree formed a callus around the twine as it tried to minimize the damage.

Even the roots were not able to develop properly

Even the roots were not able to develop properly

Finally, the burlap cloth itself should at least be slashed to allow roots a place to grow into the surrounding soil — removing it completely would be even better.

If you landscaper tries to tell you that that leaving twine and burlap on the trees is standard practice, don’t believe it and insist they do it right.

Bob


Homemade lawn weed killer using 20 Mule Team Borax

Filed under: Weeds — bob @ 7:46 am

Every year there seems to one species of plant that thrives more than it usually does. I remember a few years back when sweet clover could be seen popping allover in places where it hardly grew at all before.

This year it is the low-growing lawn weed with the purple flowers called creeping charlie that’s making the rounds. It’s all over our area, even in farm fields. It’s so dense in many places that it form a purple mat that’s easy to spot from quite a distance away.

There are chemical herbicides on the market that will control creeping charlie and other broad leaf lawn weeds. But what can you do if you are trying to avoid exposure to chemicals?

The easiest thing to do is just ignore it and accept that it is a part of your lawn’s ecosystem.

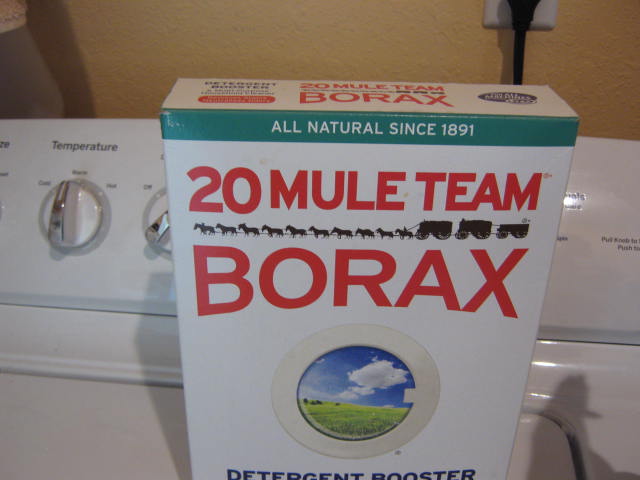
Another possible solution to try is a homemade borax-based  broad leaf  weed killer that uses 20 Mule Team Borax as its main ingredient. Researchers in Wisconsin discovered that borax used in the right concentration, killed broad leaf weeds while leaving the grass untouched.

Disolve borax in some hot water first. Then add that solution to the rest of the water.

Dissolve borax in some hot water first. Then add that solution to the rest of the water.

The science behind this concept is the element boron. Boron is an essential micro-nutrient that all plants need. In too high of a concentration, it will kill a plant. Grasses are more tolerant of high levels of boron than are broad leaf weeds like creeping charlie. That means weeds will die of a boron overdose easier than grass.

The problem with this solution is the amount of borax needed to work varies with soil type. Certain soils neutralize boron more efficiently than others.

A good formula to start out with is eight to ten ounces of 20 Mule Team Borax to two and one-half gallons of water (the volume of a standard hand-held pump sprayer). It’s a little difficult to get it to dissolve so mix it in a pail first then fill your sprayer. Spray that amount over 1000 square feet of lawn.

Sometimes the grass will start to turn brown but it eventually will out grow any damage. Like cleaning fabric, try it out in a inconspicuous spot before doing the entire area.

Bob


April 28, 2016

Be sure your garden soil is ready to till in the spring

Filed under: Soil — bob @ 9:40 am

We’re fast approaching garden tilling time. It’s not unusual around here to see gardeners preparing their soil by the first week of May. But the calendar is not the best indicator for deciding when to begin working your garden soil.

Tilling a garden at the wrong time can be damaging for certain types of soil. That is why it’s good to know when to till. Tilling too soon in the spring can be disastrous for a garden.

Gardeners make gardens in all types of soil: sand, loam, clay or, more often, a combination of two or more of these types. Short of hauling in new topsoil, there is nothing you can do to change soil type. Adding compost will vastly improve a soil’s ability to sustain plant growth but will not change the soil type.

Soil structure is different than soil type. Soil type refers to the size of the soil particles and the percentage of the different particles. Sandy soils have the largest particles while clay has the smallest, silt falls somewhere in between.

The garden soil in our upper garden is OK to till.

The garden soil in our upper garden is OK to till.

Soil structure refers to the arrangement of the sand, silt and clay particles in the soil. In soils with good structure , the soil particles are clumped together. That gives adequate space between the particles allowing water and air movement into the soil.  That provides the ideal environment for plant growth.

Tilling too soon can destroy soil structure making it difficult for plant roots to grow. In the spring, the limiting factor is soil moisture.

Sandy soils are the most forgiving soil type. In a garden setting, sandy soils can be quite wet and still be tilled without doing much harm to the soil structure. On the other hand, loam or clay type soils are much more susceptible to soil structure damage caused by early tilling.

There’s a simple test you can do right in the garden to help you decide when it’s time to till your individual garden. Scoop up a handful of soil and roll it into a ball. Lightly poke it with your finger. If it falls apart easily, it’s OK to till. If the ball holds together it is too wet to till. Let the garden dry out and try the test again later.

By getting into the garden early you may gain a couple of weeks of growing time but make sure your garden soil is ready to start the same time you are.

Bob


« Newer PostsOlder Posts »

Powered by WordPress