The Yellow Farmhouse Garden

June 10, 2015

Dill weed is easy and fun to grow

Filed under: Herbs — bob @ 12:17 pm

Whenever I taste fresh dill in a dip or salad, it brings up memories of my childhood spending time with my Polish grandmother. During the growing season I remember her using dill for a lot of different things. As a result, the lingering scent of fresh dill hung in her kitchen all summer long. For that reason alone dill is one of my favorite herbs.

Another good reason to put it at the top of the list, besides the nostalgia factor,  is how easy it is to grow. In my garden, I have it coming up year after year on its own.

It all started several years ago when I had a bunch of dried dill umbels (tops) hanging up in the open air in a forgotten part of a shed. When I found them they had collected a lot dust and I was in no mood to try to clean them. How would you do that anyway?

So, I crunched them up with my hands  and threw the seed into every corner and edge of the garden. Ever since then, I’ve never had to worry about planting dill. They show up every where. I just have to make sure I leave a few plants to mature and drop seeds.

The normal way to start dill is to sow them in rows at the spacing of about 15 to 20 seeds per foot. It takes about a week to ten days for the seeds to emerge. Once they are up, thin them to about three plants per foot. You will have to keep the weeds down around it, just like the rest of your garden.

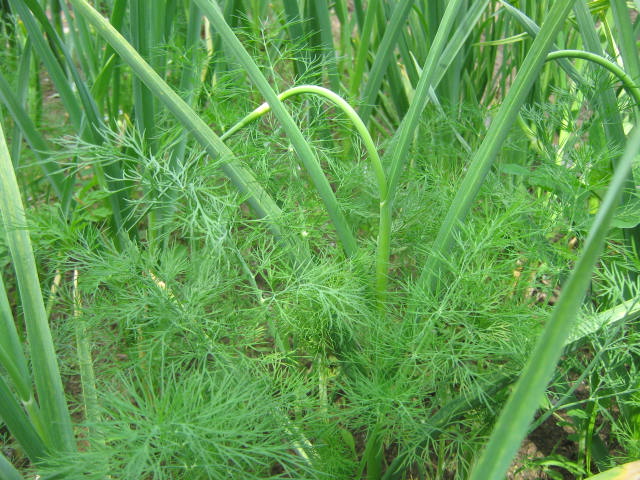
I have dill growing in the garlic bed. Once the garlic is gone, I'll let the dill finish growing.

I have dill growing in the garlic bed. Once the garlic is gone, I’ll let the dill finish growing.

Keep in mind that dill typically grows to a height of three or four feet so it will shade shorter plants. That’s why I try to restrict my dill to the out of the way places in my garden.

Dill leaves — also called dill weed — can be cut and used anytime during the growing season. For dill pickles, harvest the umbels when the seeds are full size but haven’t turned brown. That’s the secrete for super flavorful dill pickles.

If you can’t use all of your dill right away, air-dry the umbels in the shade. Traditionally, the dried umbels are stored in glass jars but I suppose any air tight container will work. Besides, a glass jar of dill umbels sitting on your kitchen counter is very decorative and lets everyone know you are a real chef.

There is still time to sow dill seed.

Once you have your first crop of dill and remember to leave a few plants in the garden at the end of the season, you won’t have to plant it ever again.

Bob
Easy to grow iris gives plenty of color for small amount of work

Filed under: Flowers — bob @ 12:11 pm

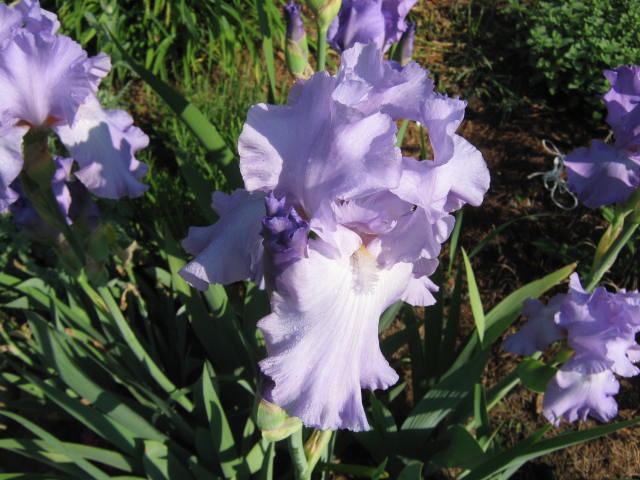
Iris are one of my favorite flowering plants for a number of reasons but mainly it’s because they are so easy to grow compared to some other plants. I’m not the only that knows this which is probably why you see so many irises in gardens.

Although there are several types of irises, the one that everyone thinks of when you say “iris” is the bearded iris sometimes called German iris.

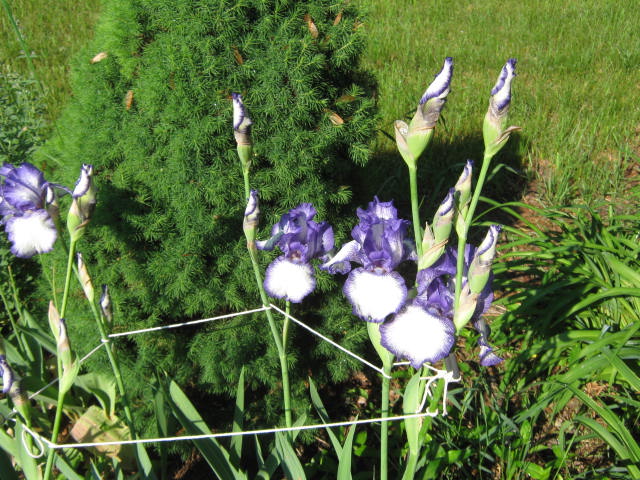
White with purple edges iris.

Irises put on quite a show in return for so little effort on our part.

Irises are perennials, which means plant them once and they’ll come back again year after year. They are very resilient plants and are quite cold tolerant. Ours when un-mulched came through two extremely cold winters and never missed a step.

Bearded irises require well-drained, sunny locations to thrive. Soggy soil, especially during the summer, will cause their roots to rot.  On the other hand, they need plenty of water during the early spring, shortly after they wake up from their winter dormancy. Around here, we usually get enough rain in the spring for them to be satisfied.


Sometimes high winds and heavy rain will knock over iris stalks. Tying them to stakes will help them stay upright.

Sometimes high winds and heavy rain will knock over iris stalks. Tying them to stakes will help them stay upright.

The most common mistake beginners make when planting iris is to place them too deep into the ground. Only the bottom two-thirds of the root rhizome gets covered with soil. The other on-third is above ground as I heard someone say, “like an alligator”.

German irises grow so prolifically that they will over-crowd themselves over time. So, every three or four years they need to be dug up, divided and replanted. It’s a relatively easy thing to do and you don’t have to worry much about hurting the plant. I’ll discuss this in a post later on this summer as we get near thinning time.

Bob


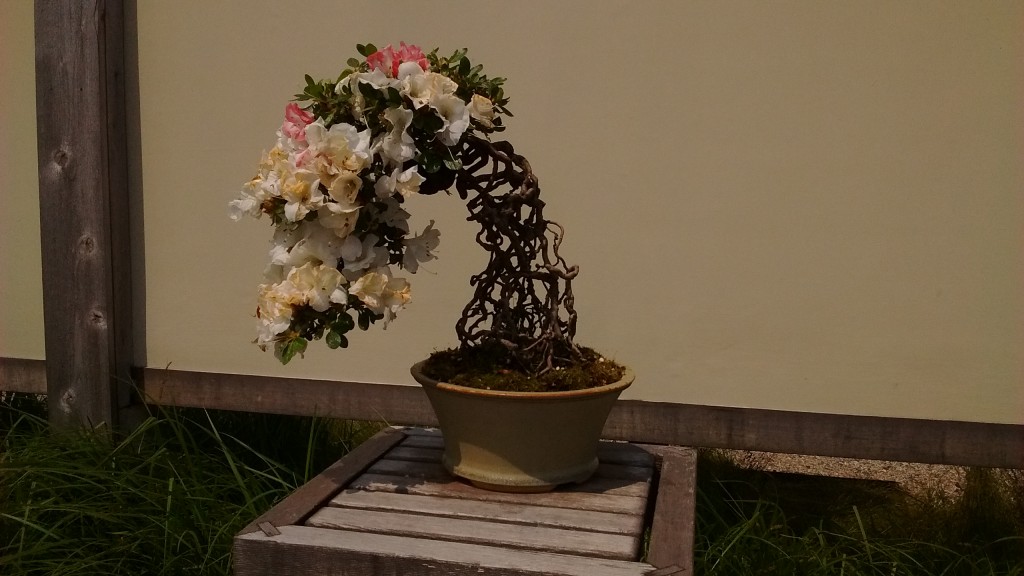
See blooming satsuki azalea bonsai June 6-14

Filed under: Bonsai,Trees — bob @ 12:02 pm

I think just about everyone enjoys looking at bonsai, the Japanese art of growing miniature trees in containers. Even those who are not particularly interested in plants will stop and take a second look at bonsai.

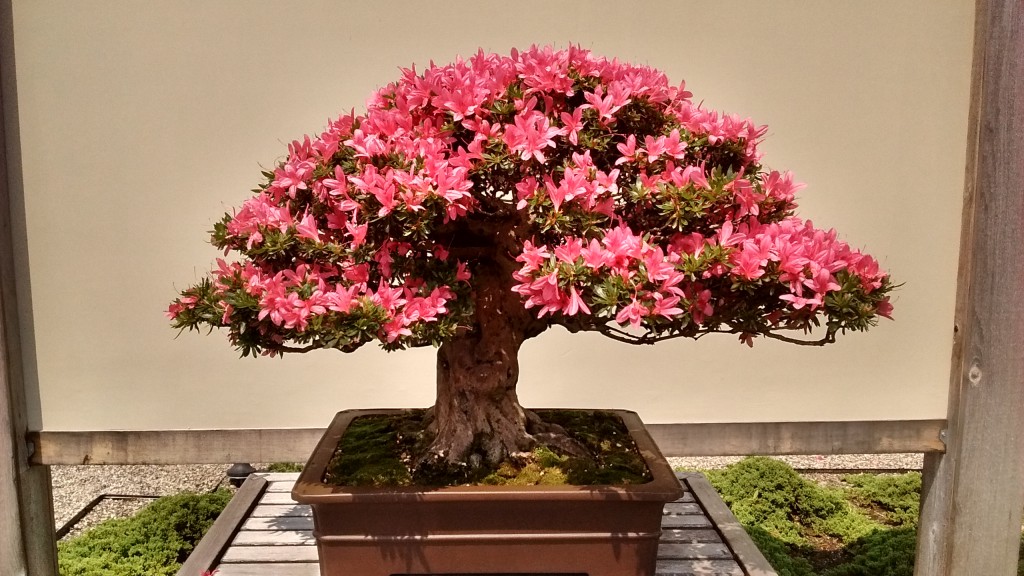
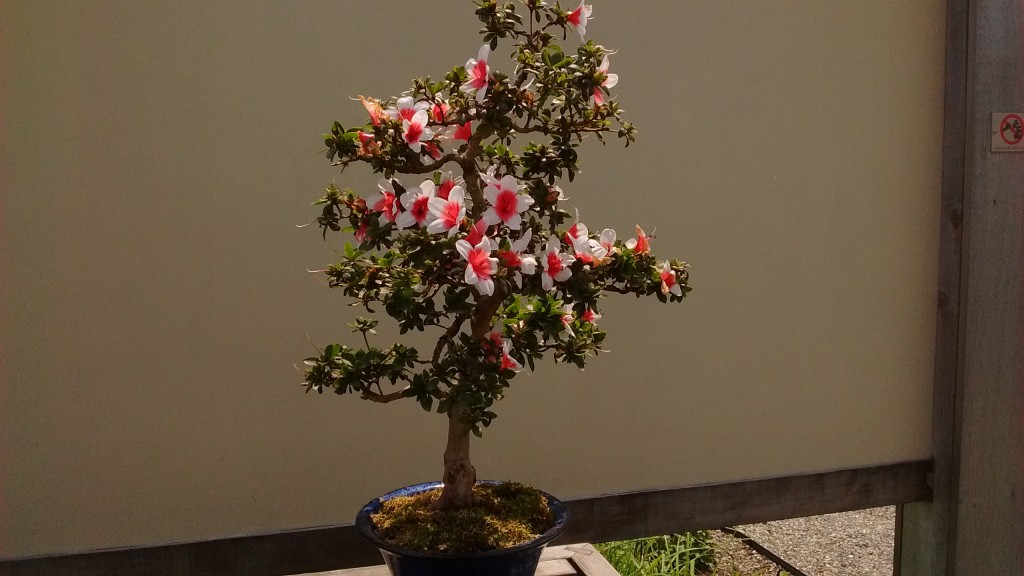
The University of Michigan Matthaei Botanical Gardens near Ann Arbor, is offering a rare treat this month, Magnificent Miniatures a showing of satsuki bonsai azaleas in full bloom.

The azaleas on display are the species Rhododendron indicum.

The azaleas on display are the species Rhododendron indicum.


The plants are on loan from Dr. Melvyn Goldstein a renowned bonsai collector from Ohio.

azalea bonsai

The bonsai are flowering right now. And like other flowering plants, the flowers only last for a short period of time.

A fantastical shaped bonsai at Matthaei Botanical Gardens.

A fantastical shaped bonsai at Matthaei Botanical Gardens.

The show is free and runs from June 6 through June 14, 10 am – 8 pm daily. It’s an easy drive to the Gardens from anywhere in southeastern Michigan and northwestern Ohio. They’re located at 1800 N. Dixboro Road, Ann Arbor. It might not be a bad idea to call ahead and make sure the bonsai are still blooming. The phone number at Matthaei Botsanical Gardens is 734-647-7600.

Bob


May 28, 2015

Double your pepper yield (or more) this year

Filed under: Planting,Vegetables — bob @ 9:09 am

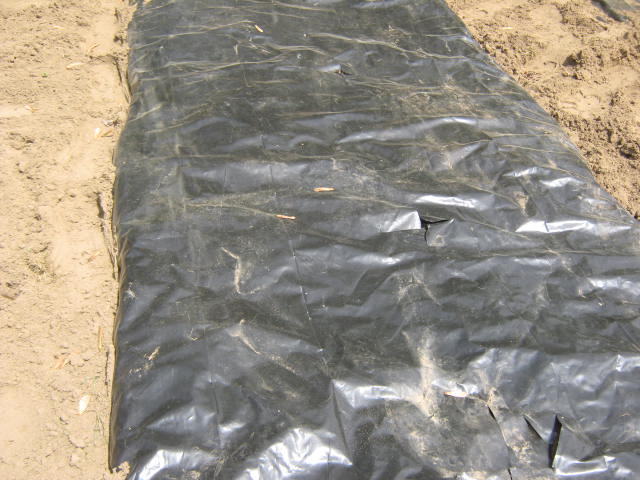
If you’ve never had much luck growing peppers, you can vastly improve your pepper yield by doing a bit of extra work now before the plants go into the garden. The secret is to use plastic mulch.

In the past I’ve experimented with several colors of plastic mulch: clear, black, red, blue and silver. All of them showed a huge improvement over organic mulch or no mulch at all.

Using plastic mulch is not a new concept, it’s been around for decades. Commercial farmers and researches have improved yields even more than double.

There are several reasons why plastic mulch works so well. The most obvious is reduced weed competition. Plastic mulch prevents nearly all weeds from growing by blocking sunlight to the soil. The only weeds that you have to contend with are those that sneak up through the hole made in the plastic for planting. The exception is clear plastic mulch. It lets sunlight through allowing weeds to thrive under the greenhouse-like conditions.

Whenever you hoe or till around plants, no matter how careful you are, valuable surface roots get cut. Since plastic mulch keeps weeds from growing, there is no need for hoeing or cultivating except in pathways between the rows of mulch.

Soil temperatures are warmer under plastic mulch which is important in a relatively cool environment like Michigan. Peppers are warm season crops that respond well to warm soil temperatures. Organic mulches on the other hand, tend to keep soil temperatures cool.

Oxygen is critical for plant roots. Garden soil under plastic stays loose, leaving space between soil particles so that air can move. This creates a better environment for plant roots and soil microbes to do their job.

Bare garden soil loses a lot of water through simple evaporation. Plastic mulch keeps the soil from drying out allowing more water for the plants to use when they need it.

Some plant diseases are spread by rain or irrigation water splashing soil up onto the plant. Plastic mulch keeps plants clean and less susceptible to disease infections.

Carbon dioxide is produced in the soil and is a normal part of the soil dynamic.  On bare soil it diffuses directly into the air. Since gases can’t pass through plastic mulch, carbon dioxide tends to collect in very high concentrations underneath the plastic sheet. It can only escape by moving through the planting holes resulting in very high levels of C02 right at plant level where the plant can efficiently use it for increased photosynthesis producing higher yields.

Black is the default color of plastic I use in my garden. Mainly because you can find it just about anywhere, although I’m seeing more red plastic around lately. Also, black plastic is available in heavier grades than the colors allowing you to use it for more than one season if you want. I never use clear because of the weed problem I mentioned earlier.

With some care, you can re-use plastic mulch another year.

With some care, you can re-use plastic mulch another year.

Lay your plastic before planting, it will be much easier to transplant through holes in the plastic. I had an assistant years ago that transplanted the plants first and then tried to install the plastic. He got it to work but it was a chore.

It’s important that the surface of the planting bed is smooth and flat, sloping slightly so rain water can run off.  Rake out all debris and don’t step in the prepared soil.

Farmers use special machines to lay plastic in their fields but we don’t need anything like that in a home garden. I just stretch a string where I want the edge of the bed to be and dig a trench. I unroll the plastic and bury one edge with soil. Then I measure the width I need for the second trench — allowing for covering the opposite edge — stretch the string again and dig my second trench. A 48 inch wide roll gives me a planting bed just over three feet wide.

I cut an “X” through the plastic where I want the plants to go and transplant through the cut.

It takes some time to properly prepare the bed and install the plastic but you will be amazed by the results.

Bob


May 20, 2015

Thoughts about tomato planting

Filed under: Transplants,Vegetables — bob @ 9:00 am

I’m sure someone somewhere has done a survey on what is the most popular vegetable grown in home gardens. My guess is that it would be tomatoes.

In virtually every vegetable garden I’ve been in and on every deck or patio with a planter, I’ve seen tomato plants.

Since we are past the average frost-free date in southeastern Michigan, it’s now safe to plant tomatoes outside without any frost protection. That’s not to say that a frost won’t happen this spring, but it is very unlikely. So now is the time to get those tomatoes planted.

Beginning gardeners should keep in mind that although tomato seeds are available, tomatoes are grown in the garden using young seedlings called transplants — plants that were raised to plantable size in a greenhouse or under grow lights. Tomato seeds sown directly into the garden at this point may not have enough time to produce tomatoes before the growing season ends.

If you are buying transplants, the best ones are those that are short, compact and leafy. This early in the spring most transplants fit that description but later on as they grow older, they will eventually become spindly and leggy. However, even leggy plants are usable, if that’s all that is available.

Over time, through natural selection, tomato plants have developed the ability to grow roots anywhere along their stems. These types of roots are called “adventitious roots”.  Adventitious roots help tomato plants survive during times of stress when their main roots would be damaged, such as during a wet spring when soil becomes water logged or flooded. The adventitious roots in that case would form and replace the damaged roots allowing the plant to continue to grow.

By setting tomato transplants deep into the soil, we can use adventitious roots to our advantage. Roots will quickly form all along the buried part of a tomato stem.

A leggy transplant, instead of sticking up above the soil surface, should be set on an angle into the garden soil so that its stem is covered with soil up to the first set of leaves.

Even well-shaped tomato transplants can be placed in the soil lower than the level they were growing in their pot or flat container.

Tomato plants are tougher than you think. Often plants purchased on-line or from a catalog will be shipped without a pot or even soil, they’re just tied together in a bundle and shipped in a box or envelop. These plants recover nicely if you take them out of their mailing container and transplant them soon after they arrive.

We still have time to plant tomatoes. Memorial Day weekend is traditionally the date when many gardeners plant tomatoes. Depending on the season, many times those later tomatoes end up producing fruit almost as soon as those planted earlier.

Bob


« Newer PostsOlder Posts »

Powered by WordPress