The Yellow Farmhouse Garden

November 30, 2009

Better Late Than Never – Garlic Planting

Filed under: Herbs — bob @ 6:53 pm

Here we are, it’s the last day of November and I just got our garlic in the ground a few days ago.

Regular readers  of this blog already know that fall is the time of year that you plant garlic.  Garlic can be planted in the spring, however you will end up with bulbs half the size of those planted in the fall.

I think there is still some time to get your garlic planted, I wouldn’t wait too much longer though.

If you have a helper in the garden, decide who is going to go out and find some garlic cloves to plant while the other stays behind and prepares the area to be planted.  If you are by yourself,well then, you’ll have to do both.

Check the garden centers for garlic cloves, if they are out, a farmer’s market stand may have some that can be used for planting. The garlic purchased in a grocery store produce department will most likely have been treated with a sprout inhibitor and will not be good for planting. Sprouting is what we want. I used my garlic that I saved from this years crop.

Your garlic spot must be free of all weeds and kept that way during the growing season because garlic does not compete well against weeds. If you are planning on amending your soil with compost or peat, now’s the time to do so.

Break apart the garlic bulbs into individual cloves just as you do in the kitchen, only this time you won’t be running them through the garlic press.

Plant the cloves into the soil about 2 inches deep and about 6 inches apart. Place the root end down. You can just push them down into the soil with your finger or dig a furrow like I did here.

Planting garlic into a 2'' deep furrow

Planting garlic into a 2'' deep furrow

Cover them up with soil and let them  go until the soil freezes.  During this period, the cloves will grow roots.  Hopefully we will have a mild December which will allow our late planted garlic some time to develop those roots. No fertilizer is needed for now, we’ll apply that in the spring.

Garlic cloves ready to be covered

Garlic cloves ready to be covered

Once the ground freezes, cover the bed with straw, compost or other type of mulch.  It’s much better for the garlic if the soil is kept at a consistently cold temperature (which the mulch will provide) than to be freezing and thawing over and over through the winter.

In the spring we will remove our mulch and add fertilizer, garlic is a crop that needs a lot of plant food.

We’ll revisit this project again at mulching time and fertilizing time.

Bob

November 20, 2009

Fall Raspberry Care

Filed under: Uncategorized — bob @ 10:41 am

So far it has been a good November to be working outside.  This has given us a lot of time to catch up on fall gardening chores.

One of those fall chores is cutting back your “Fall Raspberries”.  By fall raspberries I mean varieties that have been specially selected to bear fruit from September until the first hard frost.

Years ago, raspberries were only available in the summer.  We still see summer raspberries offered for sale, but the labor involved has made them quite a bit more expensive to grow. They had to be pruned at just the right time and  were often trained to a wire system, much like grapes. The canes produced fruit only on the second year’s growth, then they died shortly afterward. So you had to get into the patch and cut out the old canes one at a time while leaving the new canes to grow for next year’s crop.

Which brings us to the topic of today’s discussion: cutting back your fall bearing raspberries.  All you need to do is simply, cut off the canes, pick them up and dispose of them. That’s all there is to it. No critical timing, no trying onto wires…see how much easier they are than the older summer raspberries. This method can, however reduce your total crop yield by 25% or more.

If you have just a small patch, you can use your hand pruners to do the job like I’m preparing to do here:

Bob in the Raspberry Patch

If your patch is too big to do by hand, a weed-whacker with a metal brush-cutting blade works great.

A patch of fall raspberries, if not cut back in the fall will revert to an ever-bearing habit of growth. That is to say, they will begin bearing fruit in the summer and continue again in the  fall.  Some gardeners prefer to pick raspberries earlier in the season rather than waiting to pick their crop in the fall.

Cutting Raspberry Canes

Cut off the canes near ground level.

If you have a place to do it, burn the cut-offs, they can harbor disease which may infect next season’s growth.

One last thing, if you can’t get to them right now, they can be cut down any time during their dormant season…all the way up until March.

Bob

October 29, 2009

Halloween Trick

Filed under: Uncategorized — bob @ 5:24 pm

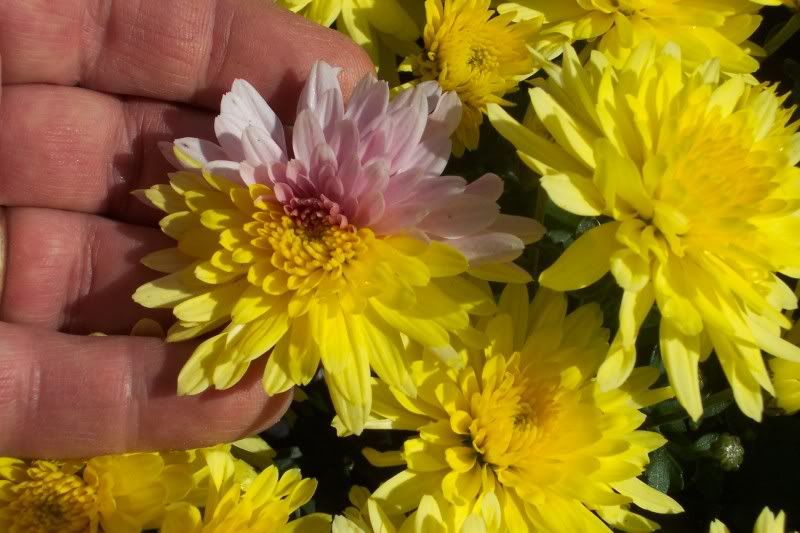
Have you ever seen a flower with two colors on one blossom? Yes, of course you have.

Have you ever seen a flower with two colors on one blossom where the colors are divided exactly down the middle? Now that’s a little more rare.

How this occurs is an interesting process.

Let’s briefly review how a flower is formed.  Think back to your high school biology. Plants are made up of small, microscopic structures called cells.  The cells grow and divide over and over again until you have a fully formed plant.

Inside of the growing tip of a bud (called a meristem) there are many many cells dividing like crazy in order to get a flower to form and blossom in one growing season. Each time they divide, they pass on a blueprint of how the flower is to be built. This is called genetics.

All of those millions of cells start out as just one cell. That one cell divides into two cells.  At this very early stage, something happened to one of those two cells.  The genetic blueprint didn’t get copied exactly right, the blueprint says it is supposed to be a Mum blossom but instead of painting it yellow, it specifies pink as the color.

All of the descendants  from that one pink cell “thinks” the flower should be pink, while all the descendants from the yellow cell know it is supposed to be yellow because it is a yellow Mum.

Those darn pink cells are stubborn and continue with their pink idea until the flower is completely built.  And guess what? Exactly half of the flower is pink and the other half is the color it is supposed to be…yellow.

In the horticulture trade this is called a chimera.  This is one way how different varieties are begun.

An observant grower will notice something unusual happening with a single plant, often just a single stem on a plant. If it looks promising, he will reproduce it and hopefully turn it into a new variety.  If he has a crew of farm hands helping and he doesn’t go to check his crop, this small detail will more than likely go unnoticed and the opportunity to create something new will be lost.

Chimeras don’t always reproduce themselves very well. They are unstable, which is how they became chimeras in the first place.

A couple examples of chimeras include thornless raspberries and different colors of Poinsettias.

So, will I make a million dollars producing pink and yellow Mums?….probably not.

Bob

October 15, 2009

Dragonflies, Jewelry and Politics

Filed under: Uncategorized — bob @ 1:50 pm

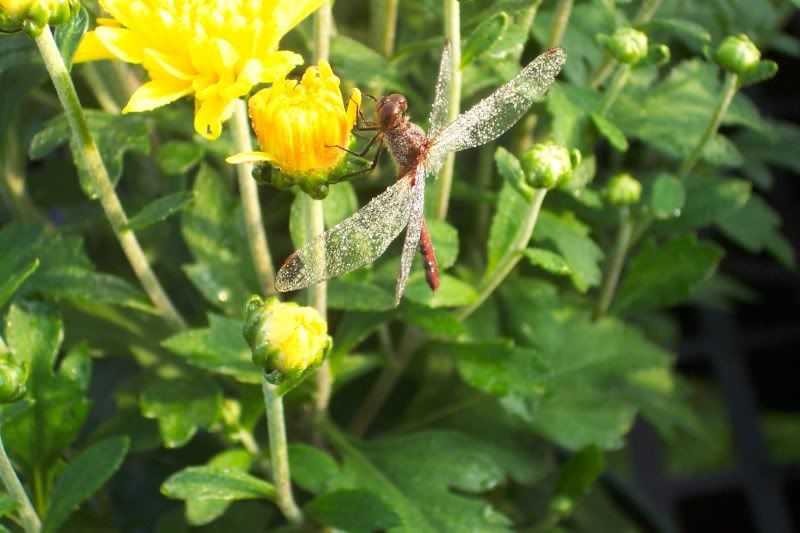
A couple of weeks ago I had an early morning visitor to the garden. Actually I believe he stayed over night until I found him in the morning.

He reminded me that gardening can have many pleasent surprises.  Sometimes, things come  your way unexpectedly.

It was still pretty chilly out, the sun wasn’t very high in the sky, so he was still resting on one of the potted Mums we are growing.

I knew he would be leaving as soon as he could so, I hurried in to the garden shed to grab my camera.

The visitor was a dragonfly covered with so many droplets of dew that he looked like he was encrusted with jewels.

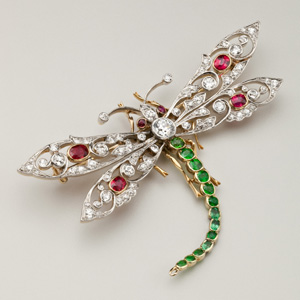
I know I’m not the only person to be delighted by this sight. The American Society of Jewelry Historians has a brooch in their collection made of gold, platinum, demantoid, ruby and diamond. It was made by Emmanuel Gattle & Company way back in 1900. I’m sure the designer was inspired by a dragonfly he saw.

Dragonfly brooch

I imagine him being given an assignment by his boss to come up with an idea for a new piece of jewelry. He was probably unable to sleep all night and got up before breakfast to take a walk in the garden. He looked over and saw… well, we know the result of what he saw.

Recent international politics have been influenced by dew covered dragonflies and other insects.

Former US Secretary of State and Ambassador to the United Nations, Madeleine Albright owns at least seven dragonfly brooches  that she has worn  during diplomatic visits to  foreign countries.

Here she is wearing a brooch in the shape of a bee during talks with Yasser Arafat…who knows where she wore the Dragonfly!

Madeleine Albright Brooch

These unexpected sights in the garden can really get you thinking of things. I better stop this “stream of consciousness” right here.

Madeleine Albright’s book Read My Pins became available in book stores just last week.

Bob

September 24, 2009

Knobby Roots in the Garden

Filed under: Uncategorized — bob @ 8:03 pm

Now that we are at the end of the summer gardening season, at lot of us will begin pulling out  old and worn out plants and tossing them in the compost pile.

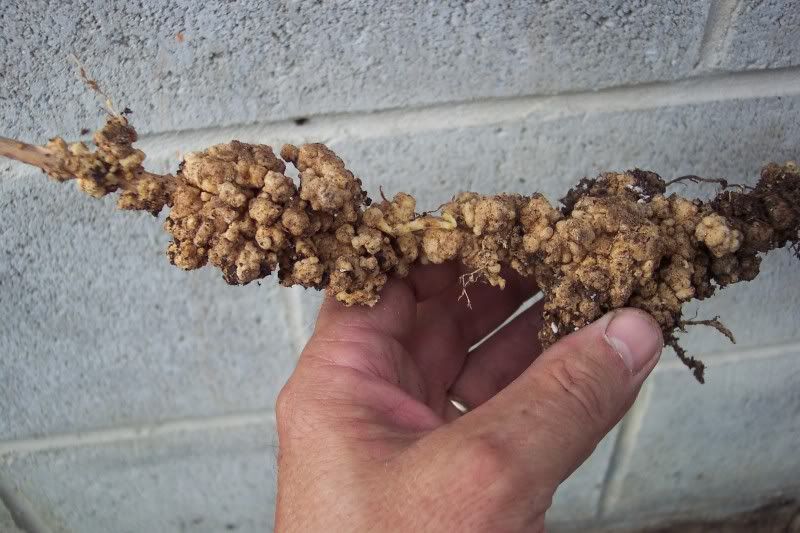
I found this root attached to a sweet potato plant:

Notice the knobby, bumpy nodules.  This is not normal for a sweet potato root. The abnormal growth is caused by a nearly microscopic worm-like creature called a nematode.

Nematodes are the bane  of sweet potato farmers in the southern states where sweet potatoes or other vegetables are grown year after year in the same spot.  In addition to gnarled roots, nematodes also cause reduced yields.  Often the damage shows up as black spots under the skin of the tuber that are not seen until the root is peeled leaving an unusable potato.

This nematode damage can occur on almost any common vegetable plant.  If you find a root that resembles the one in the photo, destroy it and don’t attempt to compost it, otherwise you risk spreading the pests to other parts of your garden.

There is no method of control for nematodes in the garden except rotating your crops.  You must rotate to a grass-related crop such as sweet corn in order to break the life cycle of the nematodes. “Regular” garden crops will support nematodes in the soil.

Knobby roots on legume plants such as peas and beans are  normal and not caused by nematodes, so don’t dispose of  them.  Beans and peas have nodules on their roots that harbor beneficial bacteria. In this case the bacteria  are beneficial to the plant and actually produce fertilizer in the form of nitrogen that the beans use to grow.

Chances are you won’t see these symptoms in a new garden because the nematodes have not had enough time to multiply.

Happy Composting,

Bob

« Newer PostsOlder Posts »

Powered by WordPress