The Yellow Farmhouse Garden

January 10, 2009

Pineapple, Michigan Grown!

Filed under: Uncategorized — bob @ 4:25 pm

One of the fun gardening projects you can do this time of the year is start your own pineapple plant. Even though most pineapples we eat are grown in Hawaii, you can actually grow a real pineapple in Michigan…for free!

Here’s how I do it.

First, you need a fresh pineapple from the produce department.  Look for the freshest looking one you can find. Of course you would probably do that anyway if you were shopping for produce.

Cut the top off normally and eat the pineapple…

Now, here’s the part that is different: instead of throwing away the top, use it to start your own pineapple plant.
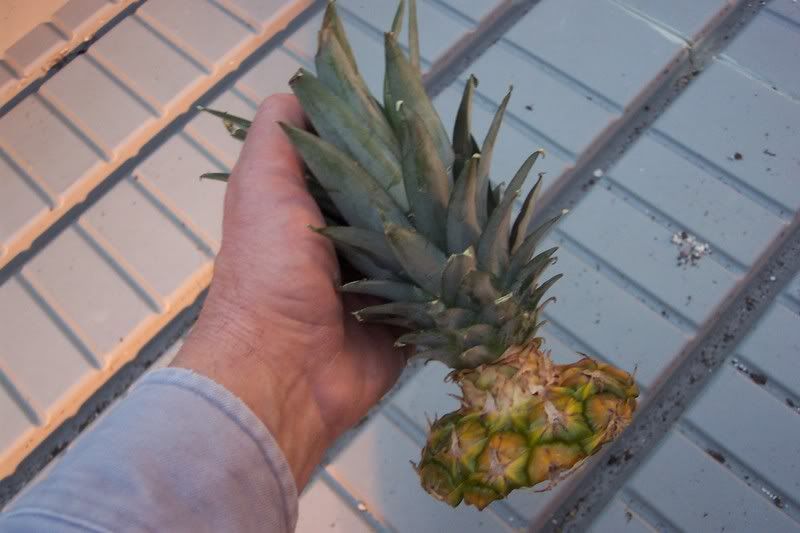
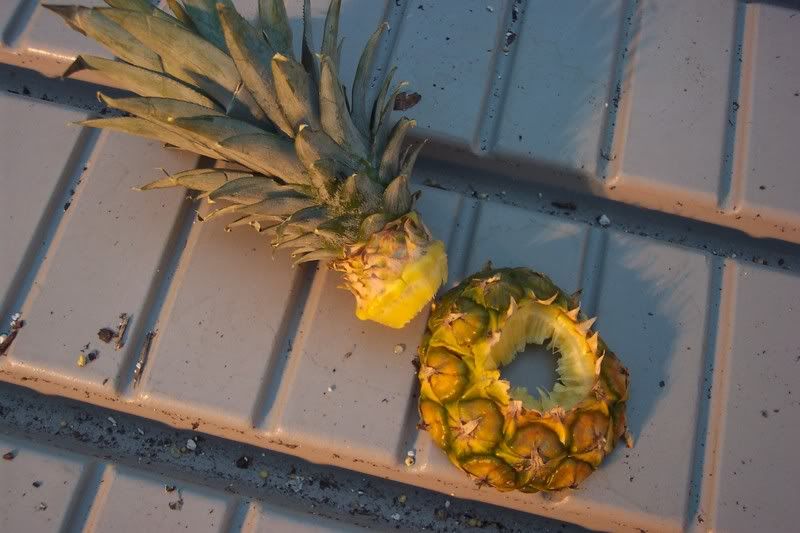
You need to prepare the top before planting by trimming away any remaining pineapple fruit, so that you end up with a top that looks like this:
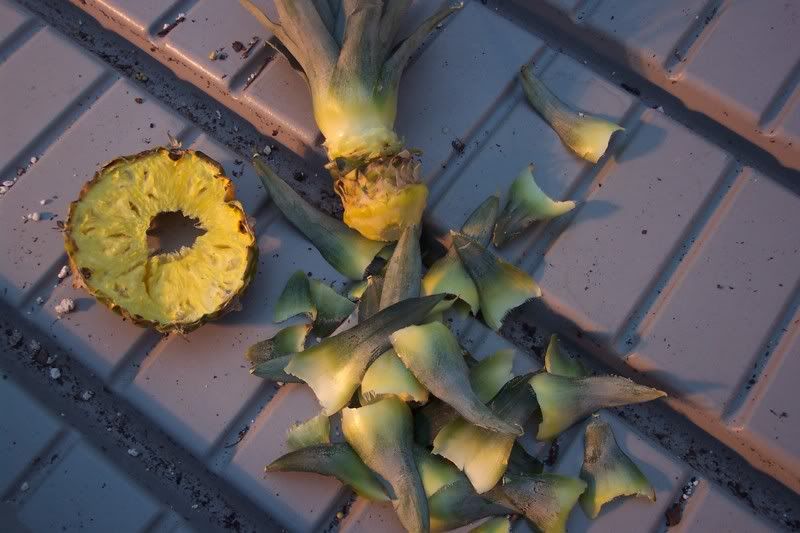
Then, pull off the lower leaves until you see some small bumps on the stalk, these will be the spot from which the new roots will grow. It will look something like this:
Then just place the prepared top into a pot of planting mix deep enough to cover those bumps and water it in. Place your plant where it can get some sun and water it when the soil gets somewhat dry. Fertilize it with a houseplant fertilizer as directed on the package and you should be all set.

The plant shown in this photo (on the right) has been growing for several weeks. Look at all those nice new leaves.
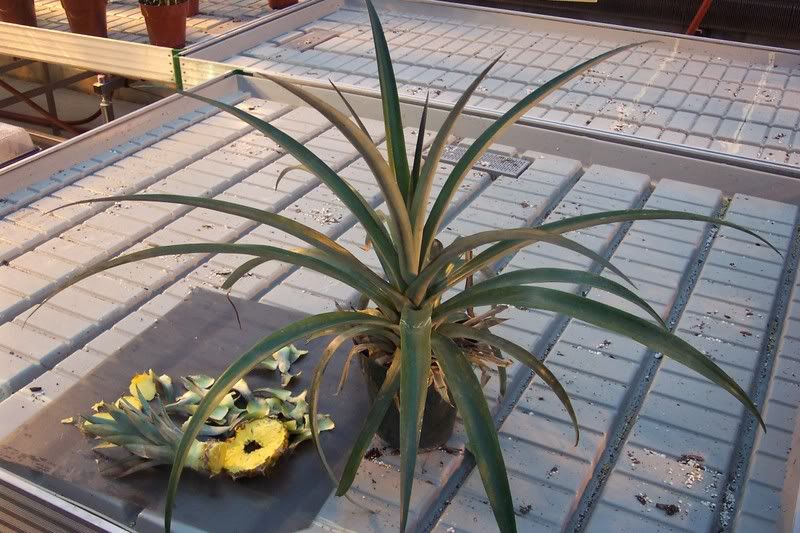
Here is that same plant several months later.
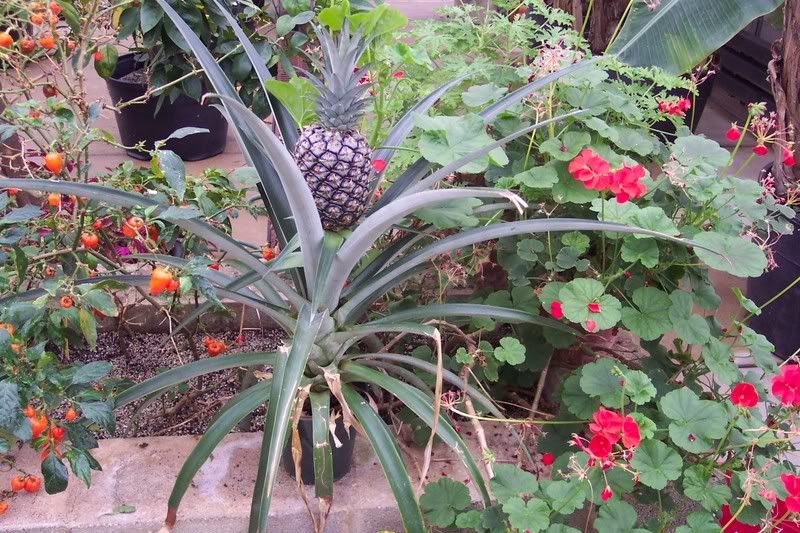
My pineapple has been growing in the same six inch pot for all that time. I would recommend that you move your plant into a larger pot as it grows.

This plant is a little over two feet tall… and has a real pineapple at the top!
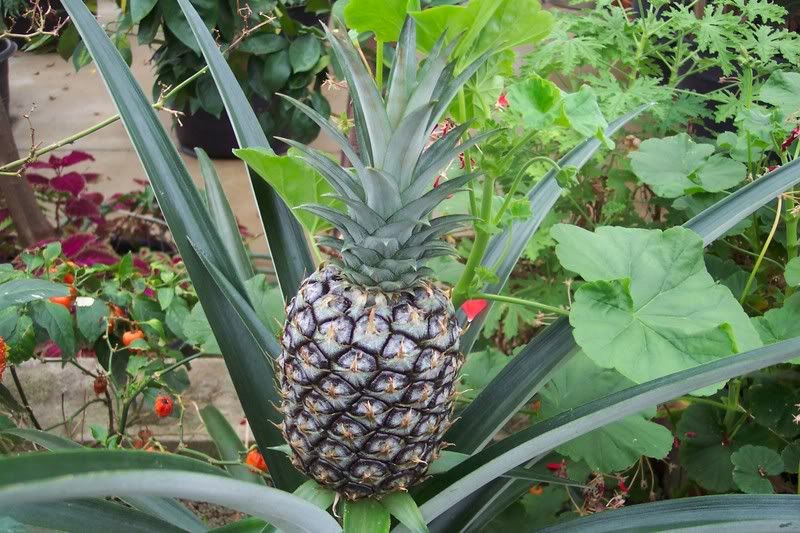
As it starts to turn a little yellow,  I will harvest it to eat and then start a new pineapple all over again!

Aloha,

Bob
December 26, 2008

Caring for Your Poinsettia

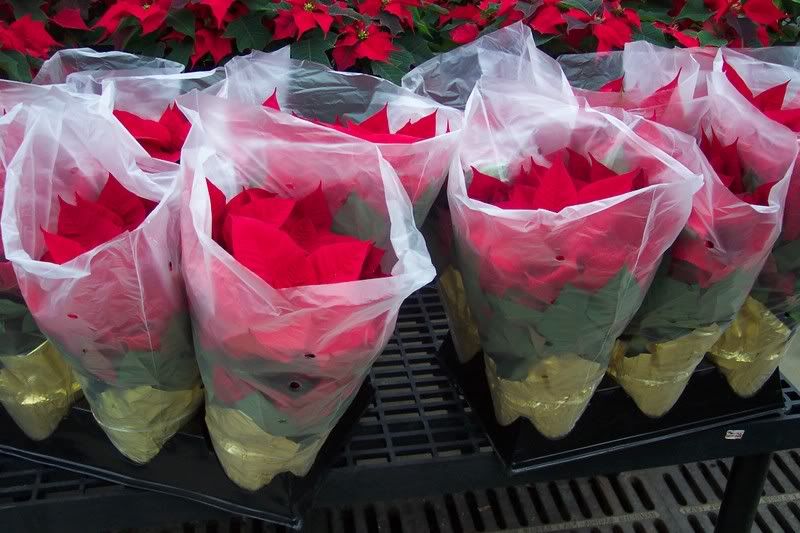
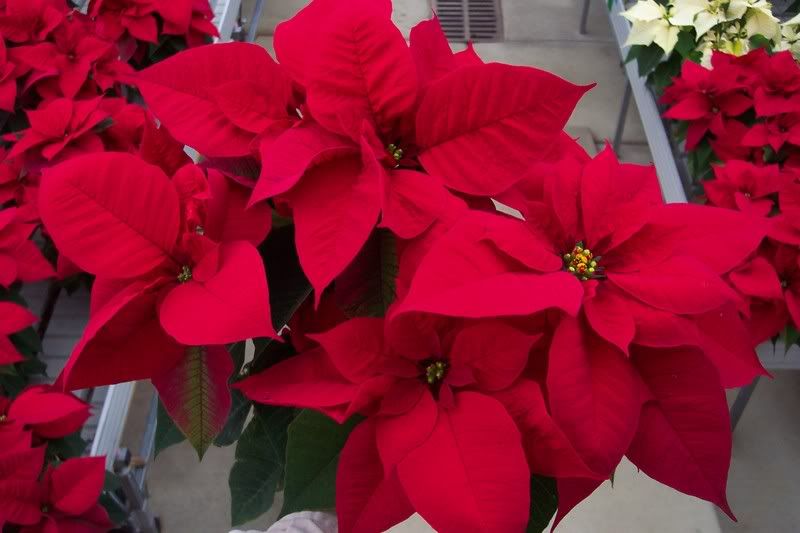
Our Poinsettias turned out wonderful this year.

The color and size were outstanding.

We grew about 250 poinsettias of various colors: marble-pink, burgundy, white, and of course, red.

We started giving them out about mid-December and sent the last ones out on the 23rd.

To keep your poinsettia going for as long as possible, you need to follow just a couple of simple guidelines.

First, keep in mind that most poinsettias die from over-watering. Your home probably has a lower quality of sunlight than the greenhouse from which it came, so your plant will be less actively growing and therefore need less water.

So, let the pot dry out some before watering. Then water the plant thoroughly until water flows out of the bottom of the pot.

If any water remains in the foil pot-wrapper, dump it out. It is this extra water in the foil that causes main reason of poinsettias dying prematurely;  waterlogged roots.

Don’t worry about fertilizer for your plant, it won’t really need much until spring. A half-strength dose of water soluble fertilizer once in a while should be adequate.

Also, keep in mind that poinsettias weren’t meant to last too much longer than the Christmas season.  They were bred for color, not hardiness.

Enjoy your poinsettia as a reminder of wonderful Christmas memories.

Bob

December 14, 2008

Thoughts About Spring

Filed under: Uncategorized — judy @ 4:50 pm

Some seed catalogs have arrived already.

Enjoy the pictures of flowers and vegetables for now, but, when you start to order seeds and plants, read the descriptions thoroughly. Look for plants that like your climate conditions,  paying close attention to the hardiness zone for each plant. Also note requirements for light, size and spacing.

If you are a beginning gardener, you’ll enjoy  your garden more if you don’t  try to push the limits. For example, if the plant description says it is hardy to zone 7, don’t think maybe it will grow on the south side of the house where it is “protected”.  You will be just asking for headaches and disappointments.  Get to know plants that will do well here in southeastern Michigan (zone 5/6).  If the description says it’s easy to grow, then it would be a good backbone plant for your garden.

Think about getting your garden soil tested. That way you’ll know for sure whether it is acid or alkaline. A complete test will also show what plant nutrients are lacking in your soil.  Some tests include the soil texture as well, that is, whether it is sand, clay or loam.

You also need to know if your site drains fast or slow. Some plants won’t tolerate “wet feet”.

How much sun or shade does your garden get?  Early morning sun until about noon, even though it’s for 6-8 hours, is more like “partial shade. While 6-8 hours of sun in the afternoon is more like “full sun”.

Look for plants that grow the way you want them to. Do you need a tall upright foliage plant in a certain spot? Then don’t talk yourself into ordering a medium-high, bushy round plant just because it has a flower color that you fell in love with.

As one gardening friend once told me, “now’s the fun time of gardening… no bugs, no heat, no drought, no aching back.  Just beautiful dreams of what you want your garden to look like”.

Happy dreaming.

bye now, 

Judy

November 30, 2008

Once In A Lifetime

Filed under: Uncategorized — bob @ 11:27 pm

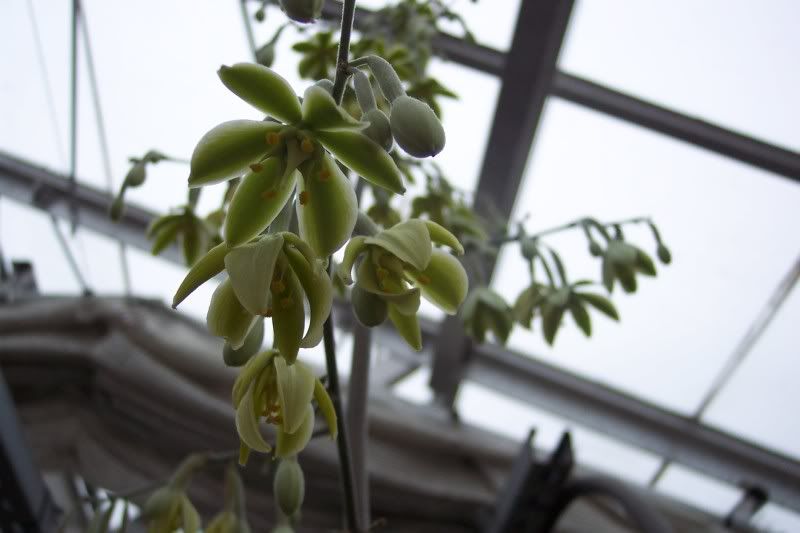
We have a very interesting botanical event happening in the greenhouse right now. One of our Agave plants is blooming.

Agave plant in full bloom

Agave plant in full bloom

This plant is about 3 or 4 years old and has decided to bloom after all this time.  This is actually fairly quick for an Agave though.  Their other nick name is “century plant” , so-called because of the seemingly long length of time it normally takes them to flower in the wild.

Agaves are native to the southwestern part of this country and “south of the border down Mexico way”.  The ‘Blue Agave’ variety that grows in the Mexican state of Tequila is used to make… you guessed it…Tequila.

I don’t know what variety this one is since Judy rescued it from going into the compost bin at the Botanical Gardens.  At that time the plant was just a small  one inch diameter “bulblet” with no name.

Agaves only bloom when they have stored enough energy in their roots and leaves. How many years this takes depends on the species.  After blossoming and forming seeds, they die, trusting that the seeds will carry on the next generation.

Even though this Agave of ours is planted in a small 8 inch pot, the flower stalk is 10 feet tall! It has been alternately ignored and well tended throughout its life.  It couldn’t have had life too hard since it took quite a bit less time than a century to bloom. We had a few last year that were in 6″ pots and their stalks reached nearly 6 feet.

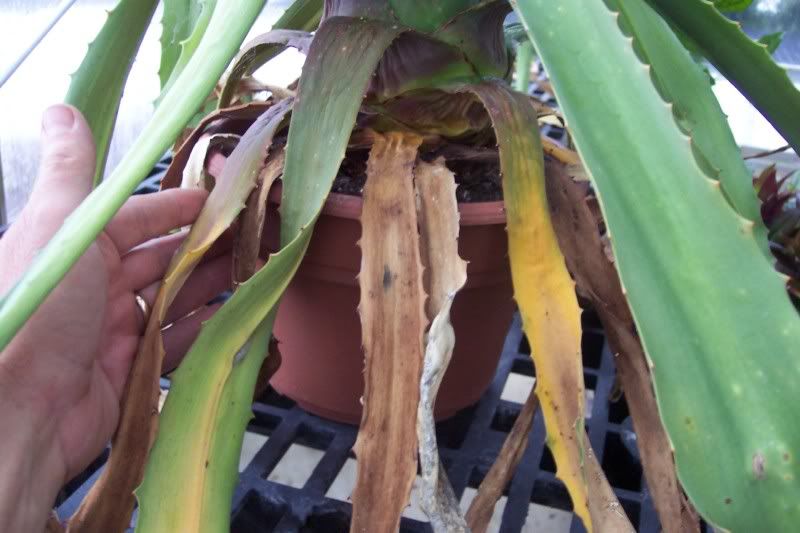
This Agave is planted in an 8 pot. Note the swollen bulb-like stem.

This Agave is planted in an 8" pot. Note the swollen bulb-like stem.

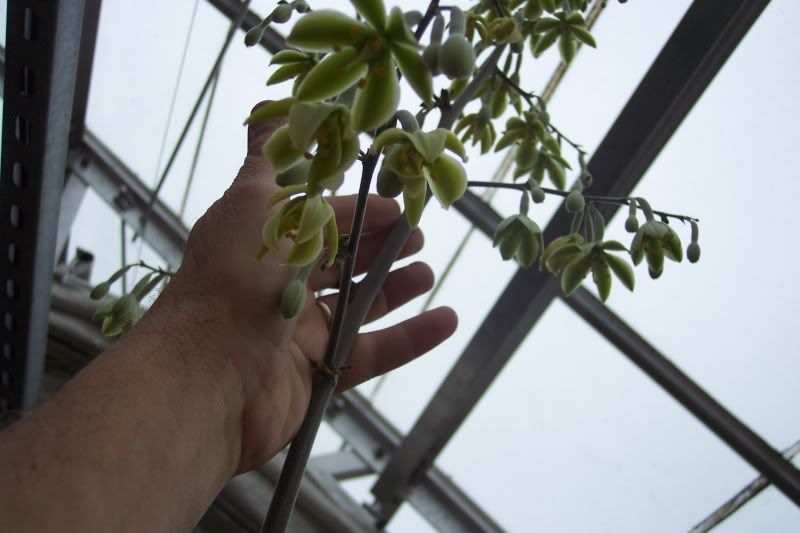
I counted over 120 flowers on the flower stalk! Wow! Each flower will produce a bulblet that will go on to produce another plant. I’d say that is pretty good odds that the next generation will survive.

Our Agave produced a ten foot tall flower stem containing over  120 flowers. I can barely reach the lowest set of flowers.

Our Agave produced a ten foot tall flower stem containing over 120 flowers. I can barely reach the lowest set of flowers.

The new seeds will go into a 20 inch pot.  I wonder what will happen…


Bob

November 9, 2008

Fresh Memories of the Garden

Filed under: Uncategorized — judy @ 1:27 pm

Now it feels like November.  Cold, rainy and dreary.  Gone are the Indian Summer days. Summer’s garden seems long past.

But with a little bit of effort a few weeks ago, I am able to make a pot of chili today using fresh tomatoes!

The day before we had that really cold night (not just the first frost when we covered our tomatoes, but this time it was going to get below  freezing so we knew the covering up wouldn’t do much good) it went to 28 degrees where my garden was.  I had picked all the tomatoes I could.  This was just a few days after that total day long rain that made the tomatoes start cracking , they swelled up so much.  I picked the red ones with a little cracking and all the green larger ones, some with a tinge of red and some that were totally green but otherwise perfect with no blemishes.

My goal has been for many years to have fresh tomato salad for Thanksgiving dinner. Some years a few tomatoes make it, some years they don’t .  So the perfect green tomatoes are wrapped carefully in newspaper and put gently in a cardboard box, then placed in a cool dark place.   They need to be checked every week or so. Take out any that show mold or black spots.  Put them on a sunny window sill and they will redden up after a few days. Cut out the bad parts of the tomato and use the good .

So, today I sorted  the tomatoes I kept in the garage and made a pot of chili with them.  This is the second time this fall that we have sorted through them . There’s still 1/4 to1/3 of them left for Thanksgiving.

Well, the tomatoes are simmering nicely.  I’d better get back to my chili making…  it smells delicious!

bye now, Judy

« Newer PostsOlder Posts »

Powered by WordPress