During this week of nice weather, we will do a lot of clean up. Odds and ends of plants sitting around that didn’t get planted for some reason or other, such as too small or ran out of room in a certain spot., etc.
We are fortunate to have at the Gardens some very useful coldframes. They are dug down into the ground about 4 ft, enclosed with cement block with a dirt bottom. The cement block extends a block high above the ground on the south side, and 2 blocks high on the north side. We used to have glass windows that fitted over them but they deteriorated. Now we have translucent fiberglass panels that cover them up. As deep as it is, it stills freezes in there, but that is okay. What we want them to prevent is wind burn drying out the over wintered plants. Also it reduces the quick freeze and thaw that can cause disastrous effects for over wintered potted plants. So cold frames are for hardy plants that, because they are still in pots, need a little extra protection.
So into the one coldframe that I use, which is about 12 ft by 5 ft wide, we will put in some leftover heuchera’s which didn’t get planted. Plus some very small wood anemones that I thought might get lost (read: weeded accidentally out) in the big Gateway Garden.
More leftovers are mums, rudbeckias, 2 Alberta spruce trees 3 ft high, sedums that I use in pots on the terrace in summer and odds and ends of perennials that I can use to fill in holes when plants die in the Perennial Garden.
Homeowners can construct a temporary coldframe using haybales as walls and old storms door as covers. In spring and fall keep an eye on the coldframe so it doesn’t overheat. In fact don’t put the covers on until things freeze which is probably in December. Translucent covers are probably the answer to that problem. Expensive plants (like the bonsai trees that a coworker takes care of here) can be further protected by putting sand around the individual pots in the coldframe.
Winter’s coming but we have a respite this week and I am trying to take advantage of it.
Bye now, Judy
November 3, 2008
Warm Weather Respite
October 21, 2008
Lilies in the Graveyard
With Halloween right around the corner we are seeing all kinds of scary stuff; themes relating to goblins, jack-o-lanterns, graveyards…
We have a graveyard here! It’s not the scary Halloween type of graveyard, but a flower bulb graveyard.
In this area outside, we plant all of the lily bulbs we grow out of season in the greenhouse that are left over from various projects or those that get returned to us after they are done flowering.
I just can’t bring myself to throw them away or even compost them, so I give them a “decent burial” in the bulb cemetery that’s located in an out of the way corner. Since it used up most of its energy blooming while in a little pot, some times it takes a couple of years for a bulb to build up enough strength to bloom again. I’ve been doing this for at least 4 years. It’s always fun to see what new flower will be blooming from one year to the next.
Even now, during Halloween season, the old Easter Lilies are still blooming!
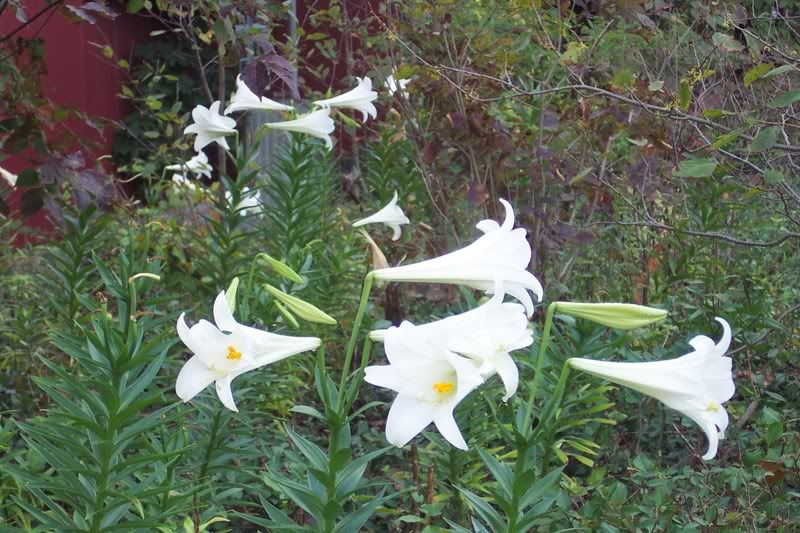
They seem to have shook off the frosts we have had so far. It won’t be long until they finally give in to the cold weather and take a long winter’s nap.
Bob
October 12, 2008
Aloe vera re-potting
The Aloe vera plant has been popular for decades as a balm or salve used to treat minor burns, cuts, sunburn and other maladies. Every household should have an Aloe plant as part of their first-aid kit.
You can do your part to spread the good news about Aloe by dividing your plants and giving them away to folks who don’t have an Aloe yet. It’s very easy to do.
As an Aloe plant grows, it forms small plantlets or off-shoots around the base of the main stem. They may or may not have roots. These can be gently pulled apart from the main plant and transplanted into new pots.
In this post I’m using an old Aloe that needed to be renewed. The same process is used for making divisions of an Aloe that might not be this far gone. Here we go…
Start by getting a potting mix together. I like to use fairly coarse potting mix to which I add sand, fine gravel and other grit to help the mix drain water well. Aloe doen’t like to be in a soggy pot.
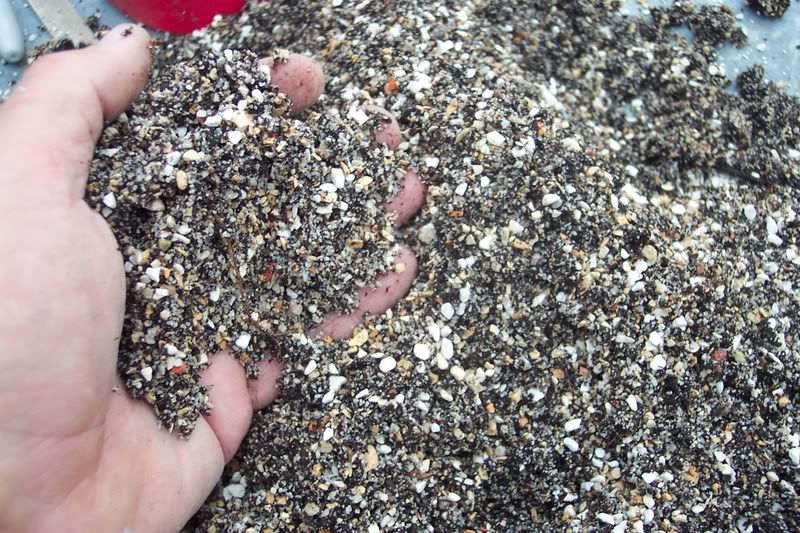
In this example, where the plant has grown too long between re-potting, the Aloe has developed a long, undesirable stem with a lot of dead leaves.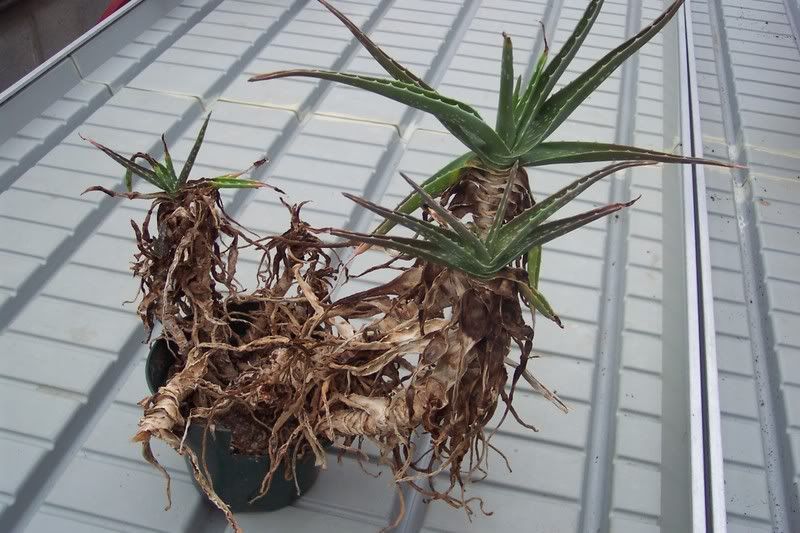
Fix this by cutting the stem an inch or so below the green active part of the plant. Peel off all of the “onion skin” until you reach the stem itself. Also, remove any dead or dying leaves. The stem has dormant root buds that will sprout to form new roots to support the newly separated plant. A dormant bud can be seen just below the pencil point. If you rub your finger over the stem, the bumps you feel are the root buds.
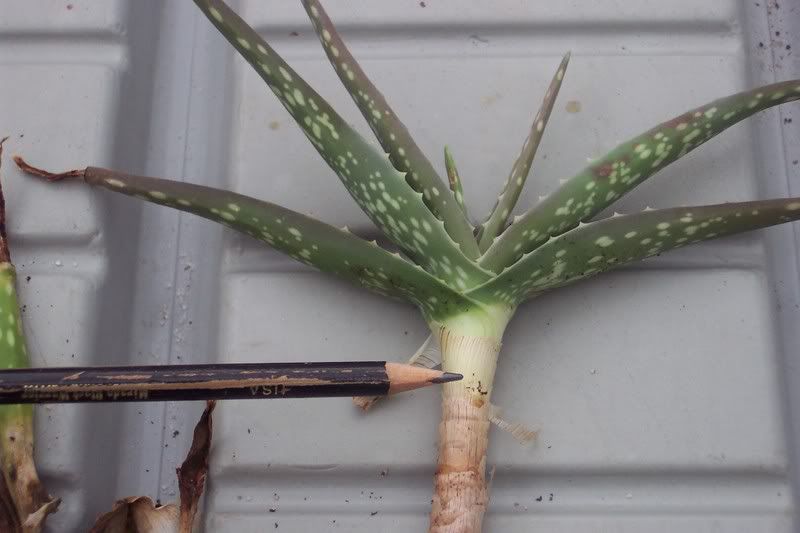
Then just fill a pot (be sure it has a drain hole in the bottom) with your potting mix and insert the prepared Aloe cutting into the soil. Water the new plant and that is it. You now have a new Aloe plant that will soon take hold in it’s new home. Here is An Aloe I transplanted a few weeks ago. Look how nicely the roots are growing.
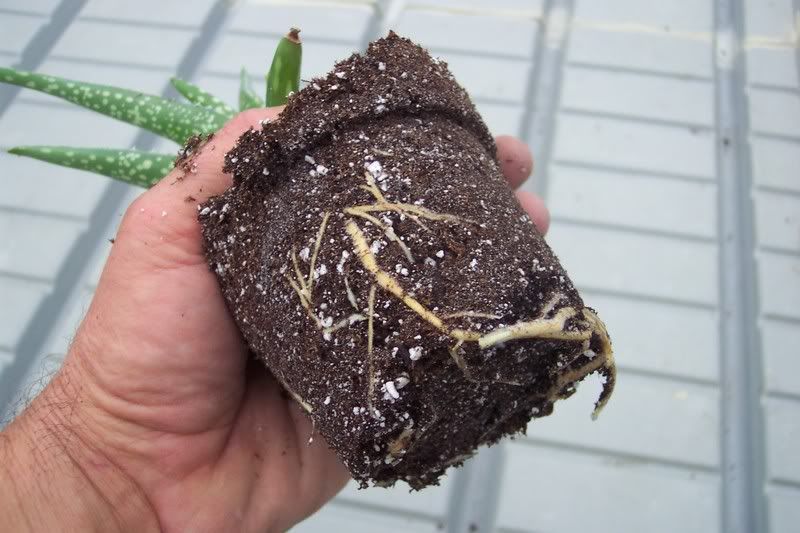
You now have a plant that can be given away as a gift. Everyone loves Aloe !
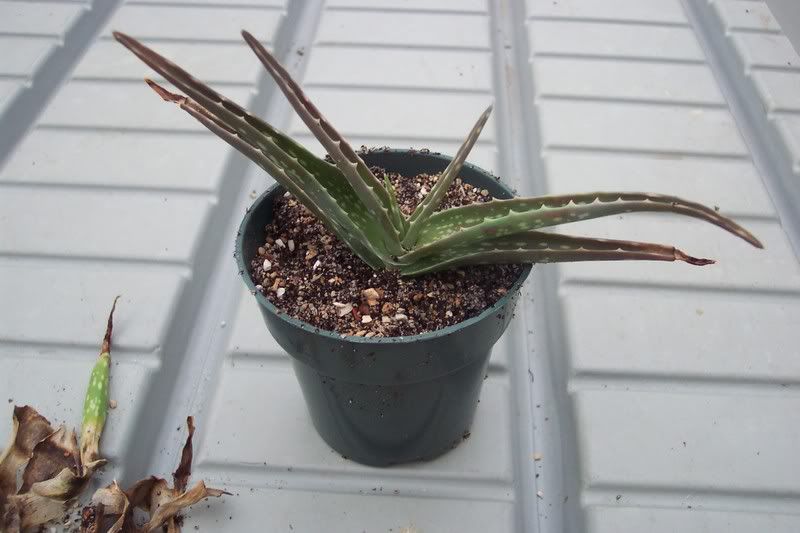
To use Aloe as a treatment for an injury, cut a leaf from your plant. Slit the leaf open and apply the jelly-like juice to your injury. You’ll feel relief immediately.
It’s medicine you can grow right on your window sill!
Bob
October 1, 2008
Grape Jelly Surprise
A few days ago Judy and I decided to replenish our grape jelly supply. Of course to do that, you need grapes. As I was getting out the kettles,sugar and pectin, Judy went out to pick grapes.
She had almost a basketful when out of the corner of her eye she was startled by an alarming sight, a hornet’s nest just inches away from her head!
After regaining her composure, she realized there was no activity around the nest at all.
Apparently an animal, most likely a skunk, had torn into the nest looking for hornet larvae to eat. By now, all of the hornets were long gone.
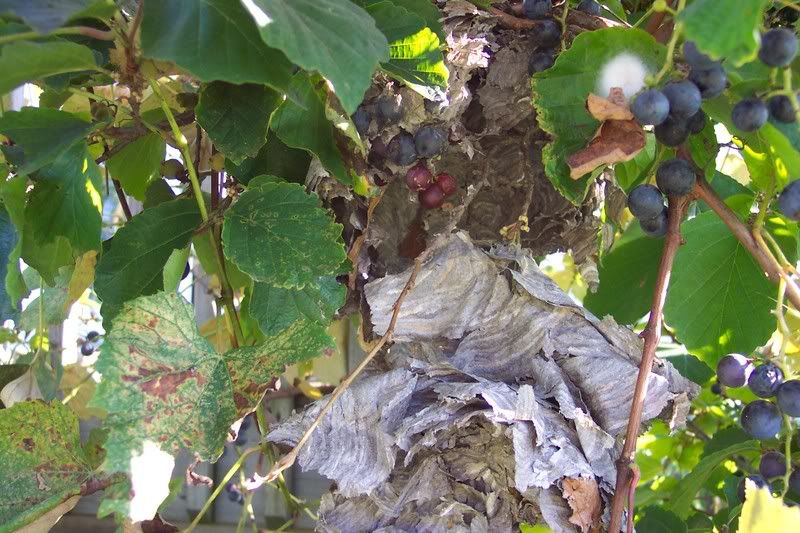
Look at both photos and you will see that the hornets built their nest right on a grapevine. As the nest grew larger, it engulfed the grapes until the grapes themselves became part of the nest. You can see the grapes ripening both inside and outside of the nest!
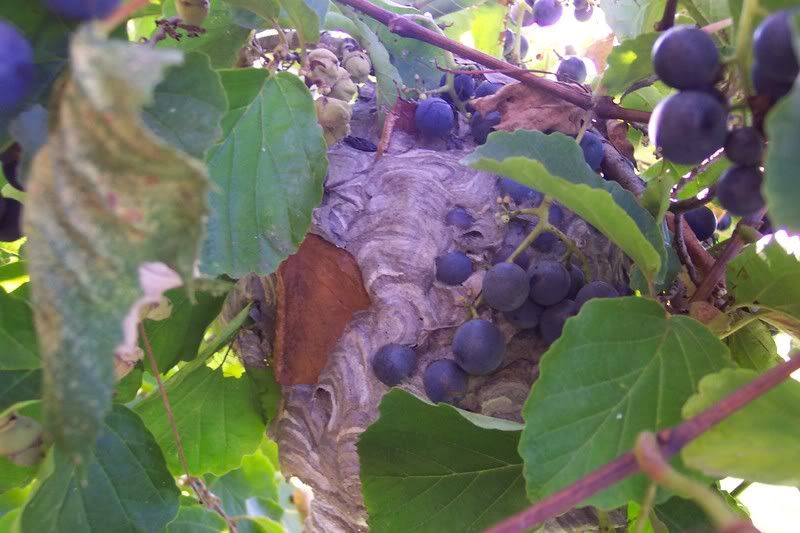
Working outside in your garden, you never know what wonder of nature you are going to find next!
And, yes, we did go on to make a couple of batches of jelly.
Bob
September 27, 2008
Blue and Gold Season
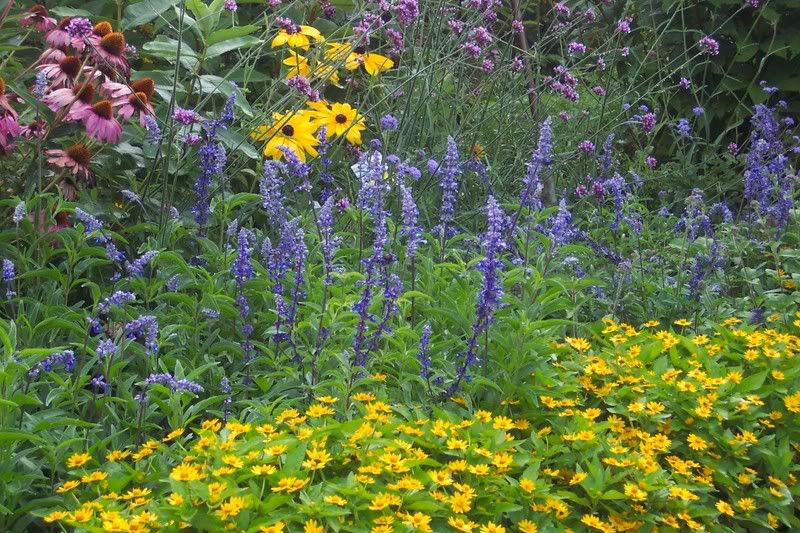
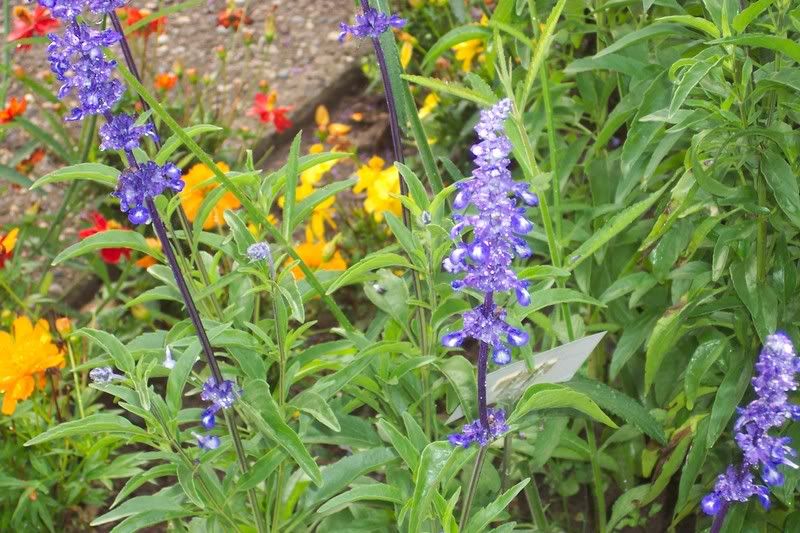
One of the annual flower color combinations that did well together this season is a blue and gold patch in a skinny bed two feet deep and ten feet long. It has a medium dark blue Salvia with the varieity name of ‘Gruppenblau’ (which is German and must mean some kind of blue) in the back of the bed. With a medium green coarse leaf and tall (24 -36 inch) wand like spikes covered with small two lipped petaled flowers, this blue salvia is at the top of my list of favorite flowers. Last year we saved seeds from it from plants that were taller than the rest and had slightly bigger flowers. That’s what I planted in this spot and was rewarded with all of these plants being about 36 inch tall. Even the stems of the flower are tinged with blue. It is very striking.
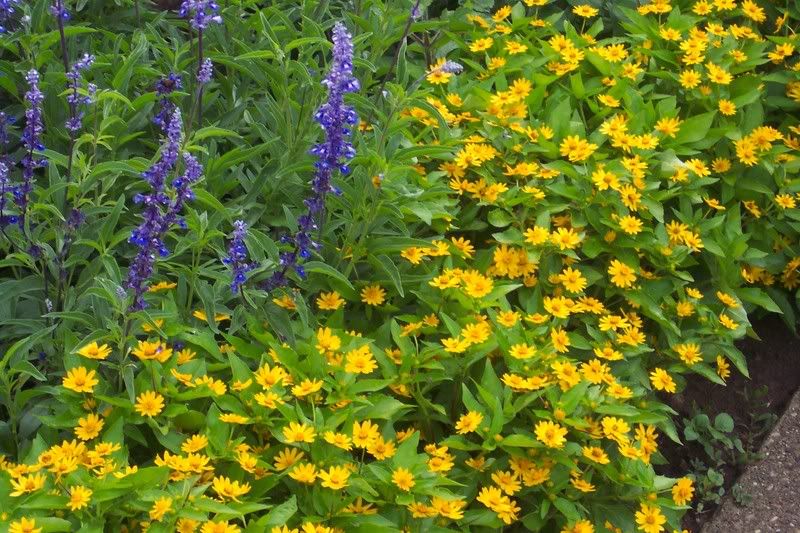
In front of the salvia is another favorite flower called Melampodium ‘Showstar’. this is the combo to plant if you want no maintenance! Healthy, full, rounded, 20 inch tall, lots of yellow gold 1 inch daisy blossoms. It has no disease and a great shape. The salvia’s tall and spikey shape complements the round full and shorter Melampodium. Both of them are still at peak bloom , have never needed deadheading and the leaves of both are still looking fresh and bright green. These colors look great with the goldenrods and the purple asters of the fall season.
Behind me as I sit on the bench is a Monarch nectaring on a white phlox called ‘David’. This is one of the best phlox – it’s resistant to mildew and is always upright with a clean green look. Behind the phlox is a patch of Joe Pye Weed 6 feet tall. Bees and butterflies love Joe Pye, too.
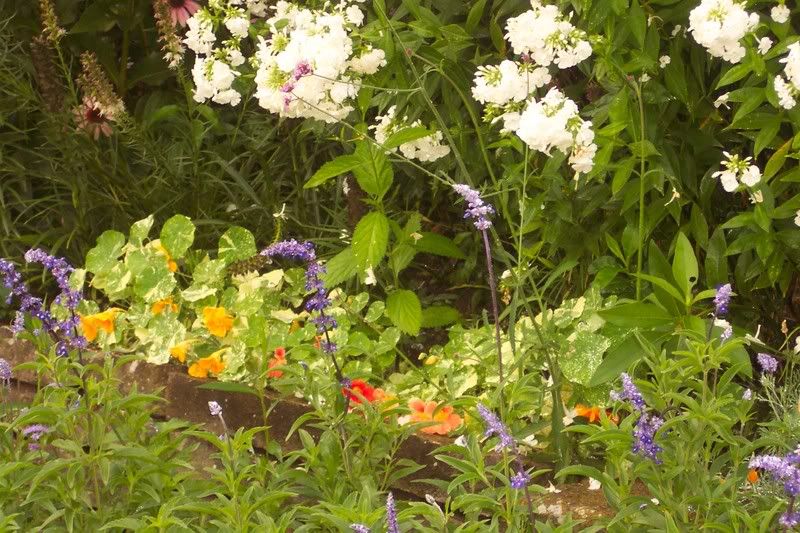
White Phlox 'David' is at the top of the photo.
Today since it is almost October would be a good day to go out and pull any poor looking plants and compost them. we have been cleaning up around our beds and cultivating the bare patches when we pull anything out. It makes this rest of the bed look even better.
That’s it for today. I am going to go out and enjoy this beautiful weather while it lasts!
bye for now, Judy